
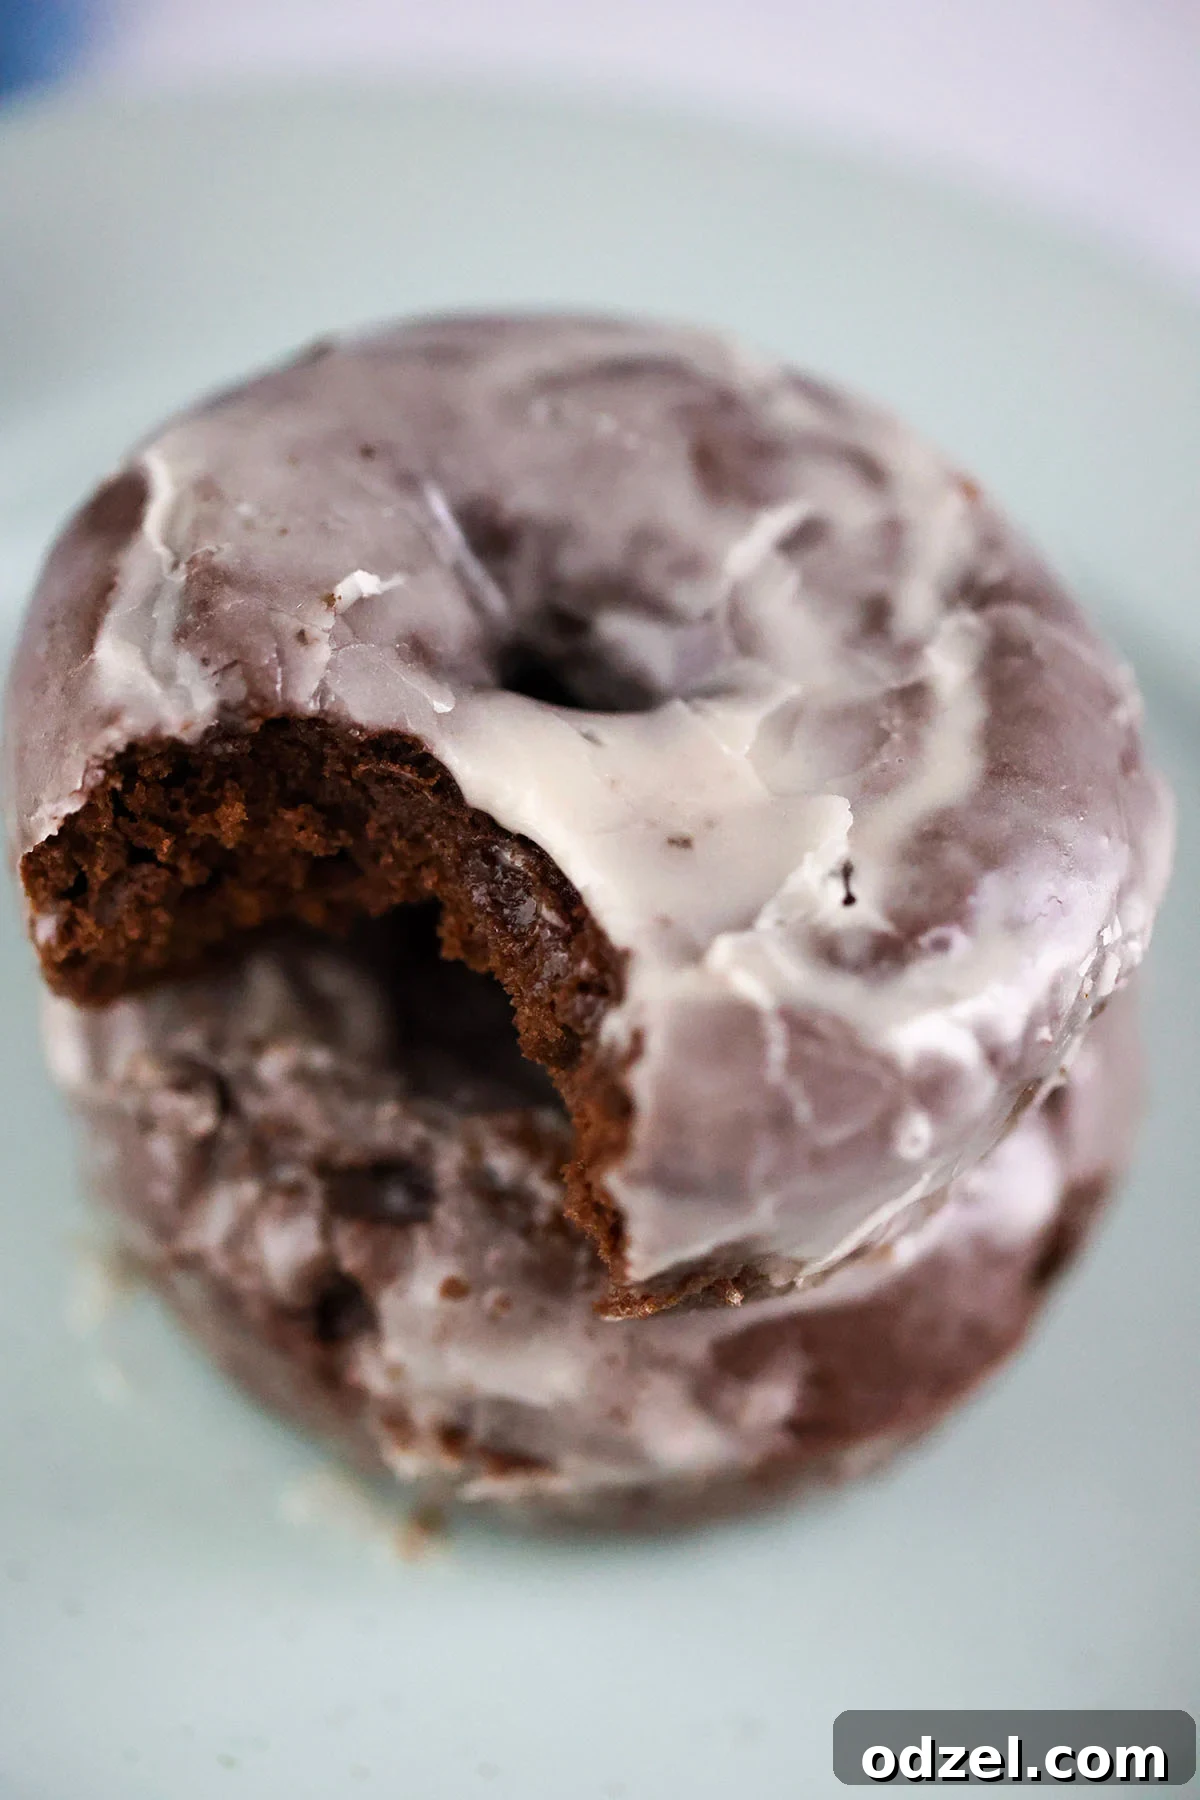
Irresistible Baked Chocolate Glazed Donuts: Your Quick & Easy Guide to Fudgy Perfection
Imagine the delight of biting into a warm, incredibly soft, and intensely fudgy donut, generously coated in a shimmering, sweet chocolate glaze. What if we told you that this absolute indulgence could be yours with a mere 8 minutes of baking, using just a handful of straightforward ingredients? Welcome to the realm of our wonderfully easy, baked chocolate glazed donuts!
Say goodbye to the fuss and mess associated with deep-frying. This recipe offers a quicker, healthier, and equally delicious alternative that promises to satisfy all your chocolate cravings. Whether you’re seeking a swift breakfast treat, a delightful afternoon snack paired with your favorite coffee, or a comforting dessert to end the day, these donuts are destined to become a cherished addition to your baking repertoire. Their tender crumb and profound chocolate flavor, harmoniously balanced with a glossy, smooth glaze, render them truly irresistible.
Once you’ve mastered this delightful creation, we encourage you to explore more of our beloved baked goods. For another satisfyingly sweet and simple treat, be sure to try our fantastic baked cinnamon sugar donuts!
Why You’ll Fall in Love with This Baked Donut Recipe
There’s an undeniable charm to homemade donuts, and when they’re baked, that charm only grows stronger. Our baked chocolate glazed donuts offer a multitude of advantages that make them a standout choice for any home baker, from novice to expert:
- Unbeatable Speed & Convenience: With a minimal prep time of just 15 minutes and an astonishingly quick baking duration of 8 minutes, you can enjoy fresh, warm donuts in less than half an hour. This makes them the ultimate solution for sudden cravings, impromptu gatherings, or a delightful start to a busy morning.
- A Healthier Indulgence: By opting for baking over traditional deep-frying, you significantly reduce the overall fat content without compromising on taste or texture. These donuts remain wonderfully decadent but carry a lighter, less greasy feel, allowing you to indulge with a little less guilt.
- Perfectly Fudgy & Moist Texture: The thoughtful combination of ingredients and our precise baking method guarantees that these donuts are incredibly moist and possess a luxurious fudgy quality. You’ll never encounter a dry or overly cake-like donut with this recipe; only tender, melt-in-your-mouth goodness.
- Pantry-Friendly Ingredients: Chances are, most of the necessary components for this recipe are already stocked in your kitchen. This makes it a convenient, go-to treat that doesn’t typically require a special trip to the grocery store, saving you time and effort.
- Irresistible Flavor Profile: The deep, robust cocoa flavor of the donut itself forms a perfect partnership with the glossy, sweet vanilla glaze. This creates a harmonious and utterly satisfying taste experience that will undoubtedly have everyone reaching for seconds, thirds, and beyond.
Essential Ingredients for Your Perfect Chocolate Donuts
Crafting these heavenly chocolate glazed donuts relies on a few fundamental ingredients. Each component plays a vital role in achieving that desired fudgy texture, rich flavor, and smooth glaze. For the most exceptional results, always strive to use high-quality ingredients.
For the Donut Batter:
- All-Purpose Flour (2 cups): This forms the structural foundation of your donuts. Using unbleached all-purpose flour typically yields the most consistent and desirable results. Sifting the flour along with other dry ingredients is a key step, as it helps to eliminate lumps and ensures the batter is light and airy.
- Granulated Sugar (¾ cup): Beyond providing essential sweetness, sugar plays a role in the donut’s browning and helps to retain moisture, contributing to its tender texture.
- Unsweetened Cocoa Powder (½ cup): This is the heart of your chocolate donuts. Investing in a good quality unsweetened cocoa powder, such as a Dutch-processed variety, will significantly deepen the chocolate flavor and impart a beautiful, rich dark color to your baked goods.
- Baking Powder (1 teaspoon): As a primary leavening agent, baking powder is crucial for helping the donuts rise in the oven, contributing to their soft and airy internal structure.
- Baking Soda (1 teaspoon): Working in conjunction with the cocoa powder (which is acidic), baking soda provides an additional lift, further enhancing the donut’s delicate and tender crumb.
- Salt (1 teaspoon): A non-negotiable ingredient, salt serves to balance the sweetness and magnificently enhances all the other flavors present in the donut batter. Do not omit it!
- Whole Milk (1 cup): Imparts essential moisture and a lovely richness to the batter. While whole milk is highly recommended for optimal flavor and texture, 2% milk can also be used successfully.
- Eggs (2, room temperature): Eggs are indispensable for binding the ingredients, adding moisture, contributing to richness, and aiding in the overall structure and rise of the donuts. Using room temperature eggs allows them to integrate more smoothly and evenly into the batter.
- Unsalted Butter (4 tablespoons, melted and slightly cooled): This provides crucial fat, which translates to a wonderfully moist, tender, and flavorful donut. Melting the butter and then allowing it to cool slightly is important to prevent it from inadvertently cooking the eggs when mixed.
- Vanilla Extract (1 teaspoon): A classic flavor enhancer that beautifully complements and deepens the chocolate notes. Always opt for pure vanilla extract for the most authentic and exquisite taste.
For the Irresistible Vanilla Glaze:
While your delightful donuts are baking or cooling, you can effortlessly whip up a simple yet utterly delicious vanilla glaze. This sweet coating provides the perfect contrast and complement to the rich chocolate flavor of the donuts.
- Confectioner’s Sugar (2 cups): Also widely known as powdered sugar, this forms the essential base of your glaze. Its exceptionally fine texture ensures it dissolves smoothly and completely, resulting in a perfectly silky, lump-free coating.
- Milk (¼ cup): This is the liquid component that brings the glaze together. It’s advisable to start with slightly less milk and gradually add more, drop by drop, until you achieve your desired consistency – thick enough to coat but still pourable.
- Vanilla Extract (2 teaspoons): Infuses the glaze with its iconic, sweet vanilla aroma and flavor. This fragrant element provides a delightful counterpoint to the deep chocolate of the donuts, elevating the overall taste experience.
Essential Equipment for Baked Donut Success
To successfully create these delightful baked chocolate donuts, you’ll primarily need one specialized piece of kitchen equipment:
- Donut Pan: A non-stick donut pan is absolutely crucial for achieving the classic ring shape of your donuts without the need for deep-frying. Even if your pan is advertised as non-stick, it is imperative to grease each cavity thoroughly to guarantee effortless release and perfectly formed donuts.
Step-by-Step Baking Guide: Crafting Your Chocolate Glazed Donuts
Follow these clear and precise instructions to create perfectly baked, wonderfully fudgy chocolate donuts that are glazed to sweet perfection. Paying close attention to each step will ensure outstanding results every time.
-
Prepare Your Oven and Donut Pan
Begin by preheating your oven to 350 degrees Fahrenheit (175°C). This critical step ensures that the oven reaches and maintains the ideal temperature for even and consistent baking. Concurrently, generously grease each cavity of your donut pans. This step is vital, as a good coating of butter or non-stick spray will prevent any sticking, allowing your beautifully baked donuts to release effortlessly.
-
Combine Wet Ingredients
In a large mixing bowl, gently whisk together all of your wet ingredients: the room temperature eggs, granulated sugar, fragrant vanilla extract, rich whole milk, and the melted (and slightly cooled) unsalted butter. Continue whisking until the mixture is thoroughly combined and smooth. Setting this aside momentarily will allow you to focus on preparing the dry ingredients.
-
Sift and Mix Dry Ingredients
In a separate, medium-sized bowl, sift together the all-purpose flour, unsweetened cocoa powder, baking powder, baking soda, and salt. Sifting is a crucial step that not only removes any potential lumps but also aerates the dry ingredients, which contributes significantly to a lighter, more tender donut texture. Once sifted, gently incorporate this dry mixture into your prepared wet ingredients.
-
Form the Batter and Fill the Pans
Using a spatula or a wooden spoon, carefully fold the dry ingredients into the wet ingredients until they are just combined. It is paramount to avoid overmixing the batter, as excessive mixing can develop the gluten in the flour too much, leading to tough and chewy donuts. The finished batter should be thick but still manageable. For the cleanest and most efficient way to fill your donut pan, transfer the batter into a large zippered plastic bag (a dedicated piping bag works even better if available). Snip off one corner of the bag with kitchen shears, creating a small opening. Carefully pipe the batter evenly into each donut cavity, filling them approximately three-quarters of the way full. This allows ample space for the donuts to rise without overflowing during baking.
-
Bake to Perfection
Carefully place the filled donut pan into your preheated oven and bake for approximately 8 minutes. Please note that baking times can fluctuate slightly depending on the calibration of your oven, so it’s wise to keep a watchful eye on them. The donuts are perfectly cooked when they spring back lightly when gently touched, and a clean toothpick inserted into the center emerges free of wet batter. It is critically important not to overbake them, as this is the leading cause of dry, crumbly donuts. Your aim is a moist, fudgy, and tender result!
-
Prepare the Vanilla Glaze
While your chocolate donuts are either baking or cooling, seize the opportunity to prepare the delectable vanilla glaze. In a medium-sized bowl, combine the confectioner’s sugar, pure vanilla extract, and milk. Whisk these ingredients thoroughly until the mixture becomes completely smooth and entirely free of any lumps. The ideal consistency should be thick enough to generously coat the back of a spoon but still fluid enough to pour or dip. If the glaze appears too thick, add a tiny splash more milk; if it’s too thin, gradually whisk in an additional tablespoon of confectioner’s sugar until perfect.
-
Cool and Glaze Your Donuts
Once baked, promptly remove the donuts from the oven and allow them to cool within the pan for about 5 minutes before carefully transferring them to a wire rack. This initial cooling period helps them to firm up slightly, making them easier to handle. It is absolutely essential to let the donuts cool for an additional 12-15 minutes on the wire rack before attempting to frost them. You want them to be comfortably warm (not hot!) for the glaze to adhere beautifully and set smoothly. If the donuts are completely cold, the glaze may not stick as effectively. Conversely, if they are too hot, they risk crumbling during the dipping process or causing the glaze to melt excessively and run off.
For the simplest and most even frosting application, we highly recommend dipping each donut directly into the prepared glaze. Gently submerge one donut at a time, flipping it to ensure both sides are coated. Lift the donut, allowing any excess glaze to drip back into the bowl, then place it back on the wire rack (ideally positioned over parchment paper to catch any stray drips). As an alternative, you can use a spoon to generously drizzle or spread the glaze over the tops of the donuts. Once glazed, allow the donuts to rest for a few minutes until the glaze sets to a firm touch.
Pro Tips for Donut Perfection
Achieving bakery-quality baked donuts right in your own kitchen is entirely within reach with these expert tips and tricks:
- Grease Generously, Always: Even if your donut pan is proudly labeled as non-stick, never skip the step of greasing each cavity thoroughly with butter, shortening, or a reliable cooking spray. This guarantees a clean, easy release and perfectly formed donuts every single time, eliminating frustrating sticking incidents.
- Embrace the Piping Bag Method: While spooning batter into the pan is feasible, utilizing a large zippered plastic bag with a snipped corner (or a dedicated piping bag) is a true game-changer. This technique allows for precise, mess-free filling of the donut cavities, ensuring uniform shapes and sizes across your batch.
- Master the “Goldilocks” Cooling Rule: The timing of cooling your donuts before glazing is absolutely critical. They should never be too hot (as they’ll likely fall apart and the glaze will simply melt and run off), nor should they be completely cold (as the glaze won’t adhere properly). Aim for a warm to slightly cool temperature – typically around 12-15 minutes after baking – for the ideal glaze application and setting.
- Avoid Overmixing the Batter: This is a common pitfall! Overmixing the donut batter excessively develops the gluten in the flour, which inevitably leads to tough, rubbery donuts. Mix the ingredients only until they are just combined. A few small lumps in the batter are perfectly acceptable and actually preferable.
- Invest in Quality Cocoa: The depth and richness of your chocolate donuts are directly proportional to the quality of the unsweetened cocoa powder you use. Opt for a reputable brand or a Dutch-processed cocoa for a truly profound and satisfying chocolate flavor experience.
Storage & Reheating Tips for Lasting Enjoyment
While these freshly baked chocolate glazed donuts are undoubtedly best enjoyed warm from the oven, you can certainly store any leftovers to savor later or extend their shelf life.
- Room Temperature Storage: Place any remaining chocolate glazed donuts in a clean, airtight container. They will stay fresh and delicious at room temperature for up to 2 days. Ensuring the container is sealed tightly is key to preventing them from drying out.
- Refrigeration for Extended Freshness: For a slightly longer shelf life, you can refrigerate the donuts in an airtight container for up to 3-4 days. However, be aware that refrigeration can sometimes subtly alter the texture of baked goods, making them a little firmer or less soft than when freshly made.
- Freezing for Long-Term Storage: If you wish to preserve your donuts for an extended period, it’s best to freeze them *unglazed*. Once the baked donuts are completely cooled, wrap each one individually in plastic wrap, then place them in a freezer-safe bag or container. They can be stored in the freezer for up to 1 month. When ready to enjoy, thaw them at room temperature and then glaze as desired. Glazed donuts can also be frozen, but the glaze might become slightly sticky or less pristine upon thawing.
- Gentle Reheating: If stored at room temperature, your donuts are ready to eat as is. If they’ve been refrigerated, a quick warm-up can restore some of their original tenderness. Gently heat them in the microwave for 10-15 seconds; this will often bring back that delightful “fresh from the oven” experience.
Frequently Asked Questions (FAQs) About Baked Chocolate Glazed Donuts
Here are answers to some common questions you might have about making these delightful baked chocolate glazed donuts:
- Can I make these donuts gluten-free?
- While this specific recipe is formulated with all-purpose flour, you can often achieve good results by substituting it with a high-quality 1:1 gluten-free baking flour blend that contains xanthan gum. Be aware that the texture might vary slightly, but it’s definitely an option worth exploring for those with dietary restrictions.
- Is it possible to use oil instead of butter in the batter?
- Melted unsalted butter contributes significantly to the rich flavor and wonderfully tender crumb that distinguishes these donuts, a quality that oil cannot fully replicate. While you could technically substitute it with a neutral-flavored oil (such as vegetable or canola oil), be prepared for the overall taste and texture to be somewhat different from the intended recipe.
- Do I absolutely have to use whole milk?
- Whole milk is highly recommended for its higher fat content, which is crucial for delivering a truly moist and tender donut. If whole milk is not available, 2% milk can be a suitable substitute. However, using skim milk might result in a slightly drier texture in the final product.
- What’s the best way to prevent my donuts from sticking to the pan?
- The most vital step in preventing sticking is to generously grease every cavity of your donut pan, even if it claims to be non-stick. You can use butter, shortening, or a good quality non-stick cooking spray. Ensure you coat all the crevices thoroughly. Additionally, ensure the donuts are fully baked and have cooled slightly before attempting to remove them.
- Can I use a chocolate glaze instead of the vanilla glaze?
- Absolutely! For an indulgent double chocolate experience, it’s very easy to prepare a chocolate glaze. Simply whisk together 1.5 cups of confectioner’s sugar, 3-4 tablespoons of unsweetened cocoa powder, 3-4 tablespoons of milk, and ½ teaspoon of vanilla extract until the mixture is smooth. Adjust the amounts of milk and cocoa powder to achieve your desired consistency and flavor intensity.
Delicious Variations to Try
Don’t hesitate to unleash your creativity and customize your chocolate glazed donuts! Here are a few exciting ideas to inspire you:
- Colorful Sprinkle Fun: Immediately after dipping your donuts in the glaze, shower them with a generous amount of colorful sprinkles for a festive and playful appearance.
- Crunchy Nutty Topping: Before the glaze has a chance to fully set, sprinkle some finely chopped nuts, such as pecans, walnuts, or almonds, over the top for an added layer of delightful crunch and nutty flavor.
- Tropical Coconut Delight: Toasted shredded coconut makes a wonderfully aromatic and textural topping that pairs beautifully with chocolate.
- Espresso Kick: For a deeper, more intense chocolate flavor that truly stands out, consider adding about ½ teaspoon of espresso powder to your donut batter. A tiny pinch can also be added to the glaze for an extra subtle coffee note.
- Bright Orange Zest: A delicate touch of fresh orange zest, incorporated into both the donut batter and the glaze, can remarkably brighten and enhance the rich chocolate flavor, creating a sophisticated taste pairing.
Homemade Recipe Card: Baked Chocolate Glazed Donuts
Chocolate Glazed Donuts
By Julie Maestre
These chocolate glazed donuts bake in just 8 minutes and require minimal ingredients! They’re fudgy, perfectly sweet, and simply irresistible.
Cook Time: 8 mins
Total Time: 23 mins
Servings: 12 donuts
Equipment
- Donut Pan
Ingredients
For the Donuts:
- 2 cups all-purpose flour
- ¾ cup granulated sugar
- ½ cup unsweetened cocoa powder
- 1 teaspoon baking powder
- 1 teaspoon baking soda
- 1 teaspoon salt
- 1 cup whole milk
- 2 large eggs, at room temperature
- 4 tablespoons unsalted butter, melted and slightly cooled
- 1 teaspoon pure vanilla extract
For the Vanilla Glaze:
- 2 cups confectioner’s sugar (powdered sugar)
- ¼ cup milk
- 2 teaspoons pure vanilla extract
Instructions
- Preheat your oven to 350°F (175°C) and generously grease your donut pans to prevent any sticking.
- In a large mixing bowl, whisk together the eggs, granulated sugar, vanilla extract, milk, and melted butter until well combined.
- In a separate bowl, sift together the all-purpose flour, cocoa powder, baking powder, baking soda, and salt. Add this dry mixture to the wet ingredients and mix gently until just combined. Be careful not to overmix.
- Transfer the donut batter into a large zippered plastic bag. Snip off one corner of the bag and pipe the batter evenly into the greased donut pan cavities, filling them about three-quarters full.
- Bake for approximately 8 minutes, or until the donuts spring back when gently touched and a toothpick inserted comes out clean. Do not overbake to ensure fudginess.
- While the donuts are baking or cooling, prepare the glaze. In a medium bowl, combine the confectioner’s sugar, vanilla extract, and milk. Whisk until completely smooth and lump-free.
- Allow the baked donuts to cool in the pan for 5 minutes, then transfer them to a wire rack to cool for another 12-15 minutes before frosting. Dip each warm donut into the glaze, coating both sides, or spoon the glaze over the tops. Let the glaze set before serving.
Chef’s Notes
- Always ensure your donut pan is thoroughly greased, even if it’s non-stick, to guarantee easy removal.
- Using a piping bag (or a zippered plastic bag with a snipped corner) offers the cleanest and easiest method for filling the donut pan cavities.
- The cooling period before glazing is crucial: donuts should be warm (not hot!) for optimal glaze adhesion, but not completely cold, which can make the glaze less effective.
Nutrition Information (Approximate per serving of 1 donut)
Nutrition information is automatically calculated and should only be used as an approximation.
- Calories: 190 kcal
- Carbohydrates: 53g
- Protein: 5g
- Fat: 5g
- Saturated Fat: 3g
- Polyunsaturated Fat: 0.4g
- Monounsaturated Fat: 1g
- Trans Fat: 0.2g
- Cholesterol: 39mg
- Sodium: 307mg
- Potassium: 163mg
- Fiber: 2g
- Sugar: 14g
- Vitamin A: 204 IU
- Calcium: 59mg
- Iron: 2mg
Additional Recipe Details
- Course: Breakfast, Dessert
- Cuisine: American
- Keywords: chocolate donuts, chocolate glazed donuts, baked donuts, easy chocolate donuts, homemade donuts, quick donut recipe
Share Your Delicious Creations!
We absolutely adore seeing your culinary triumphs and hearing about your experiences in the kitchen! If you’ve tried this delightful recipe for our baked chocolate glazed donuts, please consider leaving a star ⭐⭐⭐⭐⭐ rating and sharing your thoughts in the comments section further down the page. Your valuable feedback not only brings a smile to our faces but also assists other home bakers in discovering and perfecting new favorite recipes.
Don’t forget to connect with us and follow our culinary journey on social media for more delicious recipes, inspiring baking ideas, and behind-the-scenes glimpses! Join our growing community on Facebook or find endless visual inspiration on Pinterest to stay updated with our latest creations!