
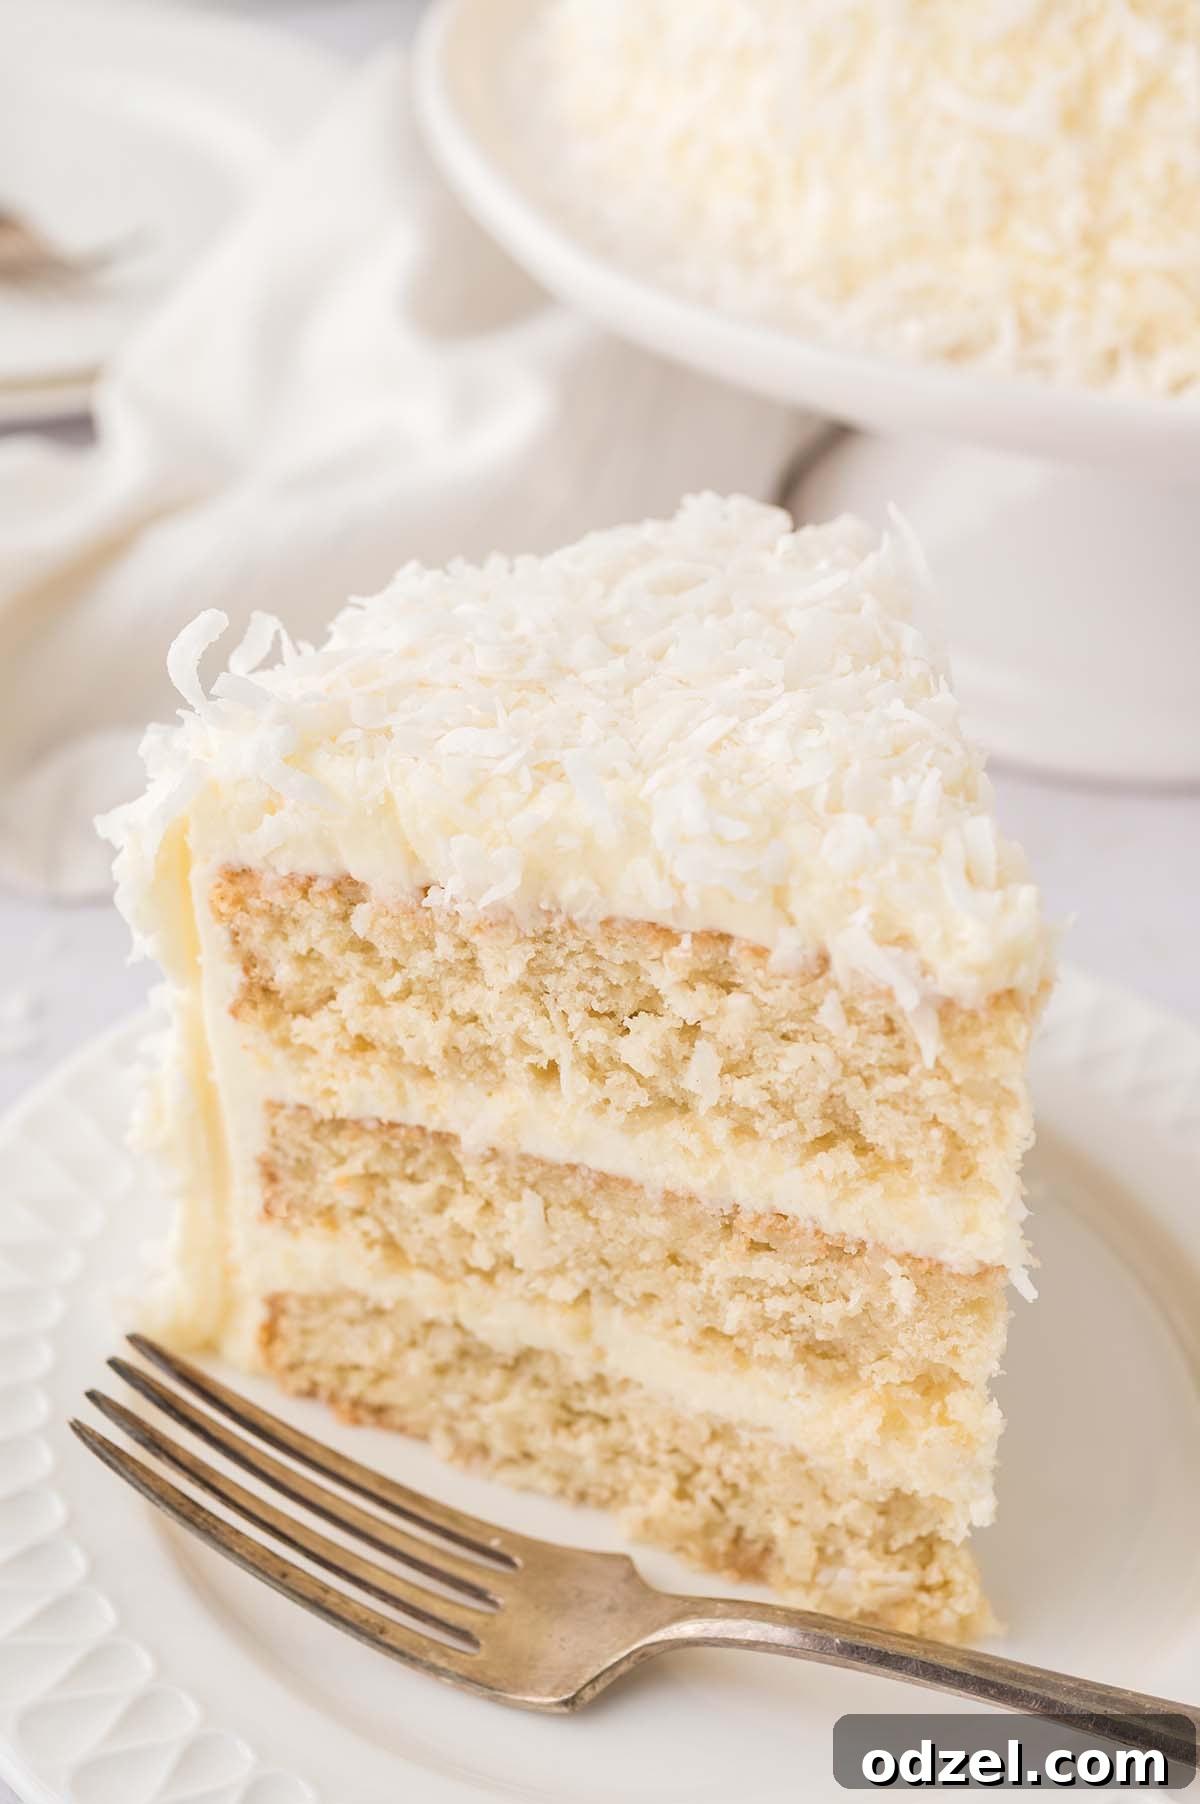
The Ultimate Southern Coconut Cake: Fluffy, Moist & Irresistible
There’s nothing quite like a classic Southern Coconut Cake to bring a touch of elegance and comfort to any occasion. This iconic dessert, renowned for its incredibly fluffy layers, perfectly moist texture, and intensely rich coconut flavor, is a true masterpiece of American baking. Our comprehensive recipe guides you through creating a show-stopping three-layer cake, generously frosted with a decadent cream cheese frosting and adorned with sweet shredded coconut. Whether you’re a seasoned baker or new to the kitchen, this detailed guide will help you achieve a slice of pure Southern bliss.
If you find yourself enchanted by the delightful taste of coconut, be sure to explore our other beloved creations. Dive into the chewy goodness of these irresistible coconut cookies, or indulge in the silky smooth, rich flavors of our creamy coconut flan. Each recipe offers a unique and satisfying way to savor the tropical essence of coconut!
This particular recipe for Southern Coconut Cake doesn’t just promise deliciousness; it delivers an experience. The delicate balance of a tender, flavorful cake base with our signature homemade cream cheese frosting creates a dessert that’s both nostalgic and incredibly fresh. The final touch of sweet, snowy shredded coconut not only enhances the flavor but also adds a beautiful, inviting presentation, making every single slice truly amazing and memorable for your guests.
Why This Southern Coconut Cake Will Become Your Go-To Dessert
Prepare to fall in love with this Southern Coconut Cake recipe. Here’s why it stands out from the rest:
- Unrivaled Moisture: We’ve perfected the balance of wet ingredients, including rich coconut milk and tangy sour cream, ensuring that each cake layer is incredibly moist and tender. Say goodbye to dry, crumbly cakes!
- Heavenly Fluffy Texture: By carefully incorporating egg whites and utilizing precise mixing techniques, we achieve a remarkably light and airy crumb that practically melts in your mouth with every forkful.
- Authentic, Deep Coconut Flavor: This cake is a true celebration of coconut! With three distinct sources – finely shredded coconut in the batter, creamy coconut milk, and a hint of coconut extract – the flavor is rich, genuine, and perfectly balanced, without being overwhelming.
- Decadent Cream Cheese Frosting: The subtly tangy and wonderfully sweet cream cheese frosting provides the perfect counterpoint to the cake’s coconut richness. It’s smooth, luscious, and incredibly spreadable, making for a truly luxurious finish.
- Visually Stunning Presentation: With its elegant three layers, pristine white frosting, and generous coating of shredded coconut, this cake is an absolute showstopper. It makes an impressive centerpiece for any special occasion, from holiday gatherings to birthday celebrations.
- A Taste of Southern Comfort: This recipe captures the essence of classic Southern baking, offering a heartwarming and satisfying dessert that evokes tradition and comfort. It’s a crowd-pleaser that will have everyone asking for the recipe.
Ingredient Spotlight: Unlocking the Flavors of Your Coconut Cake
The secret to an extraordinary Southern Coconut Cake lies in the quality and preparation of its ingredients. Understanding the role of each component is crucial for achieving that signature taste and texture. Below, we delve into the key ingredients, providing tips for selection and use. For precise quantities and step-by-step instructions, please consult the full recipe card below.
- Shredded Coconut: This recipe calls for both sweetened shredded coconut flakes in the batter and for decorating. Sweetened flakes contribute a delightful sweetness and a pleasant chewiness. For an added layer of flavor and aroma, consider lightly toasting a portion of the coconut before adding it to the batter or using it as a garnish. This simple step can elevate the overall experience.
- Unsweetened Coconut Milk (Canned): This is a fundamental ingredient, providing unparalleled moisture and a deep, authentic coconut flavor to the cake. Always opt for full-fat, unsweetened canned coconut milk for the richest taste and creamiest texture. Before opening, give the can a good shake to ensure the coconut cream and liquid are thoroughly combined for consistent results.
- Unsalted Butter (Room Temperature): Butter is essential for both the cake batter and the rich cream cheese frosting. Using unsalted butter allows you to precisely control the sodium content of your dessert. Most importantly, ensure your butter is genuinely softened to room temperature for both components. This allows it to cream beautifully with sugar, incorporating air for a light cake, and blending smoothly into a silky frosting.
- Full-Fat Cream Cheese (Softened): The star of our luscious frosting! Using softened, full-fat cream cheese is non-negotiable for achieving a smooth, rich, and slightly tangy frosting that perfectly complements the sweet coconut cake. Low-fat cream cheese can yield a thinner, less stable, and less flavorful frosting, so stick to the full-fat variety for optimal results.
- Coconut Extract: While fresh coconut and coconut milk provide a wonderful foundation, a touch of pure coconut extract amplifies the tropical essence, ensuring an unmistakably vibrant coconut flavor throughout every bite of the cake. This is your secret weapon for maximizing that delicious coconut punch.
- Large Egg Whites (Room Temperature): Using only the egg whites in the cake batter is key to its characteristic light color and incredibly fluffy, tender texture. Bringing them to room temperature before use is critical, as it allows them to whip more easily and incorporate maximum air, contributing to the cake’s lift and delicate crumb.
- All-Purpose Flour: The primary structural component of our cake. For the finest, most tender crumb, we highly recommend sifting your all-purpose flour before mixing. This removes any lumps and aerates the flour, making it lighter.
- Baking Powder & Baking Soda: These dual leavening agents work in harmony to give the cake its impressive rise and airy texture. For the best results, always ensure your baking powder and baking soda are fresh and active.
- Salt: A small amount of fine salt plays a vital role in balancing the sweetness of the cake and frosting, while also enhancing and deepening all the other flavors.
- Sour Cream (Room Temperature): A brilliant addition to the cake batter, sour cream contributes an extra layer of moisture and a delicate tang that enriches the cake’s flavor profile without making it heavy or dense. Ensure it’s at room temperature for smooth incorporation.
- Powdered Sugar (Confectioners’ Sugar): For the frosting, powdered sugar is essential for a smooth, lump-free consistency. Always sift your powdered sugar, especially if it’s been sitting in the pantry, to avoid grainy frosting.
- Heavy Cream: A small amount of heavy cream is used to adjust the consistency of the cream cheese frosting, ensuring it’s beautifully smooth, spreadable, and easy to work with for decorating.
Essential Equipment for a Smooth Baking Experience
Having the right tools at hand can significantly simplify the baking process and contribute to the success of your Southern Coconut Cake. Here’s a list of recommended equipment:
- Three 8-inch Round Cake Pans: Crucial for baking the perfect multi-layered cake.
- Parchment Paper: To line the bottoms of your pans, ensuring the cake layers release effortlessly.
- Stand Mixer with Paddle Attachment: Highly recommended for efficiently creaming butter and sugar, and mixing the cake batter and frosting. A powerful hand mixer can also be used.
- Large Mixing Bowls: You’ll need at least two – one for dry ingredients and another for wet ingredients and batter.
- Whisk: For combining dry ingredients and performing final gentle mixes.
- Rubber Spatula: Indispensable for scraping down the sides of bowls and gently folding in delicate ingredients like shredded coconut.
- Measuring Cups and Spoons: Accurate measurements are fundamental for consistent baking results.
- Kitchen Scale (Optional but Recommended): For precise and even distribution of batter among the cake pans, leading to uniformly baked layers.
- Wire Cooling Racks: Essential for allowing your cake layers to cool completely and evenly, preventing condensation.
- Long Serrated Knife: For expertly leveling your cake layers, creating a flat surface for stacking.
- Cake Turntable (Optional but Recommended): This tool greatly simplifies the frosting and decorating process, allowing for smooth, even coverage.
- Offset Spatula or Icing Spatula: For spreading frosting smoothly and evenly over the cake layers and sides.
- Bench Scraper: An excellent tool for achieving perfectly smooth and straight sides on your frosted cake.
Expert Baking Tips for a Perfectly Moist & Fluffy Southern Coconut Cake
Beyond the ingredients, technique plays a pivotal role in achieving a truly perfect Southern Coconut Cake. Follow these expert tips for a consistently moist, fluffy, and delicious result:
- Embrace Room Temperature Ingredients: This tip cannot be overstated. Softened butter, cream cheese, and room temperature egg whites and sour cream are paramount. Cold ingredients don’t emulsify properly, leading to a lumpy batter, uneven baking, and a potentially dense or greasy cake. Plan ahead and take these items out of the refrigerator 1-2 hours before you intend to start baking. This ensures everything combines smoothly, creating a light and airy texture.
- Master the Art of Mixing: When combining your wet and dry ingredients, mix on low speed only until they are *just* incorporated. Overmixing is the enemy of tender cakes as it overdevelops the gluten in the flour, resulting in a tough, chewy, and dry texture. A few small lumps in the batter are perfectly acceptable; a final gentle whisk by hand can help combine any remaining dry streaks without overworking the batter.
- Prepare Your Cake Pans Meticulously: Proper pan preparation is vital for easy cake release. Thoroughly grease your three 8-inch round cake pans, then line the bottoms with parchment paper, and grease the parchment paper again. This creates a non-stick barrier, preventing your beautiful cake layers from sticking and breaking when removed.
- Ensure Even Batter Distribution: For cake layers that bake uniformly and are easy to stack, it’s highly recommended to use a kitchen scale to divide your cake batter equally among the prepared pans. This precision helps achieve level layers, reducing the need for excessive trimming during assembly.
- Understand Your Oven’s Personality: Oven temperatures can vary significantly. Always preheat your oven thoroughly, and consider investing in an oven thermometer for accuracy. Start checking for cake doneness a few minutes before the recommended baking time. A wooden toothpick inserted into the center should come out clean or with a few moist crumbs attached, but never with wet batter. Overbaking is a common culprit for dry cakes.
- Patience During Cooling is Key: It’s tempting to frost a warm cake, but resist! Your cake layers must be *completely* cool before you even think about applying frosting. Warm cake will cause the frosting to melt and slide off, leading to a frustrating mess. Allow the layers to cool on wire racks for at least an hour, or even longer, until they are cool to the touch. For easier handling and frosting, you can even wrap the cooled layers in plastic wrap and chill them in the refrigerator for 30 minutes.
- Achieving Flawless Cream Cheese Frosting:
- Start with a Smooth Base: Begin by beating the softened butter and cream cheese together on medium speed until they are light, fluffy, and perfectly smooth. This forms the creamy foundation of your frosting.
- Always Sift Powdered Sugar: To guarantee a silky-smooth, lump-free frosting, always sift your powdered sugar before adding it to the butter and cream cheese mixture. This simple step makes a huge difference in texture.
- Mix Gradually, Then Whip: Start mixing the sifted powdered sugar, vanilla extract, and salt on low speed until just combined to prevent a cloud of sugar. Then, increase the speed to high and beat for 2-3 minutes. This incorporates air, making the frosting light, fluffy, and wonderfully spreadable.
- Adjust Consistency as Needed: If your frosting appears too thick or stiff, gradually add heavy cream, one tablespoon at a time, until it reaches your desired smooth, spreadable consistency. Conversely, if it seems too thin, incorporate a bit more sifted powdered sugar until it thickens.
- Chill if Overly Soft: If your kitchen is warm or if the frosting becomes too soft while you’re working, simply pop it into the refrigerator for 15-20 minutes to firm up slightly before continuing.
Classic Southern Coconut Cake Recipe
Prepare to be amazed by this classic Southern Coconut Cake. Featuring three perfectly baked, moist, and fluffy layers bursting with authentic coconut flavor, all generously enveloped in a luscious cream cheese frosting and adorned with sweet shredded coconut. It’s a taste of the South you won’t soon forget!
Recipe by: Julie Maestre
- Prep Time: 40 minutes
- Cook Time: 23-25 minutes
- Total Time: Approximately 1 hour 3 minutes (This accounts for active prep and bake time; additional cooling and assembly time is required.)
- Yields: 10 generous servings
- Course: Dessert
- Cuisine: American, Southern
- Keywords: coconut cake, Southern Coconut Cake, Three layer coconut cake, moist coconut cake, fluffy coconut cake, cream cheese frosting
Community Rating: 5 out of 5 stars based on 1 user vote.
Loved this recipe? Don’t forget to save it for later or share with friends!
- Pin This Recipe to Pinterest
- Print This Recipe
Ingredients
For the Moist Coconut Cake Layers
- 1 cup (2 sticks) unsalted butter, softened to room temperature
- 1 cup granulated sugar
- 5 large egg whites, separated and at room temperature
- 1 teaspoon coconut extract
- 2 teaspoons vanilla extract
- 2 ½ cups all-purpose flour, sifted
- 2 teaspoons baking powder
- ½ teaspoon baking soda
- 1 teaspoon salt
- 1 cup unsweetened coconut milk, canned (ensure it’s well-shaken)
- ½ cup sour cream, at room temperature
- 1 cup sweetened shredded coconut flakes
For the Dreamy Cream Cheese Frosting & Decoration
- 1 cup (2 sticks) unsalted butter, softened to room temperature
- 2 (8 oz) blocks full-fat cream cheese, softened to room temperature
- 6-8 cups powdered sugar (confectioners’ sugar), sifted (adjust to your desired sweetness and consistency)
- 2 teaspoons vanilla extract
- 1 teaspoon fine salt
- 1 to 2 tablespoons heavy cream (add as needed to achieve perfect frosting consistency)
- 2 cups sweetened shredded coconut flakes, for decorating the finished cake
Step-by-Step Instructions
Part 1: Crafting the Fluffy Cake Layers
- Begin by preheating your oven to 350°F (175°C). Prepare three 8-inch round cake pans: lightly grease each pan, line the bottoms with a circle of parchment paper, and then grease the parchment paper again. This ensures your cake layers will release effortlessly after baking.
- In a medium-sized bowl, thoroughly whisk together the sifted all-purpose flour, baking powder, baking soda, and salt. Set this dry mixture aside.
- In a large mixing bowl (preferably using a stand mixer fitted with the paddle attachment), cream together the softened unsalted butter and granulated sugar on medium speed for 3-5 minutes. Continue beating until the mixture becomes visibly light, pale, and fluffy, indicating air has been incorporated.
- Gradually add the room temperature egg whites to the creamed mixture, beating until just combined and smooth, typically about 1-2 minutes. Next, mix in the vanilla extract, coconut extract, and room temperature sour cream until fully incorporated. Pause to scrape down the sides of the bowl with a rubber spatula, ensuring all ingredients are well blended.
- With the mixer on low speed, alternately add the whisked dry ingredients and the unsweetened coconut milk to the wet ingredients. Start and end with the dry ingredients. Beat only until the mixture is just barely incorporated. It’s crucial not to overmix, as this can lead to a tough cake.
- Gently fold in the 1 cup of sweetened shredded coconut flakes using a rubber spatula. If you notice any remaining dry pockets at the bottom of the bowl, give the batter a final, gentle whisk by hand to ensure everything is evenly combined. The batter will have a slightly thick consistency.
- Evenly distribute the cake batter among your three meticulously prepared pans. For consistently level cake layers, we highly recommend using a kitchen scale to ensure each pan receives an identical amount of batter.
- Bake for 23-25 minutes. To check for doneness, insert a wooden toothpick into the center of a cake layer; it should come out clean or with only a few moist crumbs attached. Avoid overbaking.
- Once baked, remove the cake pans from the oven and place them on a wire rack. Allow the cakes to cool completely in their pans before attempting to invert and remove them. It is absolutely essential that the cake layers are entirely cool before you proceed to frost them.
Part 2: Preparing the Decadent Cream Cheese Frosting
- In a large mixing bowl, beat together the softened unsalted butter and softened full-fat cream cheese on medium speed. Continue beating until the mixture is beautifully creamy and perfectly smooth, which usually takes about 2 minutes.
- Gradually add the sifted powdered sugar, vanilla extract, and fine salt. Start mixing on low speed to prevent a cloud of powdered sugar, then increase the speed to high and beat for approximately 3 minutes until the frosting becomes light, fluffy, and visibly aerated.
- Assess the consistency of your frosting. If it appears too thick, incorporate heavy cream one tablespoon at a time until it reaches your desired smooth, spreadable consistency. If, conversely, it seems too thin, gradually add more sifted powdered sugar until it thickens sufficiently.
- If you’re not planning to frost the cake immediately, transfer the frosting to an airtight container and refrigerate it. Remember to remove it from the fridge about 20 minutes prior to frosting a chilled cake, allowing it to soften slightly for easier application.
Part 3: Expert Assembly and Decoration of Your Three-Layer Masterpiece
- Once your cake layers are completely cooled, use a long serrated knife to carefully slice off any domed tops, creating flat, level surfaces. You don’t need to remove the entire dome; just enough so that the layers can sit neatly and evenly when stacked. Minor imperfections can be concealed with frosting.
- Place a small dollop of frosting in the center of your cake turntable or chosen serving platter. This acts as an adhesive. Position a cake board directly on top of this frosting, ensuring it’s perfectly centered. Add another dollop of frosting to the cake board.
- Carefully place your first cooled cake layer precisely in the center of the cake board. The initial frosting dollop will act as a “glue,” preventing the cake from shifting while you decorate.
- Spoon approximately ¾ cup of the luscious cream cheese frosting onto the first cake layer. Using an icing spatula or offset spatula, spread the frosting evenly from the center of the cake towards its edges, aiming for a consistent thickness of about ¼ inch. Strive for a surface that is as level as possible.
- Carefully place the second cake layer directly on top of the first, ensuring it is positioned upside down. Placing layers upside down often provides a naturally flatter surface, contributing to a more stable and perfectly level cake. Gently press down on any areas that appear uneven to adjust as needed. Repeat the frosting process with another ¾ cup of frosting.
- Add the final cake layer, also placed upside down. Now, it’s time for the crucial “crumb coat.” Apply a very thin layer of frosting to the top and sides of the entire cake, spreading it lightly from the center to the edges. This thin layer traps any loose crumbs, preventing them from mixing into your final, pristine layer of frosting. Ensure all bare cake spots are lightly covered.
- Refrigerate the crumb-coated cake for at least 30 minutes. This chilling period is vital, as it allows the crumb coat to firm up and set, becoming non-sticky. A firm crumb coat creates a stable foundation for your final frosting layer, ensuring a smooth and clean finish.
- Once chilled, apply the remaining cream cheese frosting to the top and sides of the cake. Use your offset spatula to spread it smoothly. For perfectly smooth sides, hold a bench scraper perpendicular to the cake as you slowly spin the turntable, gently scraping away excess frosting. If any gaps appear, simply add a little more frosting and re-scrape until smooth. Use your spatula or bench scraper to smooth the top surface of the cake as well.
- Take a moment to spin the cake around and inspect it, ensuring it is perfectly level and straight along the sides. Make any final adjustments with your bench scraper if necessary, and re-smooth the sides until you are completely satisfied with the professional finish.
- To complete your masterpiece, gently press the remaining 2 cups of sweetened shredded coconut flakes onto the sides and top of the cake. For best results, cup handfuls of coconut and lightly press them onto the sides, allowing any excess to fall onto your work surface. Continue this process until the entire cake is beautifully and generously covered.
Storage and Make-Ahead Tips for Your Coconut Cake
To ensure your Southern Coconut Cake remains fresh and delicious for as long as possible, proper storage is essential. Here’s how to keep your masterpiece in prime condition, along with helpful make-ahead options:
- Room Temperature Storage: If your home maintains a cool temperature (ideally below 70°F or 21°C) and you plan to consume the cake within 1-2 days, it can be stored in an airtight cake dome or container at room temperature. The high sugar content in both the cake and frosting acts as a natural preservative.
- Refrigeration for Longevity: For extended freshness, or if your living environment is warmer, place any leftover cake slices or the entire cake in an airtight container and refrigerate for up to 4-5 days. For the best serving experience, remove the cake from the refrigerator approximately 30 minutes before you plan to serve it. This allows the cream cheese frosting to soften slightly and the cake layers to return to a more enjoyable, tender temperature.
- Freezing Cake Layers (Make-Ahead): You can brilliantly prepare the cake layers in advance! Once your baked cake layers have completely cooled, carefully wrap each individual layer tightly in plastic wrap, ensuring no air can get in. Then, wrap each plastic-wrapped layer again in a layer of aluminum foil. These securely wrapped layers can be frozen for up superb convenience for up to 2-3 months. When ready to use, thaw them overnight in the refrigerator before unwrapping and proceeding with frosting.
- Freezing a Frosted Cake: Yes, you can even freeze an entire frosted cake! For this method, first place the completely frosted cake (uncovered) in the freezer for about an hour, or until the exterior frosting is firm to the touch. Once firm, carefully wrap the entire cake tightly in several layers of plastic wrap, followed by a layer of heavy-duty aluminum foil. The frosted cake can be frozen for up to 1 month. To thaw, transfer the wrapped cake to the refrigerator overnight. Unwrap it once thawed and let it come to room temperature for about an hour before serving.
Watch Our Step-by-Step Southern Coconut Cake Video Tutorial
Sometimes, seeing is believing! Watching the baking process in action can be incredibly helpful for visual learners. Our detailed video tutorial above will guide you through each and every step of baking, frosting, and assembling this stunning Southern Coconut Cake, ensuring your success.
Frequently Asked Questions About Southern Coconut Cake
What kind of coconut should I use for this cake?
For this recipe, we highly recommend using sweetened shredded coconut flakes. The sweetness complements the cake beautifully, and the flakes provide a lovely chewiness that’s characteristic of authentic Southern coconut cakes. While unsweetened shredded coconut can be used if you prefer less sweetness, be aware it will alter the overall flavor profile. For garnishing and the best aesthetic, sweetened shredded coconut is ideal.
Can I make this Southern Coconut Cake ahead of time?
Absolutely! This cake is perfect for making in advance. The cake layers themselves can be baked 1-2 days ahead. Once they are completely cool, wrap each layer tightly in plastic wrap and store them at room temperature. The cream cheese frosting can also be prepared a day in advance; simply store it in an airtight container in the refrigerator. Before assembling, bring the frosting to room temperature and give it a quick re-whip for a minute or two to restore its fluffy texture.
How can I ensure my coconut cake is moist and doesn’t turn out dry?
Achieving a wonderfully moist cake depends on a few critical factors: First, always use room temperature ingredients, as they emulsify better. Second, avoid overmixing the cake batter after adding the dry ingredients; overmixing develops gluten, leading to a tough, dry cake. Finally, and crucially, do not overbake! Start checking for doneness a few minutes before the recommended bake time. A toothpick inserted into the center should come out with moist crumbs, not wet batter, and the cake’s edges should be just lightly golden.
My cream cheese frosting seems soupy/too thin, what went wrong?
This common issue is often caused by butter or cream cheese being too warm, or by not sifting your powdered sugar. Ensure both your butter and cream cheese are softened but still slightly cool to the touch, not melted or greasy. If your frosting does become too thin, gradually add more sifted powdered sugar until it reaches your desired thick, spreadable consistency. If it’s still too soft, pop the bowl into the refrigerator for 15-20 minutes to help it firm up.
Can I use toasted coconut in this recipe?
Yes, absolutely, and it’s a fantastic idea! Toasting the shredded coconut introduces a wonderful nutty depth of flavor and a slightly crispy texture that many people adore. You can toast a portion of the coconut intended for the cake batter or specifically for decorating the exterior. To toast, spread the coconut flakes in a single layer on a baking sheet and bake in a preheated oven at 325°F (160°C) for 5-10 minutes, stirring occasionally, until they turn a beautiful golden brown. Be sure to watch it closely, as coconut can go from perfectly toasted to burnt very quickly!
Nutrition Information (Per Serving)
The following nutrition information is automatically calculated and should be used as an approximation only. Individual results may vary based on specific ingredients and preparation methods.
- Calories: 615 kcal
- Carbohydrates: 46 g
- Protein: 6 g
- Fat: 46 g
- Saturated Fat: 30 g
- Polyunsaturated Fat: 2 g
- Monounsaturated Fat: 10 g
- Trans Fat: 1 g
- Cholesterol: 106 mg
- Sodium: 562 mg
- Potassium: 235 mg
- Fiber: 1 g
- Sugar: 22 g
- Vitamin A: 1231 IU
- Vitamin C: 1 mg
- Iron: 2 mg
Calcium: 69 mg
Share Your Southern Coconut Cake Creation with Us!
We truly hope you thoroughly enjoyed the process of baking and, most importantly, devouring this magnificent Southern Coconut Cake. It’s a recipe that encapsulates the very best of homemade desserts, bringing joy and a touch of Southern hospitality to your table.
If you tried this recipe and it brought a smile to your face, we would be incredibly grateful if you could take a moment to leave a star ⭐⭐⭐⭐⭐ rating in the comments section below. Your valuable feedback not only helps us but also inspires other aspiring bakers in our community. Don’t forget to connect with us and find more delicious recipes and baking inspiration by following us on Facebook or Pinterest!