
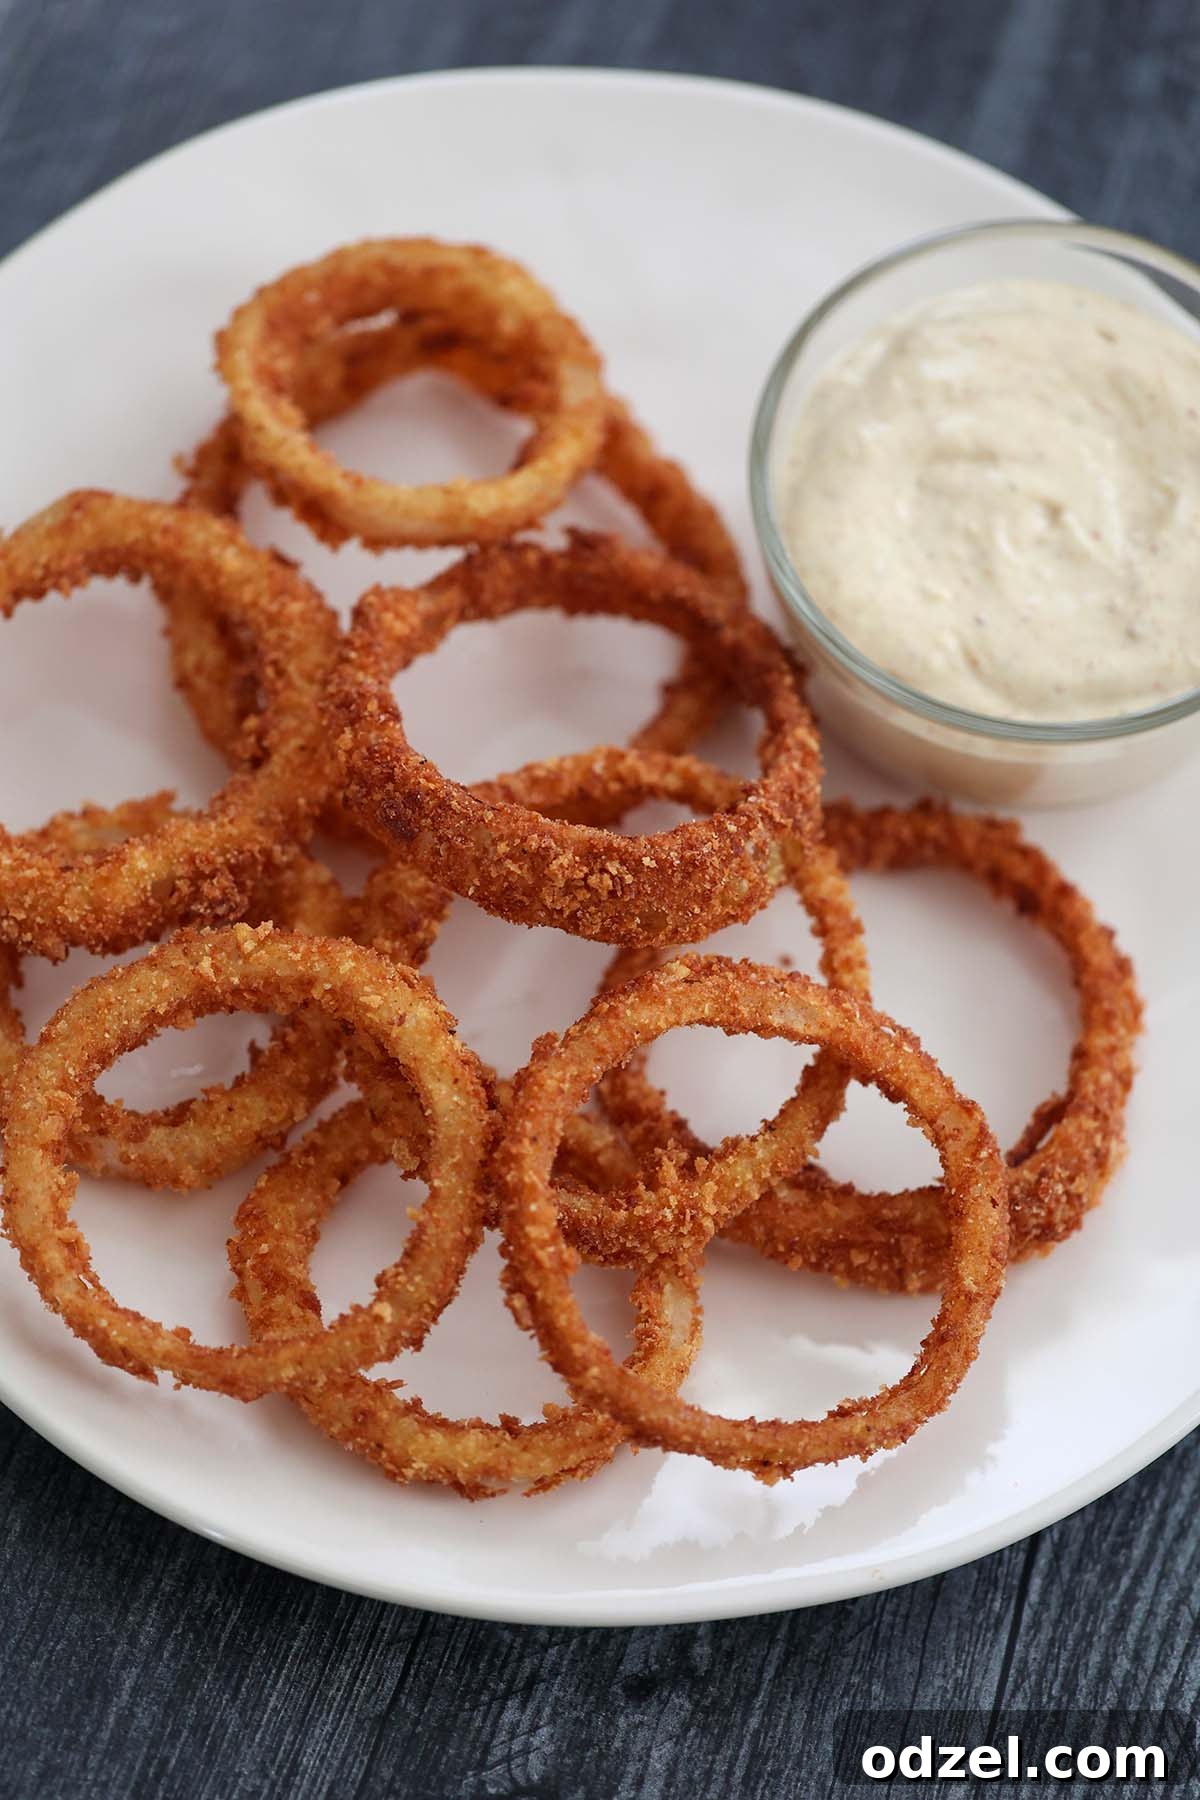
Craving that irresistible crunch and sweet, savory flavor of classic onion rings? Look no further! This recipe for **crispy homemade onion rings** promises a culinary delight that far surpasses any restaurant version. We’re talking thinly sliced, perfectly seasoned, and fried to golden perfection – all without the need for beer, milk, or buttermilk. Get ready to impress your taste buds and your guests with these effortlessly delicious rings, an ideal appetizer, side dish, or snack for any occasion. Once you taste the difference of homemade, you’ll never go back!
If you’re a fan of our French fried onions, then prepare to fall in love with these full-sized rings! Making onion rings from scratch gives you complete control over the thickness and texture. Whether you prefer them robust and meaty or delicately thin like we do, this recipe allows for customization. For an ultimate appetizer experience, serve these golden beauties with a dollop of creamy spicy aioli, elevating every bite with a zesty kick.
Why You’ll Love These Crispy Homemade Onion Rings
There are countless reasons why this **crispy onion rings recipe** will become your new go-to. Not only are they incredibly satisfying, but they’re also surprisingly simple to make:
- Unforgettable Texture and Flavor: Each ring offers a perfect balance of sweet, savory, and an utterly satisfying crunch that’s hard to beat. The secret is in the double breading and quick frying technique.
- Lightning-Fast Cooking: Forget long hours in the kitchen! These onion rings fry up in just about 2 minutes per batch, making them a quick and easy snack or side dish for unexpected guests.
- Minimal, Everyday Ingredients: You won’t need any fancy or hard-to-find components. This recipe relies on staple pantry items, proving that gourmet flavors can come from simple beginnings.
- Versatile Serving Options: These aren’t just for dipping! Serve them with classic ketchup, creamy ranch dressing, smoky BBQ sauce, a gourmet spicy aioli, or enjoy them plain to savor their pure deliciousness.
- Effortless Preparation: Don’t be intimidated by homemade frying. Our straightforward step-by-step instructions make the process incredibly easy, even for novice cooks.
- Customizable Thickness: Unlike store-bought or restaurant versions, you dictate the slice thickness. Prefer a hearty ring? Go thicker. Love delicate, airy rings? Slice them thin!
Key Ingredients for Perfect Onion Rings
The magic of these **crispy onion rings** lies in a few simple, yet carefully selected ingredients. Here’s a closer look at what you’ll need and why each component is essential for achieving the best results:
- Onions: While red or yellow onions can work, we highly recommend Vidalia onions for their naturally sweet and mild flavor profile, which perfectly complements the savory coating. Their sturdy texture also holds up beautifully during slicing and frying, preventing them from becoming mushy. For a sharper flavor, use yellow onions; for a pop of color and a milder taste, red onions are a great alternative.
- Eggs: These act as the crucial binding agent, ensuring that the delicious breadcrumb coating adheres securely to each onion ring. Without the egg wash, your breading wouldn’t stick, resulting in a less crispy and flavorful outcome.
- Bread Crumbs: Our secret to an extra-crispy exterior is using a combination of regular and panko breadcrumbs. Panko breadcrumbs, with their larger, flaky texture, provide an unparalleled crunch. Regular breadcrumbs fill in the gaps, creating a complete and even coating. If you only have one type on hand, feel free to use it, but the blend is highly recommended for optimal crispiness.
- All-Purpose Flour: The initial dredge in flour creates a dry surface on the onion, allowing the egg wash to stick better, which in turn helps the breadcrumbs adhere more effectively. This three-step breading process (flour, egg, breadcrumbs) is key to a robust and crispy coating.
- Seasoning (Garlic Powder, Salt, Baking Powder): These aren’t just for flavor! Garlic powder and salt enhance the savory taste of the rings, while baking powder is a fantastic trick for achieving an incredibly light and airy crispness. It reacts with the oil, creating tiny air pockets that result in a delicate, shattered crust.
- Oil for Frying: Choosing the right oil is paramount for successful deep-frying. Opt for oils with a high smoke point, such as vegetable, canola, peanut, or sunflower oil. These oils can reach the necessary high temperatures without breaking down or imparting undesirable flavors. **Avoid olive oil for deep frying** as it has a lower smoke point and can burn, leading to bitter-tasting rings and potential smoke in your kitchen.
Step-By-Step Guide: How to Make Crispy Onion Rings
Follow these simple instructions to create perfectly crispy, golden onion rings at home. The process is straightforward and guarantees delicious results every time!
- Prepare the Onions: Begin by peeling your chosen onions. Slice them crosswise into uniform thin (or thick, if preferred) rings. The thinner the slices, the quicker they will cook and the crispier they will become. Gently separate the layers to create individual rings.
- Set Up the Dredging Stations: In one shallow dish, combine the all-purpose flour, garlic powder, baking powder, and 1 teaspoon of salt. Mix these dry ingredients until thoroughly combined. In a second shallow dish, whisk the 3 eggs until well blended. In a third shallow dish, combine the panko breadcrumbs, plain breadcrumbs, and the remaining 1 teaspoon of salt. Mix these breadcrumbs well. This creates an efficient “assembly line” for coating.
- Heat the Oil: Pour about 4 inches of your chosen high smoke point oil into a heavy-bottomed pot or deep fryer. Heat the oil to 360 degrees F (182 degrees C). Using an oil thermometer is highly recommended for accuracy, as maintaining the correct temperature is crucial for crispiness and preventing soggy or greasy rings.
- Coat the Onion Rings: Working with one onion ring at a time, first dredge it completely in the flour mixture, ensuring it’s evenly coated and shaking off any excess. Next, dip the floured ring into the whisked egg mixture, letting any excess egg drip off. Finally, thoroughly coat the ring in the breadcrumb mixture, gently pressing to ensure the crumbs adhere well to all surfaces. Place the coated rings on a wire rack or baking sheet until ready to fry.
- Fry to Golden Perfection: Carefully lower 5-6 coated onion rings into the hot oil at a time. Do not overcrowd the pot, as this will lower the oil temperature and result in less crispy rings. Fry for approximately 1 minute on each side, or until they turn a beautiful golden brown and are perfectly crisp.
- Drain and Serve: Using tongs or a slotted spoon, remove the fried onion rings from the oil and transfer them to a plate lined with paper towels to drain any excess oil. Serve immediately while hot and crispy with your favorite dipping sauces.
Expert Tips for Unbeatable Crispy Onion Rings
Achieving restaurant-quality **crispy onion rings** at home is easier than you think, especially with these insider tips:
- Uniform Slicing is Key: For even cooking, try to slice your onions to a consistent thickness. If you prefer them thin, as we do, they will cook very quickly, usually within a minute per side. Thicker rings will require a couple of extra minutes in the oil to become tender inside and golden outside.
- Pack on the Breadcrumbs: Don’t be shy with the breading! Ensure each onion ring is generously coated with the breadcrumb mixture. Gently press the crumbs onto the egg-washed surface to create a thick, protective layer that will crisp up beautifully. A double coating technique can also be used for extra crunch.
- Maintain Oil Temperature: This is perhaps the most critical tip for perfectly crispy, non-greasy onion rings. Use an oil thermometer and keep the temperature consistently at 360°F (182°C). If the oil is too cool, the rings will absorb too much oil and become soggy. If it’s too hot, they’ll burn on the outside before the onion cooks through.
- Don’t Overcrowd the Pot: Fry the onion rings in small batches (5-6 at a time). Overcrowding significantly drops the oil’s temperature, leading to soft, greasy results instead of the desired crispiness. Patience here pays off!
- Drain Properly: As soon as the onion rings are golden and cooked, remove them from the oil and place them on a wire rack set over a baking sheet lined with paper towels. This allows excess oil to drip away, preventing them from becoming soggy. A sprinkling of extra salt immediately after frying enhances flavor.
Serving Suggestions: What to Pair with Crispy Onion Rings
While these **crispy onion rings** are absolutely delightful on their own as a standalone snack or appetizer, their versatility allows them to complement a wide range of meals. Here are some delicious ideas:
- Classic Pairings: Serve them alongside a juicy classic cheeseburger, a hearty turkey bacon avocado sandwich, or any grilled chicken or steak for a satisfying upgrade to your meal.
- BBQ & Picnic Essential: They make an excellent side for barbecue ribs, pulled pork sandwiches, hot dogs, or as part of a summer picnic spread.
- Game Day Snack: Alongside chicken wings, sliders, or nachos, these onion rings are a guaranteed crowd-pleaser for any sports event or casual gathering.
- Dipping Sauces Galore:
- Spicy Aioli: Our personal favorite, adding a creamy, garlicky, and slightly spicy kick. (Get the recipe here!)
- Ketchup: The timeless, simple choice that never disappoints.
- Ranch Dressing: Cool, creamy, and herbaceous, a perfect counterpoint to the fried goodness.
- BBQ Sauce: Smoky and sweet, a fantastic pairing for the savory onion.
- Honey Mustard: A sweet and tangy option that adds a bright flavor.
- Sriracha Mayo: For those who love an extra fiery kick.
Can I Bake These Onion Rings Instead?
Absolutely! If you’re looking for a slightly lighter alternative or prefer to avoid deep-frying, these **crispy onion rings** can certainly be baked. While the texture won’t be identical to deep-fried (they tend to be a bit less airy and uniformly crisp), they are still incredibly delicious and a healthier option.
Here’s how to bake them:
- Preheat Oven: Preheat your oven to 450 degrees F (230 degrees C). This high temperature is essential for getting them as crispy as possible in the oven.
- Prepare Baking Sheet: Line a large baking sheet with parchment paper. This prevents sticking and makes cleanup a breeze.
- Arrange Rings: After you’ve coated the onion rings in the breadcrumb mixture (following step 4 of the frying instructions), arrange them in a single layer on the prepared baking sheet. Ensure there’s enough space between each ring for air to circulate, which promotes even crisping.
- Bake to Golden: Bake for 12-15 minutes, or until the onion rings are golden brown and crisp. For best results, flip them halfway through the baking time to ensure both sides cook evenly. Keep a close eye on them during the last few minutes to prevent burning.
Baking is a fantastic option for a less messy cleanup and a guilt-free indulgence!
Storage and Reheating Tips for Onion Rings
While **crispy onion rings** are undeniably best enjoyed fresh off the fryer, you might find yourself with leftovers. Here’s how to store them and some tips for bringing back their crispness:
- Storage: If you have any leftovers, allow them to cool completely before placing them in an airtight container. Refrigerate for up to 3-4 days. It’s important to note that they will lose their crispness and become softer during storage.
- Reheating for Crispness: To revive their crispy texture, avoid the microwave, which will only make them soggy. Instead, reheat them using one of these methods:
- Oven: Preheat your oven to 375°F (190°C). Spread the onion rings in a single layer on a baking sheet and bake for 5-10 minutes, or until heated through and crisp.
- Air Fryer: For an even quicker and crispier reheat, place the onion rings in a single layer in your air fryer basket. Air fry at 350°F (175°C) for 3-5 minutes, shaking the basket halfway, until perfectly re-crisped.
We highly recommend enjoying these delicious rings immediately after frying for the ultimate experience!
More Fried Delights You Might Enjoy
If you loved making these **crispy homemade onion rings**, you’ll certainly enjoy exploring more of our delicious fried recipes. Perfect for appetizers, gatherings, or a special treat:
- Southern Fried Shrimp
- Fried Lobster Tails
- Fried Calamari
- Southern Fried Pork Chops
If you tried this recipe, we’d love to hear from you! Please consider leaving a review in the comments section below.
Crispy Onion Rings
By Julie Maestre
These crispy onion rings are sliced thin, perfectly seasoned, and fried to perfection. No beer, milk, or buttermilk is required!
Cook: 2 mins
Total: 22 mins
Servings: 24
Equipment
- Oil Thermometer
- Large heavy-bottomed pot or deep fryer
- Shallow dishes for breading
- Tongs or slotted spoon
- Wire rack and paper towels for draining
Ingredients
- 2 large onions, such as Vidalia, sliced into rings
- 1 cup all-purpose flour
- 3 large eggs, whisked
- 1 cup panko bread crumbs
- 1 cup plain bread crumbs
- 2 tsp baking powder
- 2 tsp salt, divided (or to taste)
- 1 tsp garlic powder
- Oil, for frying (e.g., vegetable, canola, or peanut oil)
- Spicy Aioli, for dipping (optional, get recipe here)
Instructions
- Peel the onions and slice them crosswise into thin (or desired thickness) slices. Gently separate the slices to create individual rings.
- In a shallow dish, combine the garlic powder, baking powder, 1 tsp salt, and all-purpose flour. Mix until well combined.
- In a separate shallow dish, whisk the 3 eggs until smooth.
- In a third shallow dish, combine the panko breadcrumbs, plain breadcrumbs, and the remaining 1 tsp salt. Mix well.
- Heat about 4 inches of high smoke point oil in a large pot or deep fryer to 360 degrees F (182 degrees C). Use an oil thermometer for accuracy.
- Working in small batches, coat each onion ring first in the flour mixture, shaking off excess. Then dip it into the egg mixture, allowing excess to drip off. Finally, thoroughly coat it in the breadcrumb mixture, gently pressing the crumbs to adhere.
- Carefully lower 5-6 coated onion rings into the hot oil. Fry for approximately 1 minute on each side, or until golden brown and crispy.
- Remove the fried onion rings with tongs or a slotted spoon and drain them on a wire rack set over paper towels to absorb excess oil. Serve immediately with your favorite dipping sauce.
Notes
- If you slice the onions thin, they will cook very quickly. Thicker rings may require a couple of extra minutes to cook through.
- Ensure to generously pack on the bread crumbs for the best crispy coating.
Nutrition
Nutrition information is automatically calculated, so should only be used as an approximation.
Calories: 59kcal | Carbohydrates: 10g | Protein: 2g | Fat: 1g | Saturated Fat: 1g | Polyunsaturated Fat: 1g | Monounsaturated Fat: 1g | Trans Fat: 1g | Cholesterol: 20mg | Sodium: 254mg | Potassium: 75mg | Fiber: 1g | Sugar: 1g | Vitamin A: 30IU | Vitamin C: 1mg | Calcium: 33mg | Iron: 1mg
Additional Info
Author: Julie Maestre
Prep Time: 20 minutes
Cook Time: 2 minutes
Total Time: 22 minutes
Course: Appetizer
Cuisine: American
Servings: 24
Calories: 59
Keyword: crispy onion rings, how to make onion rings, onion rings
Like this recipe? We’d love for you to leave a comment below and share your thoughts!