
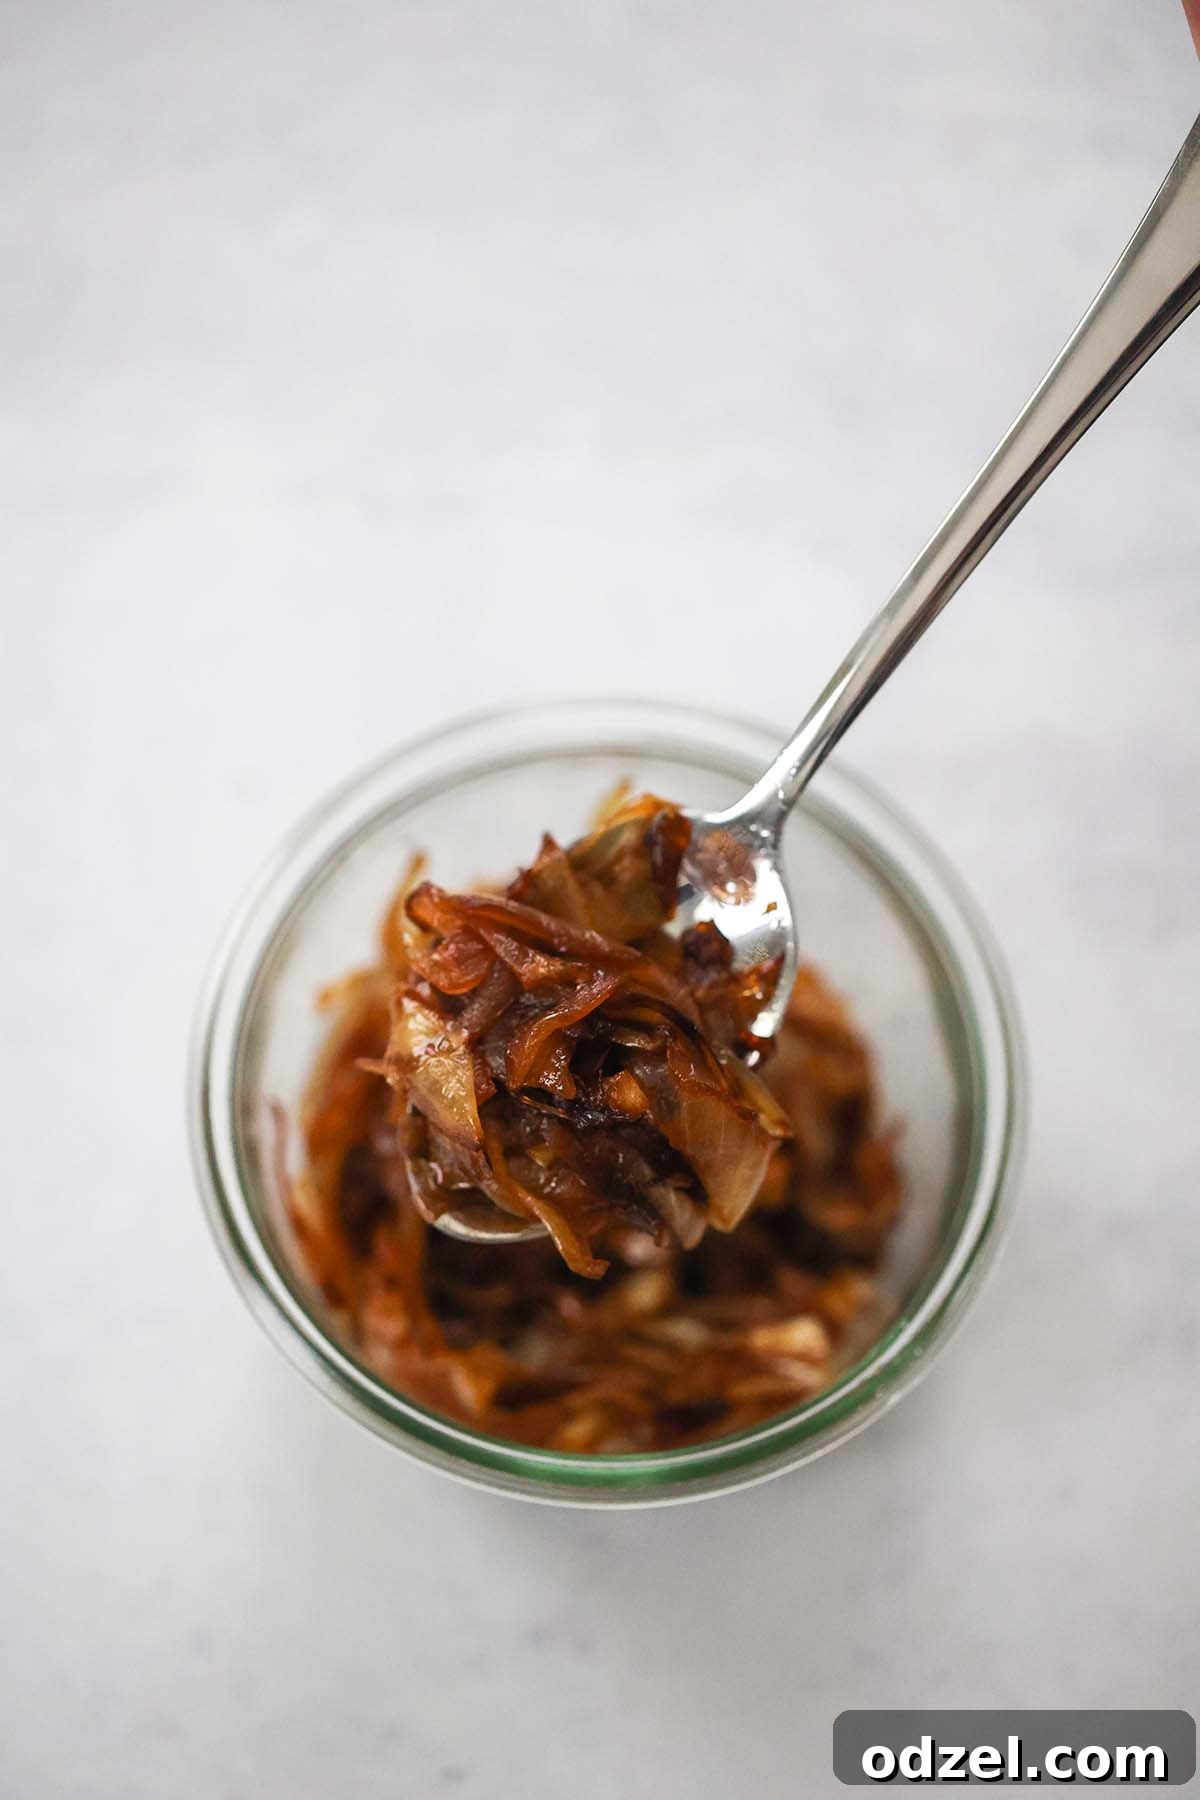
The Ultimate Guide to Sweet Caramelized Onions: A Versatile & Flavorful Condiment
Transforming humble onions into a golden, tender, and intensely sweet delicacy is a culinary art that’s surprisingly simple to master. These sweet caramelized onions aren’t just a topping; they’re a revelation, adding a layer of sophisticated flavor to an array of dishes. While the process takes a little patience – about 40 minutes of gentle cooking – the reward is immense. Their rich, savory-sweet depth is truly worth every minute, and the best part is they can be stored in your fridge for up to 5 days, making them a perfect make-ahead ingredient for busy weeks.
Imagine the elevated taste experience: succulent caramelized onions piled high on a juicy pan-seared ribeye steak, tucked into a classic cheeseburger, enhancing a vibrant salad, taking your grilled cheese sandwich from ordinary to extraordinary, or even livening up a humble hot dog. Their versatility knows no bounds, making them an indispensable secret weapon in any kitchen.
Choosing the Best Onions for Perfect Caramelization
While some onions naturally boast a higher sugar content, making them inherently sweeter, the truth is you can achieve delicious caramelized onions with almost any type of onion. The key is the slow cooking process that coaxes out their natural sugars. However, selecting the right variety can certainly enhance the final flavor and texture. Here’s a rundown of popular choices:
- Yellow Onions: Often considered the workhorse of the kitchen, yellow onions are an excellent choice. They have a good balance of sweetness and pungency, which mellows beautifully during caramelization to a deep, complex flavor. They hold their shape well and are readily available.
- Red Onions: These vibrant onions offer a slightly sharper, more peppery flavor when raw. When caramelized, they transform into a wonderfully sweet and jam-like consistency with a lovely reddish hue, perfect for adding visual appeal to dishes.
- White Onions: With a crisper texture and a more pungent, stronger flavor profile than yellow onions, white onions also caramelize well. They tend to be a bit more watery, so a little extra patience might be needed during cooking.
- Vidalia Onions (or other sweet onion varieties like Walla Walla, Maui): If you’re looking for the absolute sweetest result, Vidalia onions are your top contender. These onions are specially cultivated to be low in sulfur and high in sugar, meaning they caramelize more quickly and intensely sweet without needing much, if any, added sugar.
Regardless of your choice, if you find your onions taste a bit bitter during the cooking process, don’t fret! A small pinch of sugar can work wonders. Sugar not only boosts sweetness but also acts as a catalyst, aiding the Maillard reaction (the browning process) and helping the onions caramelize more quickly and evenly.
Essential Ingredients for Sweet Caramelized Onions
Crafting these delectable onions requires just a handful of simple ingredients, most of which you likely already have in your pantry. The magic truly happens through the cooking technique rather than a lengthy ingredient list.
- Onions: As discussed, while I often opt for yellow onions for their reliable performance and balanced flavor, feel free to experiment with red, white, or sweet Vidalia onions based on your preference. The most critical aspect here is how you prepare them: cut the onions into uniform, thin slices, ideally about 1/8-inch thick. Consistency in thickness ensures even cooking and perfect caramelization across the entire batch.
- Oil: A good quality cooking oil is essential for sautéing the onions and facilitating the caramelization process. Any neutral-flavored oil with a high smoke point will work beautifully. Olive oil is a popular choice for its flavor and health benefits, but vegetable oil, canola oil, or even avocado oil are also excellent options. For an added layer of richness and flavor, some chefs prefer to use a combination of oil and butter, or just butter, though butter has a lower smoke point and requires more careful heat management.
- Sugar (Optional): While onions naturally contain sugars that caramelize over time, adding a pinch of sugar is completely optional but highly recommended if you desire an extra layer of sweetness or want to speed up the browning process. Both brown sugar and white granulated sugar work well. Brown sugar adds a deeper, molasses-like note, while white sugar provides a cleaner sweetness. This is particularly useful if you’re using a more pungent onion variety or are simply impatient for that deep, golden hue.
- Salt: A fundamental seasoning for nearly all cooking, salt is crucial here for balancing the sweetness and enhancing the overall flavor profile of the caramelized onions. It helps to draw out moisture from the onions initially, contributing to their softening, and seasons them perfectly as they cook down. Season to taste, remembering you can always add more but can’t take it away.
Mastering the Art of Cutting Onions for Caramelization
Properly slicing your onions is a crucial first step for successful caramelization. Uniformity is key here, as it ensures all the onion pieces cook evenly and reach that perfect tender, golden-brown stage at the same time. Here’s a simple guide:
- Prepare the Onions: Begin by slicing off both the stem and root ends of each onion. This creates stable flat surfaces.
- Halve and Peel: Carefully cut each onion in half lengthwise, from the stem end to the root end. Once halved, remove the papery outer layers and any overly soft or bruised sections.
- Position for Slicing: Place the onion halves cut-side down on your cutting board. This stable position prevents the onion from rocking while you slice, making the process safer and more efficient.
- Achieve Thin Slices: Now, using a sharp knife, slice the onions lengthwise (from stem to root). Aim for consistent, thin slices, approximately 1/8-inch thick. The thinness allows them to cook down efficiently and caramelize beautifully.
- Consider Your Cut Style:
- Half-Moons: Slicing lengthwise from a halved onion yields lovely crescent-shaped “half-moons.” This is the most common and versatile cut for caramelized onions, offering a good balance of texture and surface area for browning.
- Onion Rings: If you desire perfect onion rings for a specific presentation, do not cut the onions in half initially. Instead, slice directly across the whole onion (from pole to pole) to create complete rings. Then, gently separate the rings before cooking. This method works well if you want a more distinct ring shape in your final dish.
A sharp knife is your best friend in this process, ensuring clean cuts and minimizing tears. The better your slices, the more consistently your onions will caramelize into that sweet, tender perfection.
Selecting the Ideal Skillet for Caramelizing Onions
The choice of your cooking vessel plays a more significant role than you might think in achieving perfectly caramelized onions. A good skillet provides even heat distribution and retention, which are critical for the slow, steady browning process. The best options are those with a heavy bottom, as they prevent hot spots that can lead to uneven cooking and burning. Here are the top recommendations:
- Heavy-Bottomed Stainless Steel Pan: These pans are excellent because they distribute heat very evenly across the surface and retain it well. The heavy bottom prevents the onions from scorching in one area while others remain undercooked. Their lighter interior also allows you to easily monitor the color of the onions as they caramelize.
- Cast Iron Skillet: A classic for a reason, cast iron is unparalleled in its heat retention and distribution. Once heated, it maintains a consistent temperature, which is ideal for the long, slow cook required for caramelization. Cast iron also helps to develop a beautiful, deep brown crust on the onions. Just be mindful that cast iron can get very hot, so careful heat management is necessary to prevent burning.
- Dutch Oven: A heavy-bottomed Dutch oven, typically made from enameled cast iron, is another fantastic option. Its wide base offers ample surface area for the onions to spread out (crucial for browning), and its thick walls ensure steady, gentle cooking.
Avoid thin, lightweight pans, as they tend to create hot spots and can lead to unevenly cooked or burned onions. A pan that is wide enough to accommodate your onions without overcrowding is also important. If you’re making a large batch, it’s better to use two pans or cook in batches rather than overcrowd a single skillet, which can steam the onions instead of browning them.
The Science Behind the Sweetness: Understanding Caramelization
Caramelizing onions is more than just cooking them; it’s a fascinating culinary transformation rooted in chemistry. As onions cook slowly over low heat, two primary chemical reactions occur that create their signature sweet and savory flavor:
- Caramelization: This is the direct breakdown of sugars present in the onions due to heat. Onions naturally contain various sugars (fructose, glucose, sucrose). When heated to around 310°F (154°C) or higher, these sugars undergo a complex series of reactions, breaking down into hundreds of new flavor compounds. This process gives caramelized onions their characteristic golden-brown color, nutty aroma, and deep, sweet, slightly tangy taste.
- Maillard Reaction: Simultaneously, the Maillard reaction (a non-enzymatic browning reaction) occurs. This is a complex chemical reaction between amino acids and reducing sugars in the presence of heat. It’s responsible for the rich brown color and savory “umami” notes you find in seared steaks, roasted vegetables, and, of course, caramelized onions. While sugar caramelizes independently, the Maillard reaction significantly contributes to the complexity and depth of flavor in caramelized onions, adding savory, roasted, and nutty notes that balance their sweetness.
The slow and steady cooking process is essential because it allows the moisture to evaporate gradually, concentrating the sugars and enabling these reactions to unfold without burning the onions. High heat would scorch the exterior before the interior sugars have a chance to properly break down and develop their full flavor. Understanding these processes helps appreciate why patience is the most important ingredient in this recipe!
Expert Tips for Perfectly Caramelized Onions
Achieving that coveted deep, sweet, and tender consistency in caramelized onions requires a few key techniques and a bit of patience. Follow these top tips to ensure your batch turns out perfectly every time:
- Maintain Moisture: As onions cook down, they can sometimes dry out, especially towards the end of the cooking time. To prevent this, add a small splash of water (about 1-2 tablespoons) every 15-20 minutes. This helps to deglaze the pan, picking up all those flavorful browned bits from the bottom, and keeps the onions moist, allowing them to soften without burning. Chicken stock, wine, or balsamic vinegar can also be used for extra flavor, as mentioned below.
- Strategic Stirring: This is a delicate balance. You don’t want to overmix the onions; doing so prevents them from developing a nice brown crust and deep flavor on the surfaces exposed to the heat. Allow them to sit undisturbed for several minutes between stirs. However, don’t forget them entirely! Make sure to give them a thorough stir every 7-10 minutes to ensure they cook evenly and don’t burn on the bottom. The goal is to brown them, not blacken them.
- Low and Slow is the Way to Go: The most crucial tip for caramelization is patience. Cook the onions over consistent medium-low heat for at least 35-40 minutes, or even longer, until they acquire a rich, uniform golden-brown to deep amber color. Rushing the process with high heat will only result in burned, bitter onions rather than sweet, tender ones.
- Elevate Flavor with Additions: While delicious on their own, you can easily enhance the complexity of your caramelized onions:
- Butter: For extra richness, add a tablespoon or two of butter alongside your oil at the beginning or towards the end of cooking.
- Fresh Herbs: A sprig of fresh thyme or rosemary added during the last 10-15 minutes of cooking infuses a beautiful aromatic layer.
- Liquids: For deeper flavor, instead of just water, you can add a splash of chicken stock, red or white wine (for a more gourmet touch), or balsamic vinegar during the deglazing steps. These liquids evaporate, leaving behind concentrated flavors.
- Scaling the Recipe: Feel free to double or even triple this recipe! Caramelized onions are fantastic to have on hand. Just remember that the longer the onions cook, the more they will reduce in volume. It might seem like an overwhelming amount of raw onions at the start, but they shrink significantly as they release moisture and caramelize. For reference, two large yellow onions typically yield about 1/2 cup of deeply caramelized onions. Ensure your pan is large enough, or use multiple pans, to avoid overcrowding.
- The Right Tool: A sharp knife makes slicing onions much easier, safer, and more consistent, which is key for even cooking.
Creative Ways to Enjoy Sweet Caramelized Onions
The beauty of sweet caramelized onions lies in their incredible versatility. Once you have a batch ready, a world of culinary possibilities opens up. Here are some expanded ideas to inspire your next meal:
- Elevate Main Courses: They are a dream pairing for meats. Spoon them over perfectly grilled or pan-seared steaks, roast pork, or even simple chicken breasts for an instant gourmet touch.
- Ultimate Sandwich & Burger Topping: No burger or sandwich is complete without them. They add moisture, sweetness, and a savory depth that takes a classic cheeseburger, pulled pork sandwich, or even a turkey wrap to the next level. Imagine them with a smear of goat cheese on a baguette!
- Grilled Cheese Perfection: Add a layer of caramelized onions to your favorite grilled cheese sandwich. The sweet and savory notes perfectly complement the melted cheese, creating an irresistible combination.
- Breakfast & Brunch Star: Mix them into scrambled eggs or an omelet, serve them alongside crispy bacon, or add them to a breakfast hash for a surprisingly delightful morning meal.
- Pizza & Flatbread Topping: Spread a thin layer over pizza dough before adding cheese and other toppings. They pair wonderfully with goat cheese, bacon, or mushrooms on a gourmet pizza.
- Dress Up Appetizers: Serve them on crostini with a dollop of brie or feta cheese, or incorporate them into savory tarts and quiches. They’re also fantastic folded into dips, like a classic onion dip.
- Soups & Sauces: They are the foundational flavor for an authentic French Onion Soup. You can also stir them into gravies, pan sauces, or even a simple vinaigrette for a rich, sweet kick.
- Salad Enhancer: While often associated with warm dishes, caramelized onions can add a sweet and savory punch to green salads, especially those with goat cheese, walnuts, or balsamic vinaigrette.
- Potato Pairings: Mash them into mashed potatoes, fold them into roasted potato dishes, or serve alongside a baked potato for added flavor.
Storing and Reheating Your Caramelized Onions
One of the many advantages of making a batch of sweet caramelized onions is their excellent shelf life, allowing you to enjoy their rich flavor for days to come. Proper storage is key to maintaining their quality and freshness:
Once your caramelized onions have achieved that perfect golden-brown hue and tender texture, allow them to cool completely at room temperature. This is an important step before refrigerating to prevent condensation buildup, which can lead to sogginess.
Once cooled, transfer the onions to an airtight container. Good options include:
- A mason jar with a tight-fitting lid.
- A resealable plastic storage bag, pressing out as much air as possible.
- A plastic or glass air-tight container.
Store the sealed container in the refrigerator for up to 5 days. You can enjoy these flavorful onions at room temperature, gently warmed, or even cold, depending on your preference and the dish you’re pairing them with.
To Reheat: For best results, gently reheat caramelized onions on the stovetop in a small skillet over low heat, adding a tiny splash of water or broth if they seem dry. You can also microwave them in short bursts, stirring occasionally, until warmed through.
Freezing for Longer Storage: For longer storage, caramelized onions freeze exceptionally well. Portion them into ice cube trays or small freezer-safe bags, freeze until solid, then transfer the cubes or small blocks to a larger freezer bag or container. They can be stored in the freezer for up to 3 months. Thaw in the refrigerator overnight or reheat directly from frozen in a pan with a little liquid.
Troubleshooting Common Caramelization Issues
Even with careful attention, sometimes things can go slightly awry when caramelizing onions. Here are some common issues and how to troubleshoot them:
- Onions are Burning, Not Browning: This is almost always a sign that your heat is too high. Immediately reduce the heat to medium-low. If scorching has already occurred, remove the burned bits, add a splash of water or broth to deglaze, scrape up the good browned bits, and continue cooking at a lower temperature. Patience is crucial here; caramelization requires a slow, gentle heat.
- Onions are Steaming, Not Browning: If your onions are becoming soft and translucent but not developing that desired golden crust, it’s likely due to overcrowding the pan. When too many onions are packed into a skillet, they release moisture, which then steams rather than evaporates, preventing browning. If possible, transfer half the onions to another pan or work in batches. If that’s not an option, increase the heat slightly (but carefully!) and ensure there’s enough space for steam to escape, stirring less frequently.
- Onions are Drying Out: If your onions appear shriveled and dry before they’re fully caramelized, they need more moisture. Add a splash of water, chicken stock, or wine (1-2 tablespoons at a time) to the pan. This will not only rehydrate them but also help deglaze the pan, incorporating any stuck-on flavorful bits.
- Onions Taste Bitter: Sometimes, especially with certain onion varieties, a slight bitterness can emerge. This often happens if they’ve been cooked at too high a heat or if they’re simply a more pungent onion. A pinch of sugar (as mentioned in the ingredients section) can help counteract bitterness. A splash of balsamic vinegar or red wine added towards the end of cooking can also introduce acidity and sweetness to balance the flavor.
- Onions Aren’t Sweet Enough: If your caramelized onions lack the desired sweetness, you can stir in a small amount of sugar (brown or granulated) or a touch of balsamic vinegar during the last 5-10 minutes of cooking. Continue to cook until the added sugar dissolves and melds with the onions.
Remember, cooking is an art, and every batch of onions can be a little different. Don’t be afraid to adjust as you go!
More Recipes You Might Enjoy with Caramelized Onions…
- French Onion Dip
- Crockpot Mashed Potatoes with Caramelized Onions
- French Onion Soup
- Beer Battered Onion Rings
We hope you’ve enjoyed this comprehensive guide to making sweet caramelized onions. If you tried this recipe, we’d love to hear from you! Please consider leaving a star rating in the recipe card below and/or a review in the comments section further down the page. Your feedback is invaluable. You can also connect with us and share your culinary creations on Facebook, Instagram, or Pinterest!
Sweet Caramelized Onions
Julie Maestre
5 mins
40 mins
45 mins
4
Equipment
-
Cutting Board
-
Sharp Knife
-
Skillet (heavy-bottomed or cast iron recommended)
Ingredients
- 2 onions (yellow, red, white, or Vidalia)
- 1 tablespoon olive oil (or other cooking oil)
- Salt to taste
- Sugar to taste (optional, brown or white granulated sugar)
Instructions
-
Slice off the ends of the onions, cut them in half lengthwise, and remove the outer papery layers. Place the onion halves cut-side down on a cutting board. Slice the onions lengthwise from stem to root into thin, uniform slices (about 1/8-inch thick).
-
Heat the oil in a large, heavy-bottomed skillet or cast iron pan over medium-high heat. Once hot, add the sliced onions and spread them evenly. Immediately reduce the heat to medium-low.
-
Cook the onions, stirring every 7-10 minutes to ensure even browning and prevent burning. If the onions start to dry out or stick to the pan, add a splash of water (1-2 tablespoons) or more oil as needed to deglaze and keep them moist.
-
After about 20-25 minutes, if desired, add a pinch of sugar to make the onions extra sweet and to aid in deeper caramelization. Season with salt to taste, adjusting as the onions cook down and flavors concentrate.
-
Continue cooking the onions for a total of 35-40 minutes (or longer, up to an hour for very deep caramelization), maintaining medium-low heat and stirring periodically. They should achieve a rich, golden-brown to deep amber color and be very tender.
-
For extra flavor, you can add a tablespoon of butter, a sprig of fresh thyme, or a splash of chicken stock, wine, or balsamic vinegar during the last 10 minutes of cooking. Stir until thoroughly combined and enjoy your perfectly caramelized onions!
Notes
- To prevent the onions from drying out, add a splash of water or broth every 15-20 minutes as they cook. This also helps deglaze the pan.
- Avoid overmixing the onions; allow them to develop a nice brown crust on the bottom before stirring. However, ensure you stir every 7-10 minutes to prevent burning and promote even cooking.
- Always cook over medium-low heat. Patience is key for true caramelization without burning.
- Experiment with flavor additions like butter, fresh thyme, chicken stock, wine, or balsamic vinegar for enhanced complexity.
- Caramelized onions reduce significantly in volume. Feel free to double or triple the recipe, using a larger pan or multiple pans if needed. Two large onions typically yield about 1/2 cup once caramelized.
- A sharp knife ensures consistent, thin slices, which are vital for even cooking.
Nutrition
Calories:
53
kcal
|
Carbohydrates:
5
g
|
Protein:
1
g
|
Fat:
4
g
|
Saturated Fat:
1
g
|
Polyunsaturated Fat:
0.4
g
|
Monounsaturated Fat:
3
g
|
Sodium:
2
mg
|
Potassium:
80
mg
|
Fiber:
1
g
|
Sugar:
2
g
|
Vitamin A:
1
IU
|
Vitamin C:
4
mg
|
Calcium:
13
mg
|
Iron:
0.1
mg
Nutrition information is automatically calculated, so should only be used as an approximation.
Additional Info
Julie Maestre
5 minutes
40 minutes
45 minutes
Sides, Condiment
American
4 servings
53
caramelized onions, sauteed onions, sweet caramelized onions, onion topping