
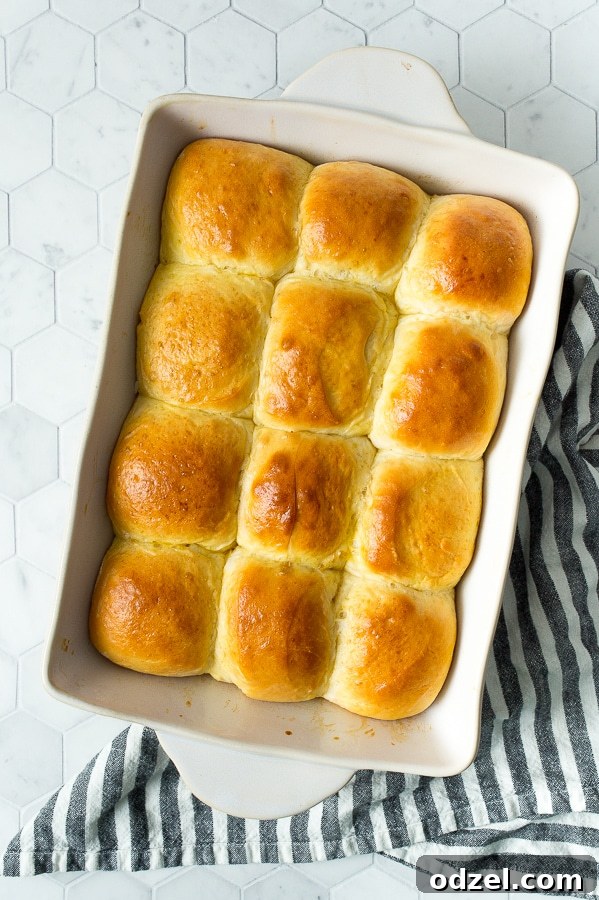
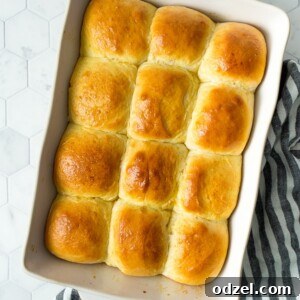
These homemade dinner rolls are more than just a side dish; they’re a centerpiece! Incredibly light, wonderfully fluffy, and irresistibly soft, these rolls are destined to become a top highlight of any meal. With just a few staple ingredients you likely already have in your pantry, you’re all set to bake pure joy and fill your home with the comforting aroma of freshly baked bread. Say goodbye to store-bought and hello to bakery-quality rolls right from your kitchen!
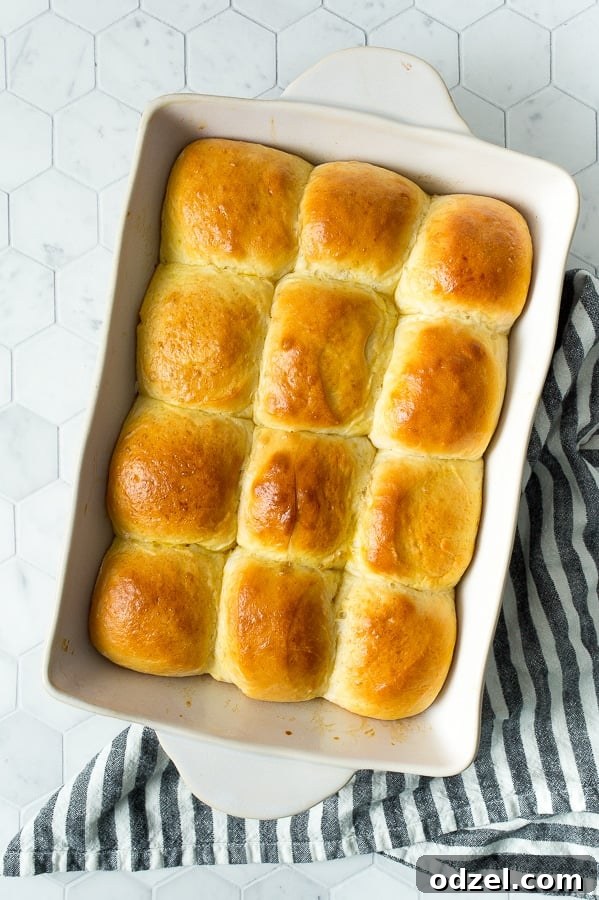
Many families enjoy the convenience of eating out for dinner, and there’s certainly a fun appeal to ordering pizza or takeout. However, it can be challenging to ensure your family consumes the healthiest and most beneficial ingredients when relying on restaurant food. That’s precisely why I advocate for making delicious homemade dinners that still get rave reviews from everyone at the table. Crafting meals at home allows you to control the quality of ingredients, reduce processed foods, and often save money, all while creating cherished family memories.
Some of the beloved main courses in our household include flavorful Salmon Burgers and savory Ham and Cheese Sliders. While dinner rolls aren’t a complete meal on their own (though I could happily make them one!), they are the ultimate accompaniment to an astonishing array of entrees, from hearty stews and succulent roasts to light salads and vibrant pasta dishes. They bring a delightful texture and buttery richness that ties the whole meal together.
How To Make The Best Homemade Dinner Rolls
Making dinner rolls from scratch might sound intimidating, but it’s a surprisingly simple and rewarding process. Follow these detailed steps to achieve perfectly soft and golden-brown rolls every time, elevating your dinner table with a touch of homemade magic.
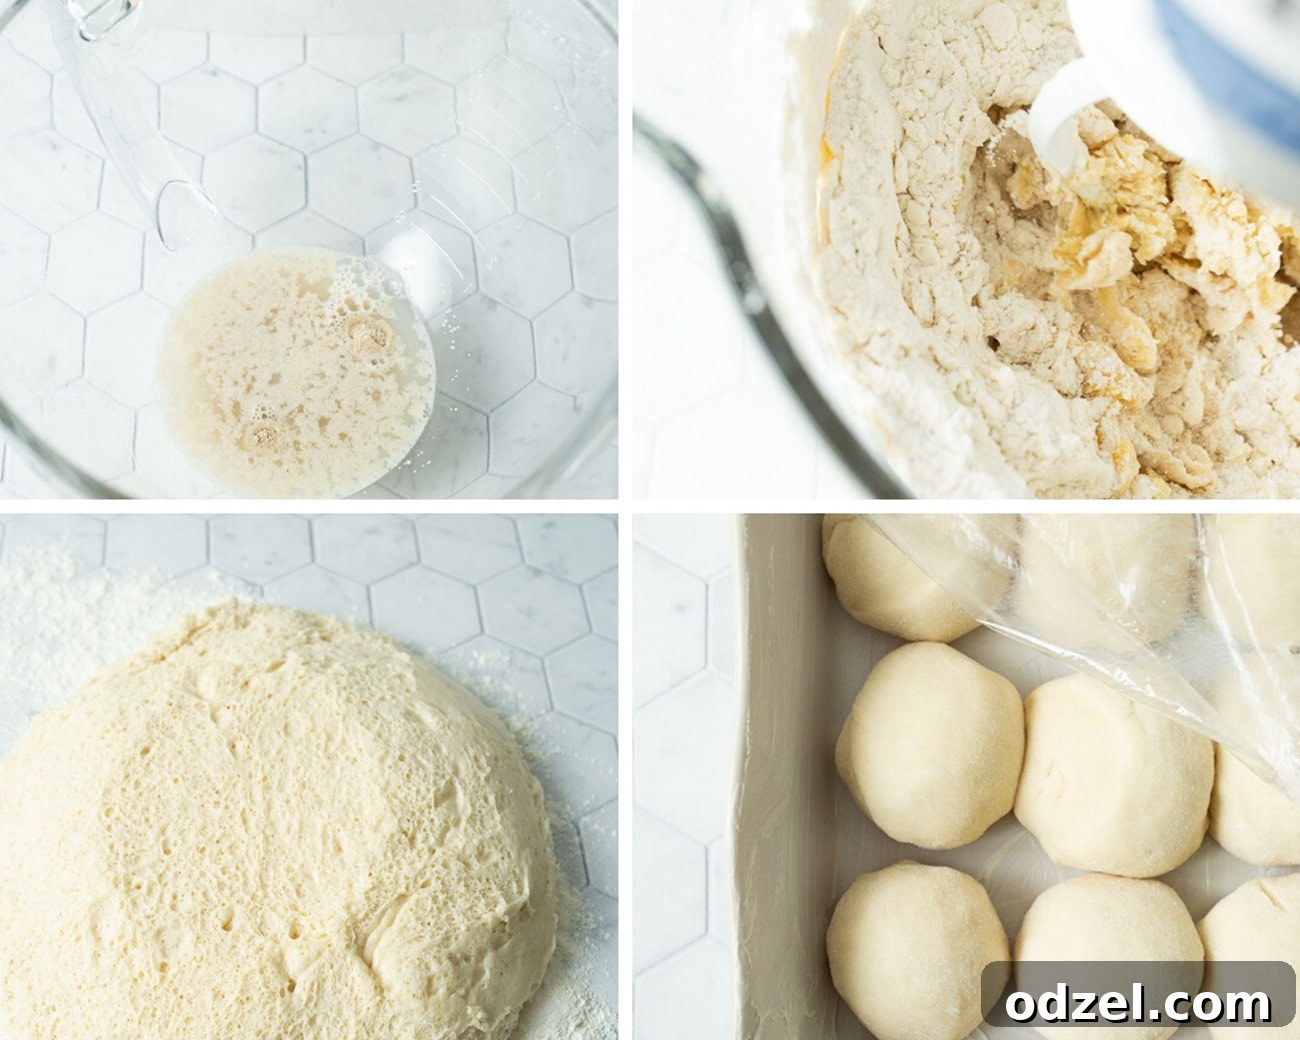
- Activate the Yeast and Start the Dough – Begin by combining the warm water (ideally around 105-115°F, check with a thermometer) and active dry yeast in the bowl of your standing mixer. Give it a gentle stir and then let it sit undisturbed for approximately 5-7 minutes. This crucial step allows the yeast to activate, and you’ll know it’s ready when the mixture becomes beautifully foamy and fragrant, indicating the yeast is alive and eager to work its magic. Next, add in the warm milk (also around 115°F), a lightly beaten egg, sugar, perfectly melted butter, and salt. Mix these wet ingredients thoroughly until well combined, making sure to scrape down the sides of the bowl with a spatula if necessary to ensure everything is incorporated.
- Knead and Develop the Dough – Once your wet ingredients are harmoniously blended, gradually add the bread flour to the mixer. This is where a stand mixer with a dough hook truly shines. Attach the dough hook and mix the ingredients on low speed for 8-10 minutes. The kneading process is vital for developing the gluten in the bread flour, which is responsible for the rolls’ signature chewy yet soft texture. As the dough kneads, it should pull away from the sides of the bowl but remain slightly sticky to the touch. Avoid the temptation to add too much extra flour at this stage, as it can result in dry, tough rolls. The slight tackiness is exactly what you want for maximum softness.
- First Rise: The Proofing Stage – Lightly flour a clean, flat work surface. Carefully transfer the dough from the mixer bowl onto this surface and knead it by hand for just a few more seconds. This brief final knead helps to ensure a smooth, elastic dough ball. Once finished, shape the dough into a neat ball and place it into a large bowl that has been greased with a little oil or cooking spray. Turn the dough once to coat it evenly. Cover the bowl snugly with a clean kitchen towel or plastic wrap. Find a warm, draft-free spot in your kitchen (like a slightly warm oven that’s turned off, or near a sunny window) and let the dough rise for about an hour, or until it has visibly doubled in size. This first rise develops incredible flavor and ensures a light, airy crumb.
- Shape and Second Rise: Preparing for Baking – Gently punch down the risen dough to release the air. Transfer it onto your lightly floured work surface again. Using a sharp knife or a dough cutter, divide the dough into 12 equal portions. For consistent sizing, you can weigh each portion, aiming for approximately 2-2.5 ounces per roll. To shape each portion into a perfect dinner roll, take a piece of dough and tuck the sides underneath, gently rolling it against the counter with the palm of your hand to create a smooth, tight ball. This technique helps build surface tension, resulting in a beautiful shape. Lightly butter a 9×13 inch baking dish. Arrange the shaped dough balls side-by-side in the prepared dish, leaving a little bit of space between each one to allow for expansion. Cover the dish again and let the rolls rise for another 40 minutes in a warm spot, or until they have nearly doubled in size once more. This second rise is crucial for light, airy rolls.
- Bake to Golden Perfection – Preheat your oven to 375°F (190°C). While the oven heats, whisk together one egg with a tablespoon of water to create an egg wash. Gently brush this mixture over the tops of your risen dough balls. The egg wash will give your dinner rolls a beautiful golden-brown color and a slightly shiny crust. Place the baking dish into the preheated oven and bake for 20 minutes, or until the rolls are fully cooked through and have achieved that irresistible golden hue. As soon as they come out of the oven, for an extra touch of flavor and a soft finish, you can brush them with a little more melted butter. Serve them warm and watch them disappear!
Expert Tips and Delicious Recipe Variations for Your Dinner Rolls
Making homemade dinner rolls is a joyous experience, and with these tips and variations, you can tailor them to any meal or occasion, ensuring perfect results every time.
- Optimal Storage for Freshness – To keep your freshly baked dinner rolls at their peak softness and flavor, the best storage method is to wrap them tightly in plastic wrap or aluminum foil once they’ve completely cooled. Then, place them in an airtight container and store them in a cool, dark, and dry spot in your pantry. Stored this way, they will remain wonderfully fresh for up to a week. For longer preservation, you have excellent options:
- Refrigeration: Wrap the rolls individually or in small batches with plastic wrap, then place them in an airtight container or a freezer-safe bag. They will keep well in the refrigerator for about two weeks.
- Freezing: This is ideal for making ahead! Once the rolls are fully cooled, place them on a baking sheet and freeze until solid (this prevents them from sticking together). Then, transfer the frozen rolls to an airtight, freezer-safe bag or container, separating layers with wax or parchment paper to prevent freezer burn. They can be frozen for up to two months. Thaw at room temperature or reheat directly from frozen (see reheating tips).
- Reheating for Bakery-Fresh Warmth – Nothing beats a warm dinner roll!
- Microwave: For a quick reheat, place rolls spaced apart in the microwave. Start with 10-15 seconds for rolls from the pantry or fridge, and 20-30 seconds for frozen rolls. Add 5-10 seconds as needed until warmed through and soft. Be careful not to overheat, as they can become tough.
- Oven: For the best texture, especially for larger batches or frozen rolls, wrap them loosely in aluminum foil and bake in a preheated oven at 300°F (150°C) for 10-15 minutes (or 20-30 minutes for frozen rolls) until soft and warmed through. This method helps to retain their moisture and fluffy interior.
- Creative Garnishing Options – The final touch can truly elevate your dinner rolls:
- Melted Butter: My personal favorite! A simple brush of melted unsalted butter immediately after baking adds richness and a beautiful sheen.
- Garlic Butter: Elevate the classic by mixing finely minced garlic (or garlic powder), a pinch of dried parsley, and a dash of salt into your melted butter. Brush over warm rolls for a savory kick.
- Honey Butter: For a sweet counterpoint, whip together softened butter and a touch of honey. This is divine for breakfast or brunch rolls.
- Cinnamon Sugar Mixture: Lightly brush rolls with melted butter, then sprinkle generously with a blend of cinnamon and sugar for a sweet treat perfect for dessert or a morning pastry.
- Flaky Sea Salt: For a simple yet elegant touch, a sprinkle of flaky sea salt on buttered rolls enhances their savory notes.
- Plain: Of course, leaving them plain is always a wonderful option, allowing their natural flavor to shine.
- Infusing Additional Flavors into the Dough – Get creative by incorporating herbs and spices directly into your dough:
- Herbs: Add 1-2 tablespoons of finely chopped fresh herbs like rosemary, thyme, chives, or dill to the dough mixture for aromatic savory rolls.
- Spicy Kick: For a touch of heat, mix in a teaspoon or two of crushed red pepper flakes.
- Cheese: Fold in ½ cup of shredded Parmesan, cheddar, or Gruyere cheese during the last minute of kneading for cheesy dinner rolls.
- Everything Bagel Seasoning: Brush the shaped rolls with egg wash and sprinkle generously with everything bagel seasoning before baking for a savory, textured crust.
- Transform into Garlic Cheesy Bread – These versatile rolls are perfect for transforming into delicious garlic bread or even cheesy garlic bread, especially wonderful with Italian dishes:
- Garlic Bread: Once the rolls have cooled slightly, carefully slice them in half horizontally. Spread a generous amount of garlic butter (homemade or store-bought) on the inside of each cut half. Place them cut-side up on a baking sheet and bake in a 375°F (190°C) oven for 5-7 minutes, or until golden brown and fragrant.
- Cheesy Garlic Bread: Follow the steps for garlic bread, then top the buttered halves with a generous layer of shredded mozzarella, provolone, or an Italian cheese blend. Return to the oven and bake until the cheese is melted, bubbly, and slightly golden, usually another 3-5 minutes.
- The Importance of Bread Flour – Yes, there truly is a significant difference between bread flour and the more common all-purpose flour found in most grocery stores. Bread flour has a higher protein content (typically 12-14%) compared to all-purpose flour (10-12%). This higher protein level means more gluten can be developed during the kneading process. Gluten is the elastic network that gives bread its structure, chewiness, and the ability to trap gas from the yeast, resulting in a lighter, airier, and more substantial roll. While you *can* use all-purpose flour in a pinch, if you desire the absolute best outcome – those incredibly soft, fluffy, and slightly chewy rolls – using bread flour is non-negotiable and will yield superior results.
How Do You Ensure Extra Soft Dinner Rolls?
Achieving remarkably soft dinner rolls is a goal for many bakers, and this recipe is designed to deliver just that. If you follow this homemade dinner rolls recipe meticulously, you should consistently end up with exceptionally soft and tender results. However, if you find your dough isn’t quite as soft as you’d hoped, there are a few key factors and tips to consider for your next batch:
- Proper Hydration: Ensure your dough is adequately hydrated. A slightly sticky dough after kneading is often a good sign; resist the urge to add too much extra flour.
- Using Bread Flour: As mentioned above, bread flour’s higher protein content is crucial for developing strong gluten, which, when properly kneaded, results in a light and soft crumb.
- Thorough Kneading: Don’t skimp on kneading time. Developing the gluten is essential for a soft, elastic dough that rises beautifully.
- Warm Ingredients: Ensure your water and milk are at the correct warm temperatures (105-115°F) to properly activate the yeast and encourage a good rise.
- Don’t Overbake: Overbaking is a common culprit for dry, hard rolls. Once they’re golden brown and cooked through (internal temperature around 200-210°F), take them out promptly.
- Lemon Juice Trick: For an added boost of tenderness, try adding a teaspoon of lemon juice or apple cider vinegar to your wet ingredients next time. The acidity can help tenderize the gluten, contributing to a softer texture.
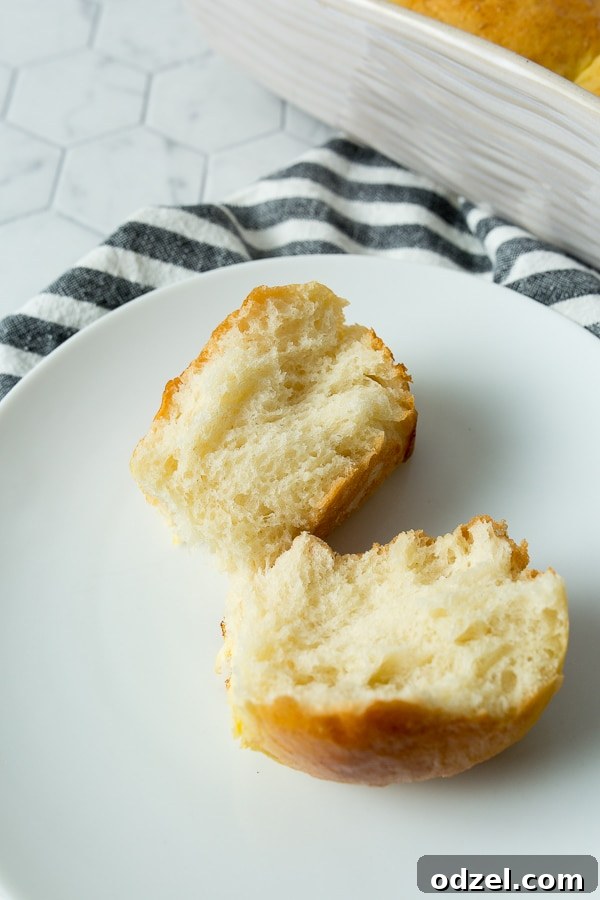
We absolutely adore hearing from our readers! If you’ve given these incredible homemade dinner rolls a whirl, please share your experience in the comments below. We’d love to know what variations you tried, how they turned out, and any creative serving ideas you came up with! Your feedback truly helps our community of home bakers.
More Delicious Rolls Recipes You’re Sure to Love:
If you’ve fallen in love with making homemade bread, expand your baking repertoire with these other fantastic roll recipes:
- Cheese and Garlic Crescent Rolls
- Soft Onion Rolls
- Garlic Parmesan Dinner Rolls
- Hawaiian Sweet Rolls
- Rosemary and Garlic Dinner Rolls
You can find more delicious recipes and cooking tutorial videos on Youtube and Facebook.
Homemade Dinner Rolls
Julie Maestre
10 minutes
20 minutes
1 hour
40 minutes
30 minutes
12
servings
Rate Recipe
Print Recipe
Ingredients for 12 Servings
Dinner Rolls
- 4 cups bread flour
- 2 1/2 tsp active dry yeast
- 1/4 cup warm water, 105-115 degrees F
- 1/3 cup granulated sugar
- 4 ounces melted unsalted butter
- 1 tsp salt
- 1 large egg
- 1 cup warm milk, 115 degrees F
Egg Wash
- 1 large egg
- 1 tbsp water
Instructions
-
In the bowl of a standing mixer, stir the active dry yeast into the warm water (approximately 105-115°F) and let it sit for about 5-7 minutes, until it becomes foamy.
-
Once the yeast is activated and foamy, go ahead and beat in the warm milk (115°F), sugar, melted butter, salt, and the lightly beaten egg until well combined.
-
Gradually add the bread flour to the yeast mixture. Using the dough hook attachment, knead on low speed for 8-10 minutes until the dough is smooth, elastic, and slightly tacky to the touch.
-
Lightly flour your work surface and briefly knead the dough with your hands for a couple of extra seconds to form a smooth ball.
-
Place the dough in a greased bowl, turning once to coat. Cover the bowl with a clean kitchen towel or plastic wrap and let it rise in a warm, draft-free place for about an hour, or until it has doubled in size.
-
Once risen, gently punch down the dough to release the air. Transfer it to your floured work surface and divide the dough into 12 equal pieces.
-
Shape each dough piece into a dinner roll by tucking the edges underneath and rolling it into a smooth ball.
-
Butter a 9×13 inch baking pan and arrange the dough balls inside, leaving a little space between each. Cover and let them rise in a warm place for an additional 40 minutes, or until doubled in size.
-
Preheat your oven to 375°F (190°C). Whisk together 1 egg with 1 tablespoon of water for the egg wash. Gently brush the risen dough balls with the egg wash. Place in the preheated oven and bake for 20 minutes, or until fully cooked through and golden brown.
-
For an extra touch, brush the warm rolls with additional melted butter immediately after removing them from the oven. Serve warm and enjoy!
Video
Nutrition Information (per serving)
Calories:
265
kcal
|
Carbohydrates:
37
g
|
Protein:
6
g
|
Fat:
9
g
|
Saturated Fat:
5
g
|
Cholesterol:
49
mg
|
Sodium:
282
mg
|
Potassium:
86
mg
|
Fiber:
1
g
|
Sugar:
6
g
|
Vitamin A:
310
IU
|
Calcium:
36
mg
|
Iron:
0.5
mg
Nutrition information is automatically calculated, so should only be used as an approximation.
Additional Info
Julie Maestre
10 minutes
20 minutes
1 hour
40 minutes
30 minutes
Side Dish, Bread
American
12
servings
265
Bread, Dinner Rolls, homemade dinner rolls, soft rolls, fluffy bread
Love this recipe? Leave a comment below and share your thoughts!