
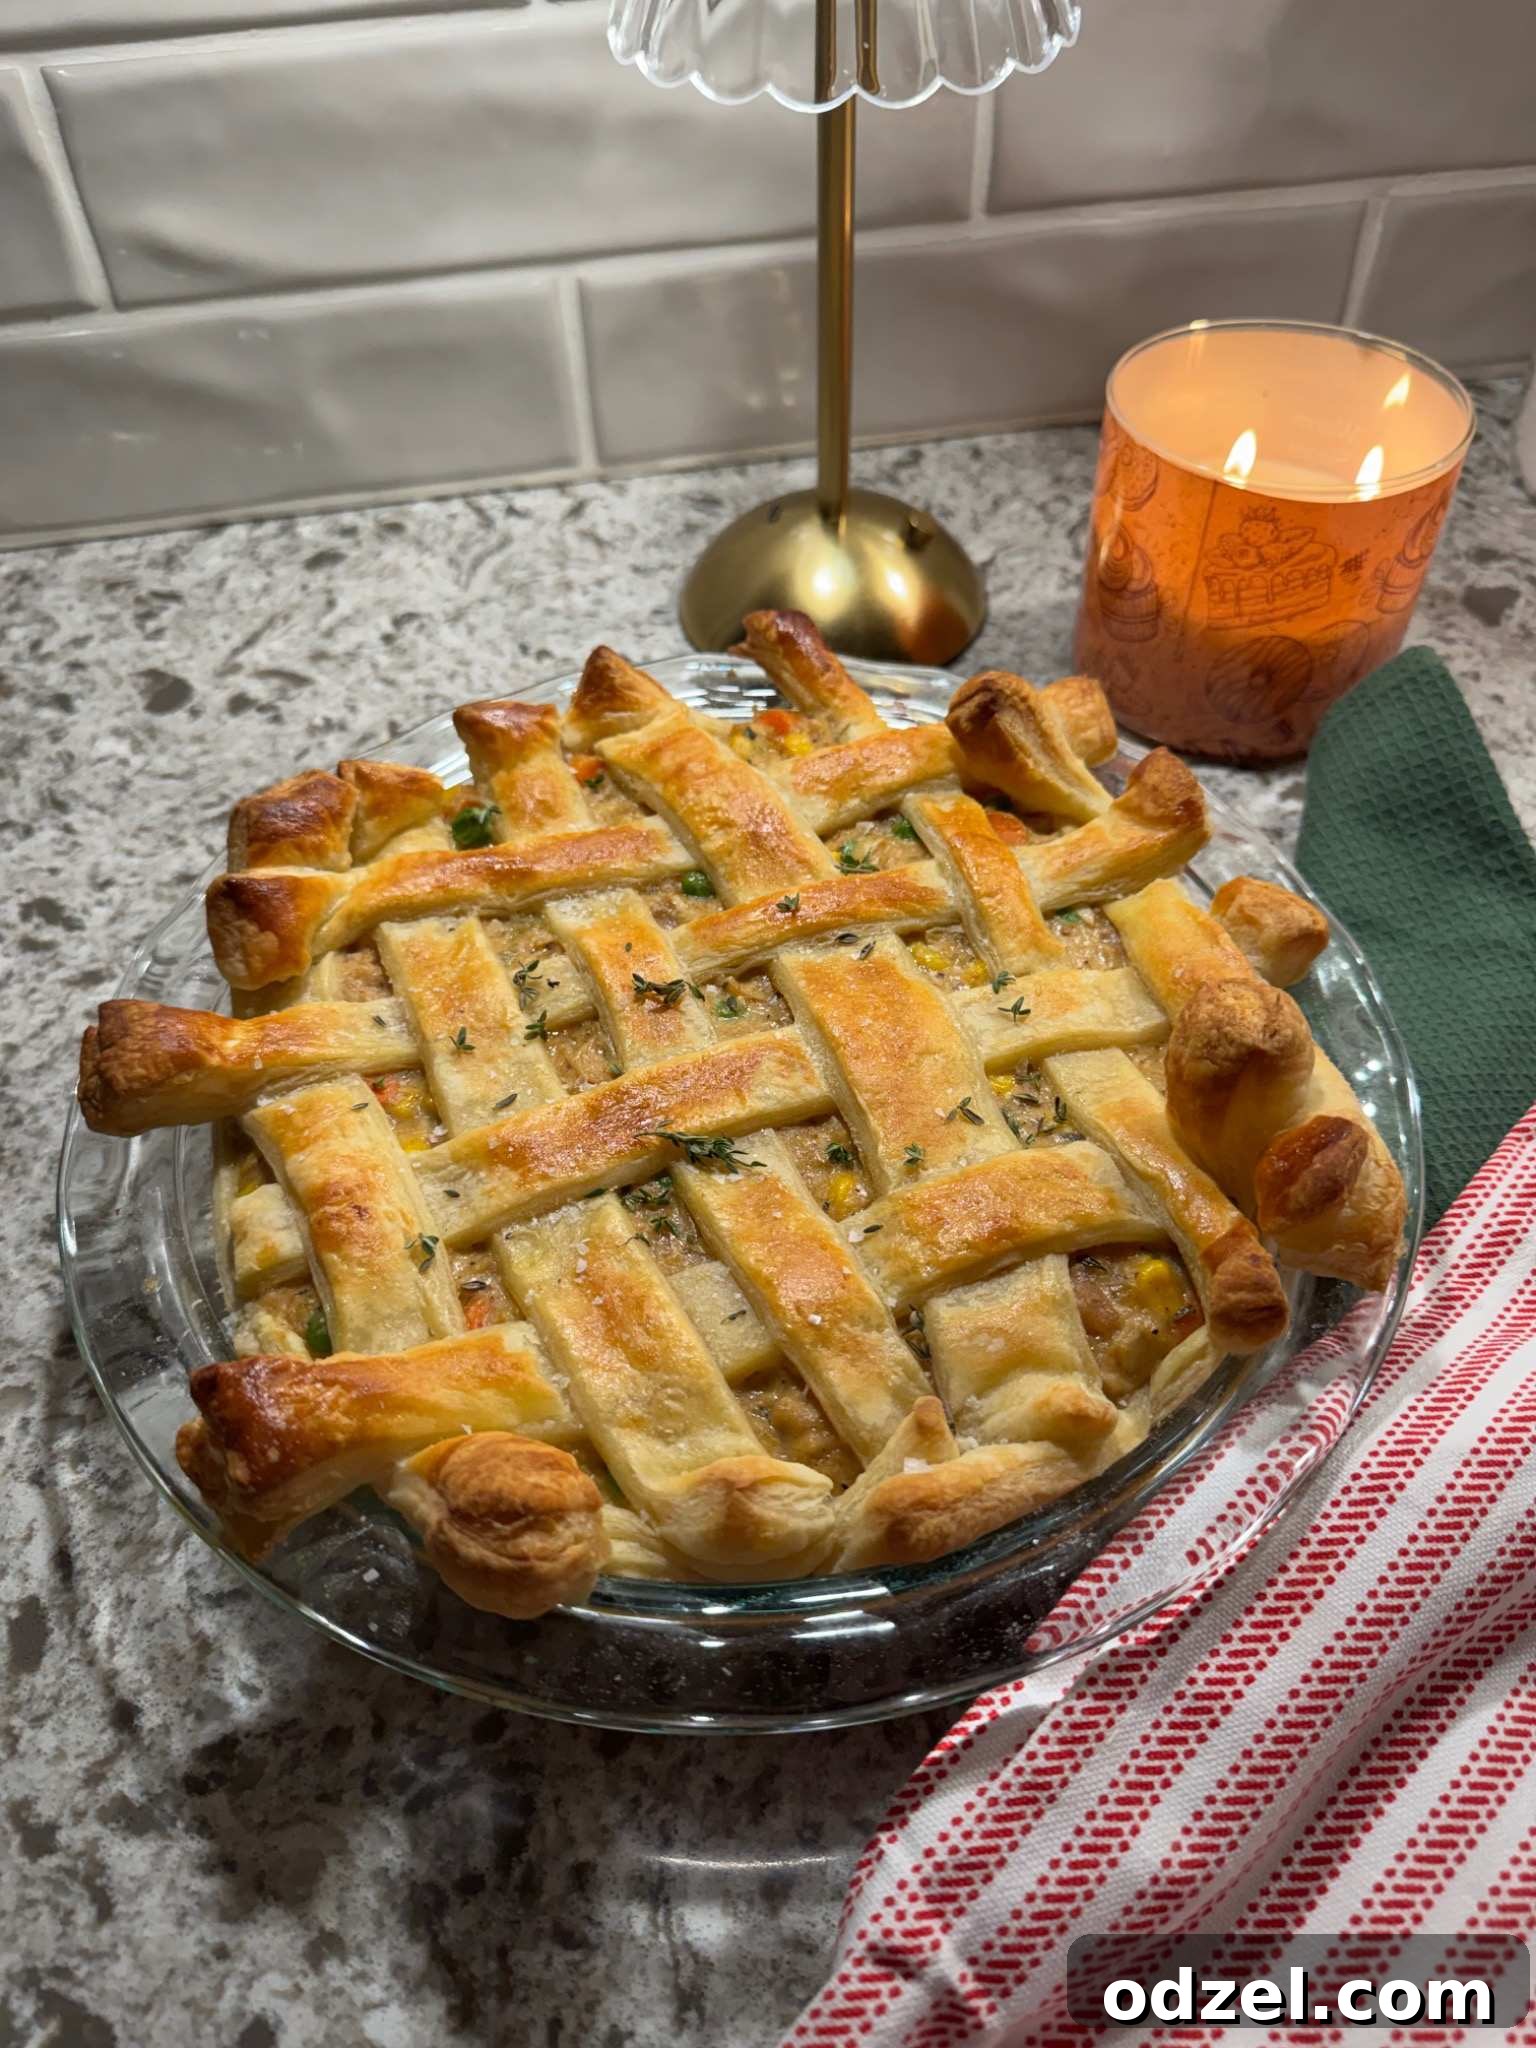
There’s nothing quite like a warm, hearty chicken pot pie to bring comfort and joy to your dinner table. This recipe takes the classic dish to new heights with a golden, impossibly flaky puff pastry crust that encases a rich, creamy, and deeply flavorful filling. Imagine tender, perfectly seasoned chicken, vibrant vegetables simmered in a velvety sauce, all crowned with a buttery, crisp pastry top. It’s an unforgettable meal that looks impressive yet is surprisingly easy to make, perfect for busy weeknights or special gatherings. Served alongside a fresh green salad and some crusty Italian bread, it transforms into a complete and satisfying feast that your family will ask for again and again. Get ready to bake a truly sensational puff pastry chicken pot pie!
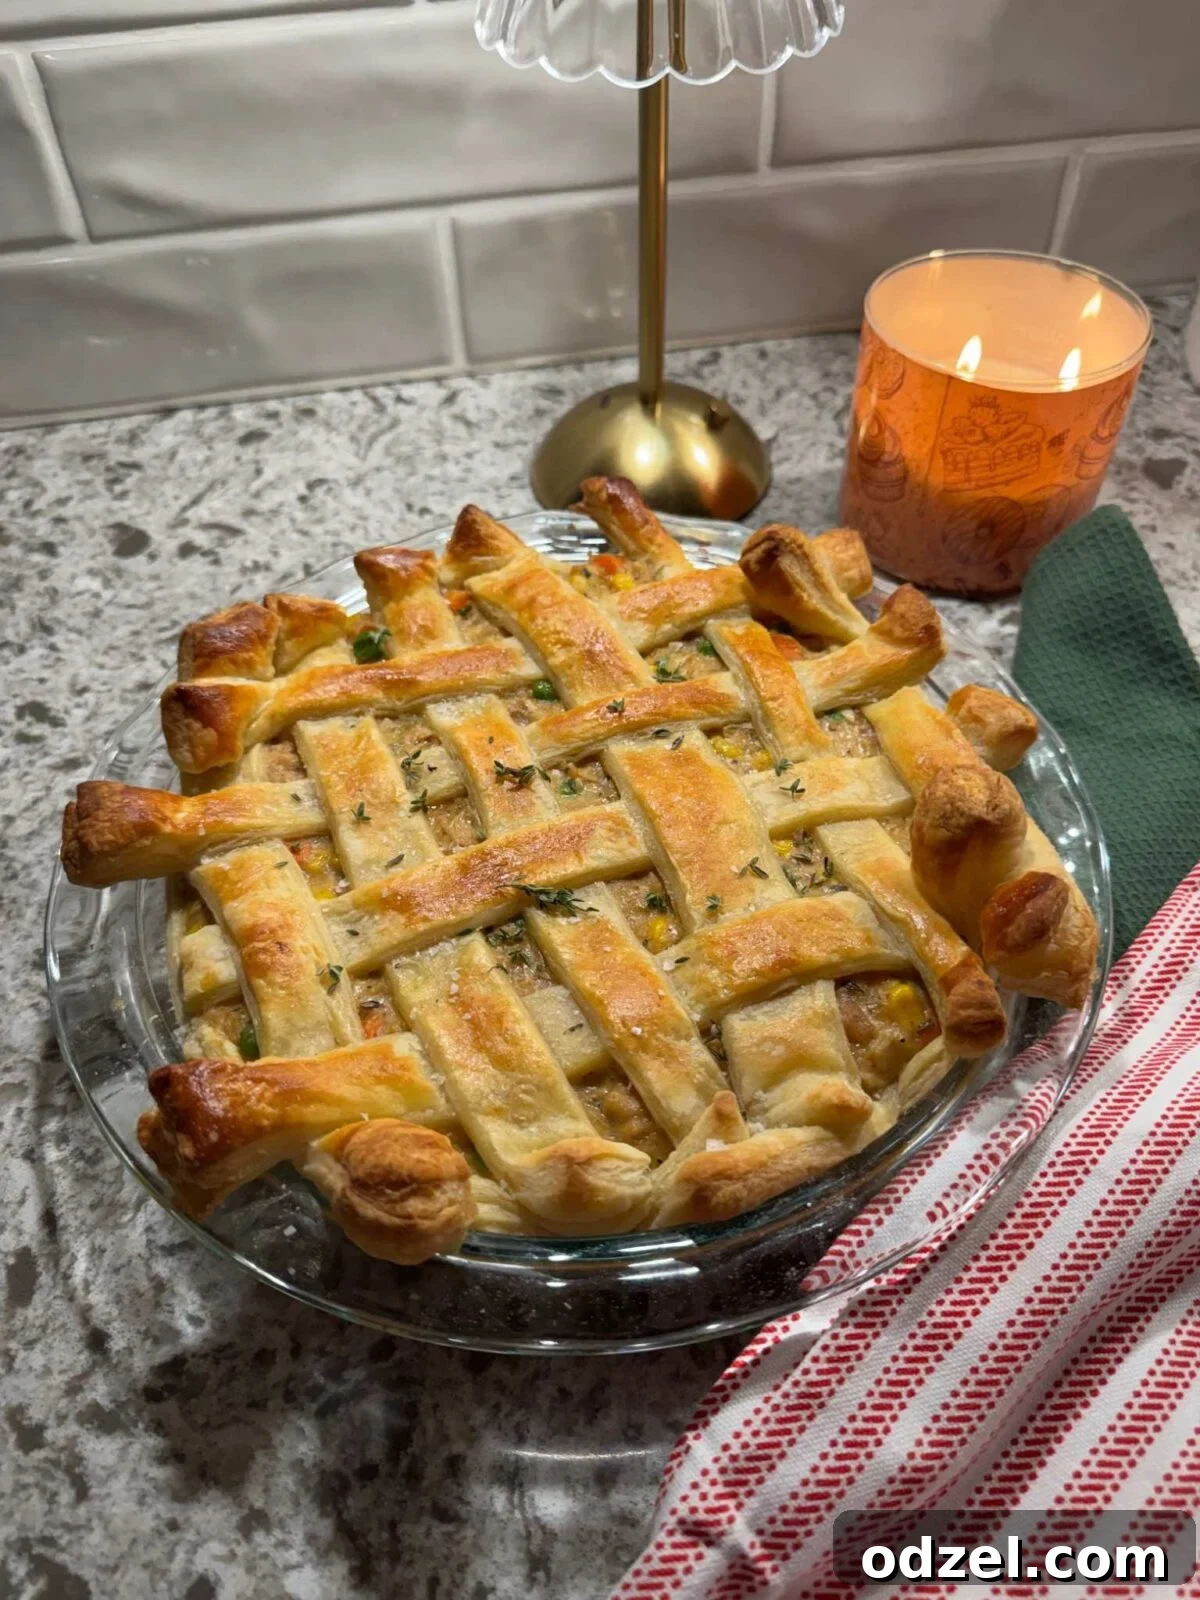
Table of Contents
- Why You’ll Love This Puff Pastry Chicken Pot Pie
- Essential Ingredient Notes
- Expert Tips For a Flawless Chicken Pot Pie
- Storage and Reheating Suggestions
- More Irresistible Chicken Recipes…
- Chicken Pot Pie with Puff Pastry Recipe Card
Why You’ll Love This Puff Pastry Chicken Pot Pie
If you’re searching for a comforting, satisfying meal that truly hits the spot, look no further than this incredible chicken pot pie recipe. What sets this version apart is the use of readily available store-bought puff pastry, which elevates the dish with minimal effort and maximum reward. Here’s why this particular recipe for chicken pot pie with puff pastry will quickly become a cherished household favorite:
- Effortless Elegance: Puff pastry transforms a humble pot pie into something truly special and impressive. Its delicate, airy, and buttery layers bake up to a beautiful golden-brown, offering a delightful contrast to the creamy filling without the hassle of making your own pie dough from scratch. It’s the ultimate shortcut for a gourmet touch.
- Rich & Creamy Filling: We craft a luxurious, thick sauce with savory chicken stock, rich heavy cream, and freshly grated Parmesan cheese, making every bite incredibly decadent and deeply satisfying. This filling is seasoned to perfection, ensuring no blandness here!
- Flavorful & Tender Chicken: Boneless, skinless chicken thighs are our secret for maximum flavor and superior juiciness, holding up beautifully within the hearty filling. Their natural richness makes them ideal. For ultimate convenience and a faster preparation time, you can easily substitute a pre-cooked rotisserie chicken.
- Hearty Vegetable Medley: A colorful and nutritious blend of fresh carrots, celery, and onions forms the aromatic base, beautifully complemented by the sweet pop of frozen peas and corn. This combination ensures a balanced texture and a burst of flavor in every spoonful.
- Weeknight Friendly: Despite its gourmet appearance and depth of flavor, this chicken pot pie with puff pastry is surprisingly straightforward and quick to assemble. With a hands-on prep time of just about 20 minutes, you can have a wholesome, homemade comfort meal on the table even on your busiest evenings.
- Perfectly Balanced Flavors: The thoughtful combination of classic herbs like rosemary and thyme, along with a hint of Worcestershire sauce and a generous seasoning of salt and pepper, creates a harmoniously balanced flavor profile that everyone will adore.
Essential Ingredient Notes
Crafting the perfect chicken pot pie starts with understanding and selecting the right ingredients. Below, we delve into the key components that make this dish shine, offering insights and potential substitutions to ensure your pot pie is nothing short of spectacular. Remember to check the full ingredient quantities and detailed instructions in the recipe card further down for precise measurements.
Chicken: For the ultimate flavor and texture, I highly recommend using boneless, skinless chicken thighs. Chicken thighs have a slightly higher fat content than breasts, which ensures they remain incredibly tender and juicy even after simmering in the filling and baking in the oven. This prevents the chicken from drying out, which can sometimes happen with chicken breast. To maximize flavor, I prefer to season and cook the chicken myself, creating a foundational layer of taste for the entire dish. However, for a super-quick and convenient option, a store-bought rotisserie chicken is an excellent substitute. Simply shred the meat and incorporate it into the filling, ensuring it’s well-seasoned from the start.
Vegetables: The heart of any great pot pie lies in its vegetable medley. Our recipe uses a classic, aromatic foundation of fresh onions, carrots, and celery, finely diced or sliced. These three vegetables, often referred to as a “mirepoix,” are sautéed to release their sweet and savory notes, building a deep flavor base. To add vibrant color, additional sweetness, and a satisfying texture, we also incorporate frozen peas and corn. These frozen vegetables are incredibly convenient as they can be added directly to the hot filling without the need for prior thawing. Feel free to customize your vegetable selection; diced potatoes (par-cooked first), green beans, or sliced mushrooms would also be delicious additions, ensuring they are cut into small, uniform pieces to cook evenly.
Puff Pastry: This is the defining element of our chicken pot pie, providing that irresistible flaky, golden crust. We utilize readily available store-bought puff pastry sheets, which can typically be found in the frozen dessert or freezer aisle of most supermarkets. Using puff pastry is a game-changer, allowing you to achieve a beautiful, airy, and buttery crust without the laborious and time-consuming process of making traditional pie dough from scratch. It’s important to thaw your puff pastry according to the package instructions, usually for about 20-30 minutes at room temperature, but always keep it cold until you are ready to use it. Cold pastry is key for maximum puff and flakiness. If puff pastry is absolutely unavailable, a regular store-bought pie crust can be used, but note that the texture will be different – less airy and flaky.
Flavor Builders: A carefully selected blend of seasonings and aromatics elevates the pot pie filling from good to extraordinary. We start by generously seasoning the chicken with a robust blend of paprika, garlic powder, onion powder, and Italian seasoning. Once the vegetables are sautéed, we introduce fresh rosemary and thyme, which infuse the creamy sauce with their distinct, fragrant notes. The addition of minced garlic cloves further enhances the aromatic profile. An often-overlooked secret ingredient is Worcestershire sauce, which adds a subtle yet significant layer of umami complexity, deepening the overall savory taste of the filling. Finally, freshly grated Parmesan cheese melts into the hot sauce, contributing a wonderful salty, nutty richness that harmonizes all the flavors.
The Creamy Base: The luxurious, velvety texture of our pot pie filling is achieved through a classic culinary technique: the roux. We begin with a generous amount of unsalted butter, which is melted and then cooked with all-purpose flour. This combination creates a “roux,” a thick paste that serves as the essential thickener for our sauce. This roux is then gradually whisked with rich, savory chicken stock and luscious heavy cream. The mixture is brought to a gentle simmer and cooked until it transforms into a thick, gravy-like sauce that perfectly coats every piece of chicken and vegetable. Don’t forget to season this creamy base generously with salt and freshly ground black pepper throughout the cooking process, adjusting to your taste for a perfectly balanced and savory filling.
Expert Tips For a Flawless Chicken Pot Pie
Achieving a show-stopping chicken pot pie with a perfectly golden and gloriously flaky puff pastry crust is easier than you think when armed with these expert tips. Follow these guidelines to ensure your dish is a resounding success every single time, delighting everyone at your table.
- Season Your Chicken Generously from the Start: This is perhaps the most crucial tip for a flavorful pot pie. Whether you’re cooking boneless chicken thighs from scratch or opting for the convenience of pre-cooked rotisserie chicken, it is paramount to ensure the chicken itself is packed with flavor *before* it gets folded into the creamy filling. Season raw chicken liberally with salt, pepper, and your chosen spices (like paprika, garlic powder, onion powder, and Italian seasoning) and cook it until it achieves a beautiful, deep golden-brown sear. A bland chicken component will inevitably lead to a bland pot pie overall, even if your sauce is rich.
- Build a Robust, Thick Filling: The consistency of your pot pie filling is vital. It should be much thicker than a typical soup or stew before it ever goes into the oven. This is because the filling will naturally thin out slightly as it bakes due to the moisture released from the vegetables and the melting of the butter. Start with a sturdy, almost gravy-like sauce consistency. This ideal thickness is achieved by properly cooking the flour with the butter to create a well-developed roux, and then simmering the chicken stock and heavy cream until they reach a thick, clingy consistency. If the filling is too thin, your baked pot pie will be watery and lack that satisfying, hearty texture.
- Keep Your Puff Pastry Chilled: The secret to an incredibly flaky, airy, and golden puff pastry crust lies in keeping it as cold as possible until it is placed into a hot oven. The layers of butter trapped within the cold pastry dough create pockets of steam when exposed to high heat. This steam rapidly expands, pushing the pastry layers apart and resulting in that iconic, delicate puff and irresistible flakiness. If your pastry becomes too warm and soft while you’re handling or shaping it, simply pop it back into the refrigerator for 10-15 minutes to firm up before continuing. This small, crucial step makes an immense difference in the final texture of your crust.
- Vent for Steam Release: Before baking, it is absolutely essential to cut a few small slits (about 1-2 inches long) into the top puff pastry crust. These vents serve as crucial escape routes for the steam that builds up within the pot pie during baking. Without them, the steam would become trapped, potentially causing the pastry to crack unevenly, bubble excessively, or worse, become soggy underneath. Proper venting ensures a consistently crisp, beautifully golden top crust and helps prevent the filling from bubbling over the edges of your pie dish.
- Allow Adequate Resting Time After Baking: It’s incredibly tempting to dig into your bubbling hot pot pie immediately after it emerges from the oven, but patience is a virtue here! Let the pot pie rest for at least 10-15 minutes before attempting to slice and serve it. This resting period is critical; it allows the super-hot filling to cool down slightly and, more importantly, to set and thicken further. Cutting into it too soon will result in a runny, messy filling that spills out rather than holding its delightful shape.
- Achieve a Beautiful Golden Crust with an Egg Wash: For that truly irresistible, deep golden-brown, and slightly glossy finish, brush the entire top surface of your puff pastry generously with a beaten egg wash (one large egg whisked with a tablespoon of water or milk) just before placing it into the oven. This simple step not only enhances the color but also contributes to a slightly crispier and more professional-looking crust.
- Don’t Overfill Your Pie Dish: While you certainly want a generous pot pie, be mindful not to overfill your dish. Leave a little space at the top, typically about half an inch, between the filling and the rim of the dish. This allows ample room for the puff pastry to expand and puff up without touching the filling prematurely, which could hinder its flakiness and prevent it from cooking evenly.
Storage and Reheating Suggestions
Chicken pot pie is a fantastic make-ahead meal that stores wonderfully, making it perfect for planned leftovers or future quick dinners. To ensure your pot pie remains delicious and safe to eat, follow these comprehensive storage and reheating recommendations:
- Cool Completely Before Storing: Before storing any leftover pot pie, it’s absolutely crucial to allow it to cool down to room temperature. This typically takes about 1-2 hours after it comes out of the oven. Placing a hot pot pie directly into the refrigerator can raise the internal temperature of your fridge, potentially spoiling other foods and creating excessive condensation that can make the beautiful pastry soggy.
- Refrigeration: Once completely cool, transfer any leftover pot pie to an airtight container. If you wish to store the entire pie in its original dish, cover the dish tightly with several layers of plastic wrap, followed by aluminum foil, to prevent freezer burn and absorption of other odors. Refrigerate for up to 3 days for optimal freshness and safety.
- Freezing for Longer Storage: Chicken pot pie freezes beautifully, making it an excellent option for meal prepping and having a comforting dinner ready on demand.
- Freezing a Baked Pot Pie: To freeze an already baked pot pie, first allow it to cool completely to room temperature. Wrap the entire pie dish (or individual slices if preferred) tightly with several layers of plastic wrap, ensuring no air gaps, and then follow with a layer of heavy-duty aluminum foil. Label with the date. It can be frozen for up to 2-3 months.
- Freezing an Unbaked Pot Pie: You can also prepare the filling and assemble the pie (with the puff pastry top) in an oven-safe and freezer-safe dish. Wrap it tightly as described above. When you’re ready to bake, you can often place the frozen pie directly into a preheated oven (no need to thaw), though it will require a longer baking duration—usually around 60-90 minutes at a slightly lower temperature (e.g., 375°F/190°C). If the crust begins to brown too quickly, loosely tent it with aluminum foil.
- Reheating from Refrigerator:
- Oven (Recommended): For the best results, especially to re-crisp that flaky pastry, reheat slices or the entire pie in a preheated oven at 300-325°F (150-160°C) for about 20-30 minutes, or until the center is thoroughly heated through. If the pastry appears to be browning too much, cover it loosely with aluminum foil.
- Microwave: While convenient for speed, the microwave will soften the puff pastry, making it less flaky. It’s best reserved for individual servings if you’re prioritizing quick reheating over crust texture. Heat on medium power in 1-2 minute intervals, stirring the filling if possible, until warm.
- Reheating from Freezer (Baked): For optimal results, thaw the frozen, baked pot pie overnight in the refrigerator. Then, reheat it in a preheated oven at 350-375°F (175-190°C) for 30-45 minutes, or until it is piping hot in the center.
Tried This Recipe?
We absolutely love hearing from you and seeing your culinary creations! If you’ve given this delicious chicken pot pie a try, please take a moment to leave a review and share your feedback below. Your thoughts, tips, and experiences are incredibly valuable to us and help other aspiring cooks in our community. We’d greatly appreciate it! ❤️
More Irresistible Chicken Recipes…
If you’re a fan of comforting, flavorful, and hearty chicken dishes, you’ll love exploring these other popular and well-loved recipes from our kitchen. Expand your culinary repertoire and discover new family-friendly favorites with these delicious options:
- Marry Me Chicken Noodle Soup: A rich, creamy, and incredibly flavorful twist on classic chicken noodle soup, guaranteed to impress anyone who tries it.
- Homestyle Chicken and Dumplings: Indulge in pure comfort with tender, succulent chicken and fluffy, perfectly cooked dumplings swimming in a savory, herb-infused broth – truly soul-warming.
- Southern Fried Chicken and Waffles: Experience the ultimate sweet and savory combination with crispy, perfectly seasoned fried chicken paired with light and airy waffles, ideal for an unforgettable brunch or a fun dinner.

Chicken Pot Pie with Puff Pastry
Julie Maestre
20 minutes
8
Pin Recipe
Rate Recipe
Print Recipe
Equipment
-
9-inch pie dish
-
Large skillet or Dutch oven
-
Whisk
-
Cutting board and sharp knife
Ingredients
For the Seasoned Chicken:
- 1 lb boneless, skinless chicken thighs, cut into 1-inch pieces for even cooking
- 2 teaspoons paprika, for color and mild flavor
- 2 teaspoons garlic powder
- 2 teaspoons onion powder
- 2 teaspoons Italian seasoning, a blend of savory herbs
- Salt and freshly ground black pepper, to taste, for seasoning chicken
- Olive oil, about 1-2 tablespoons for sautéing chicken and vegetables
For the Creamy Filling:
- 6 tablespoons unsalted butter
- 1 large yellow onion, finely diced for quick cooking
- 2 celery stalks, finely sliced
- 1 cup carrots, finely sliced or diced
- 3 garlic cloves, finely minced, adds depth of flavor
- 1 teaspoon fresh rosemary, finely chopped, or ½ teaspoon dried
- 1 teaspoon fresh thyme, finely chopped, or ½ teaspoon dried
- ⅓ cup all-purpose flour, for thickening the sauce
- 2 cups chicken stock, low sodium preferred
- ½ cup heavy cream, for richness and creaminess
- ¼ cup freshly grated Parmesan cheese, adds savory depth
- 2 teaspoons Worcestershire sauce, for umami flavor
- ½ cup frozen peas, no need to thaw
- ½ cup frozen corn, no need to thaw
For the Puff Pastry Crust:
- 2 sheets puff pastry, thawed but kept cold for best flakiness
- 1 large egg, beaten (for egg wash)
Instructions
-
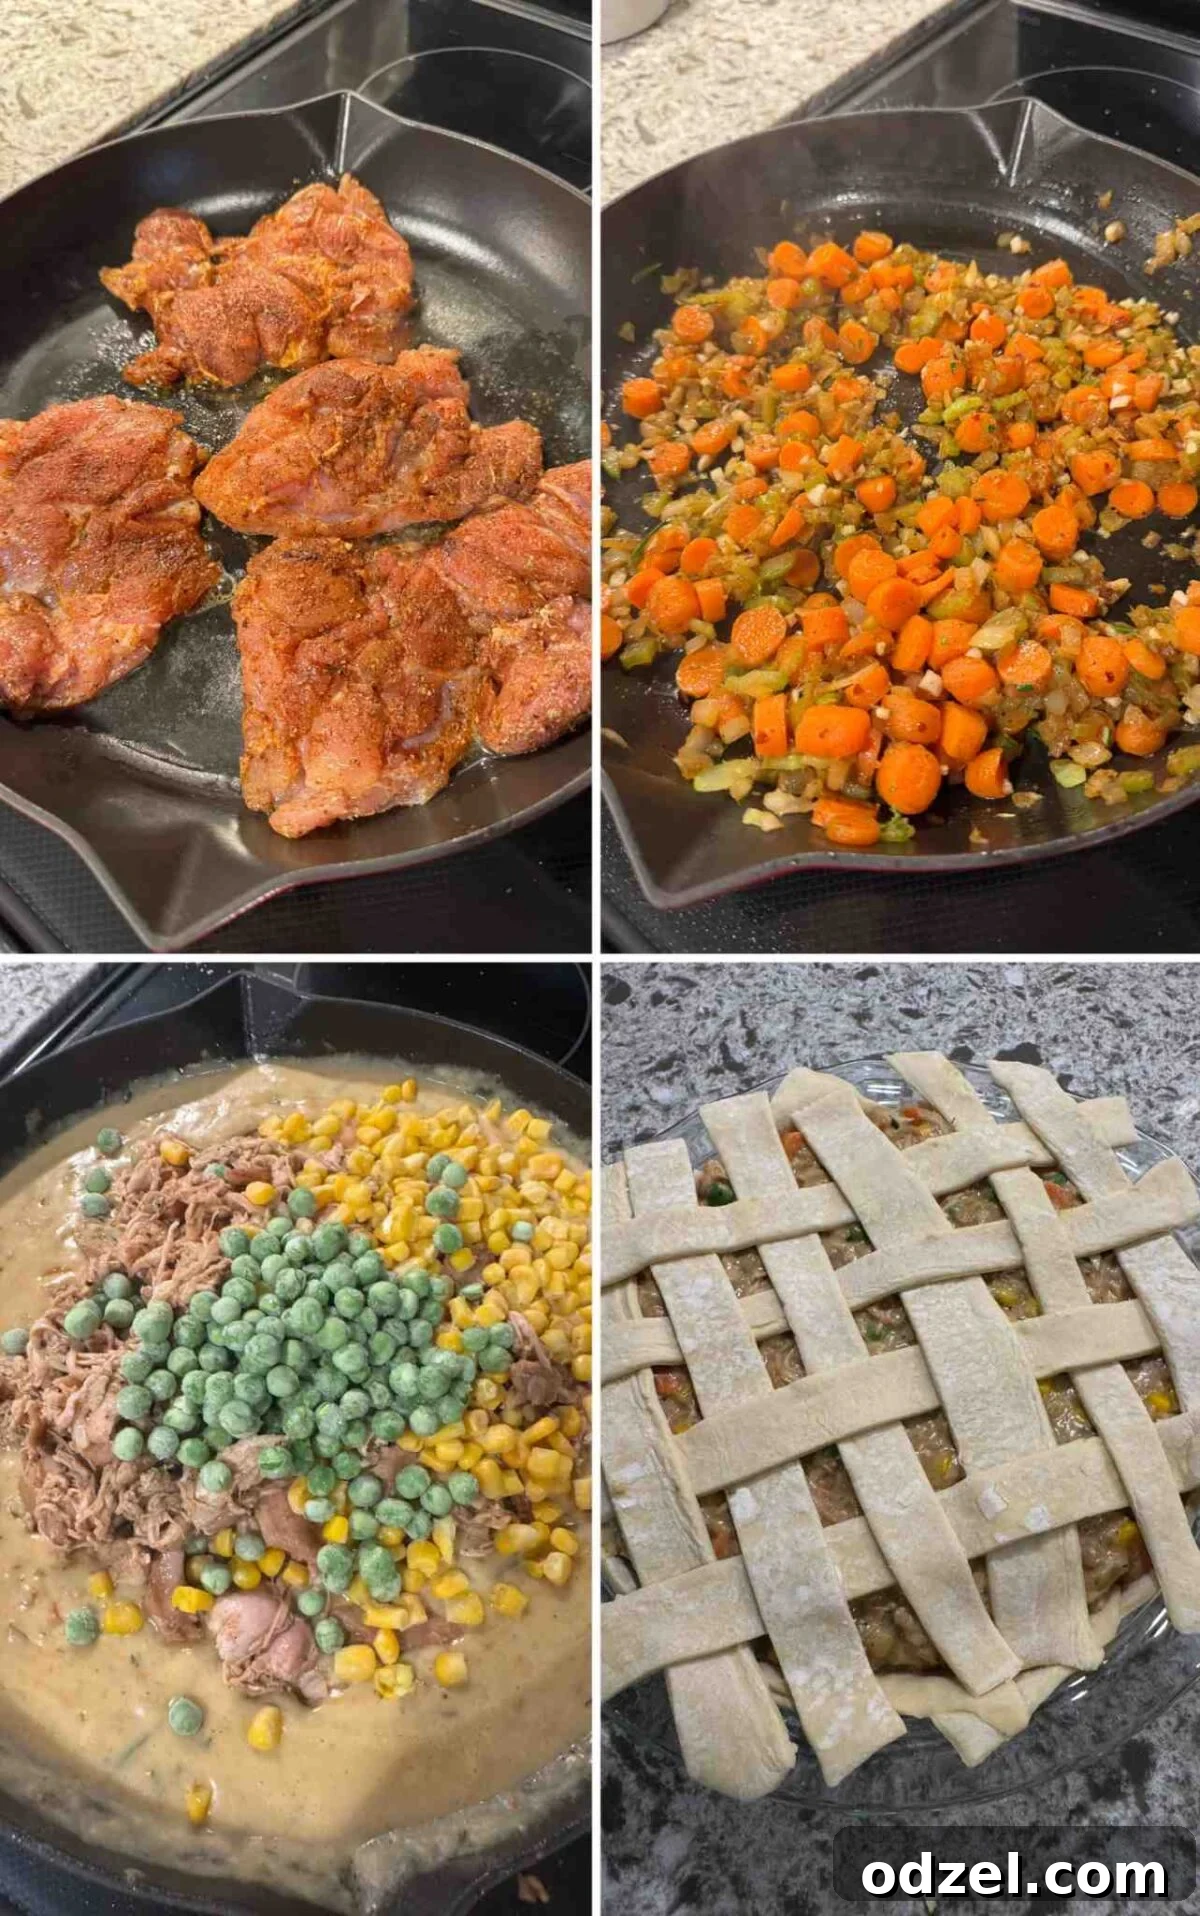
Preheat Oven & Season Chicken: Preheat your oven to a steady 400°F (200°C). Take your boneless, skinless chicken thighs and season them generously on both sides with salt, freshly ground black pepper, paprika, garlic powder, onion powder, and Italian seasoning. Ensure an even coating for maximum flavor.
-
Cook the Chicken: Heat 1-2 tablespoons of olive oil in a large, heavy-bottomed skillet or Dutch oven over medium-high heat until shimmering. Carefully add the seasoned chicken thighs to the hot skillet. Cook for 5-6 minutes per side, until they are beautifully golden brown and cooked through. To ensure the chicken remains incredibly tender and juicy, I recommend covering the pan and lowering the heat to medium-low after you flip the chicken for the first time.
-
Shred Chicken & Set Aside: Once the chicken is fully cooked, remove it from the skillet and transfer it to a clean cutting board. Using two forks, shred the chicken into uniform, bite-sized pieces. Alternatively, for even quicker shredding, an electric mixer on low speed can do the trick. Set the shredded chicken aside while you prepare the filling.
-
Sauté the Vegetables: If necessary, add another drizzle of olive oil to the same skillet (don’t clean it, those browned bits are flavor!). Add the finely diced yellow onions, thinly sliced celery, and diced carrots. Cook over medium-low heat for 6-7 minutes, stirring occasionally, until the vegetables begin to soften and become delightfully fragrant, but not browned.
-
Add Aromatics: Stir in the finely minced garlic, fresh rosemary, and fresh thyme. Continue to sauté for just 30 seconds more, until the garlic is wonderfully fragrant. Be careful not to burn the garlic, as it can turn bitter.
-
Make the Roux: Add the unsalted butter to the skillet, allowing it to melt completely. Use a wooden spoon to scrape up any flavorful browned bits stuck to the bottom of the pan – this is called fond and adds tremendous depth. Once the butter is fully melted, whisk in the all-purpose flour. Cook this mixture, known as a roux, for 2-3 minutes, stirring constantly. This step is crucial for cooking out the raw flour taste and creating a stable thickener.
-
Build the Creamy Sauce: Gradually whisk in the chicken stock and heavy cream, a little at a time, ensuring that no lumps form. Continue whisking until the mixture is smooth. Bring the sauce to a gentle simmer and let it cook for 10-15 minutes, or until it has thickened to a rich, gravy-like consistency that coats the back of a spoon. Stir frequently to prevent any sticking to the bottom of the pan.
-
Combine Filling Ingredients: Once the sauce has reached your desired thickness, stir in the freshly grated Parmesan cheese, Worcestershire sauce, the reserved shredded chicken, frozen corn, and frozen peas. Allow the mixture to simmer for a few more minutes, just long enough for the frozen vegetables to heat through and meld with the sauce. Taste the filling and season generously with additional salt and freshly ground black pepper as needed, ensuring a well-balanced and savory flavor profile.
-
Assemble the Pot Pie: Carefully unroll one sheet of thawed but still cold puff pastry and press it gently into a 9-inch pie dish, allowing any excess pastry to hang over the edges. Pour the warm, creamy chicken and vegetable filling evenly into the pastry-lined dish. Gently lay the second puff pastry sheet over the top of the filling. If you desire a decorative presentation, you can cut the second sheet into strips and weave a lattice top instead.
-
Seal & Vent the Crust: Trim any excess pastry from the edges of the dish, leaving about a ½-inch overhang. Fold the top pastry over the bottom pastry and crimp the edges together securely with your fingers or the tines of a fork to create a tight seal. This prevents the filling from bubbling out. Using a sharp knife, cut a few small slits (about 1-2 inches long) into the top pastry. These vents are crucial for allowing steam to escape during baking, preventing a soggy or burst crust. Finally, brush the entire top surface of the pastry generously with the beaten egg wash for that beautiful golden-brown finish.
-
Bake to Golden Perfection: Place the assembled pot pie on a baking sheet (this will catch any potential drips and make transfer easier) and bake in the preheated oven for 30-35 minutes. The puff pastry should be gloriously golden brown, beautifully puffed up, and the filling should be visibly bubbling around the edges, indicating it’s heated through.
-
Rest & Serve: Once the chicken pot pie comes out of the oven, resist the urge to cut into it immediately. For an extra touch, you can sprinkle the top with a pinch of coarse sea salt. It’s crucial to let the chicken pot pie rest for at least 10-15 minutes before slicing and serving. This allows the hot filling to cool down slightly and, more importantly, to set and thicken further, preventing it from spilling out when you cut into it. Serve warm and enjoy your homemade, comforting chicken pot pie!
Recipe Notes
- Ensure Flavorful Chicken: The key to a delicious pot pie is flavorful chicken. Season generously before cooking, or use a well-seasoned rotisserie chicken.
- Thick Filling is Crucial: Your filling should be quite thick before baking; it will naturally loosen slightly in the oven. A proper roux and simmering time are vital for the right consistency.
- Keep Pastry Cold: For maximum flakiness, always keep your puff pastry as cold as possible until it’s ready for the oven. If it warms up, refrigerate briefly.
- Vent the Crust: Don’t forget to cut several small slits in the top puff pastry crust. This allows steam to escape, preventing a soggy bottom and promoting an even puff.
- Allow to Rest: Patience is key! Let the baked pot pie rest for at least 10-15 minutes before slicing. This allows the hot filling to set, making for cleaner cuts and preventing spills.
- Egg Wash for Golden Finish: For an irresistible golden-brown and slightly shiny crust, brush the top of the puff pastry with a beaten egg (egg wash) just before baking.
- Customize Vegetables: Feel free to add other quick-cooking vegetables like diced potatoes (par-cooked), green beans, or mushrooms to the filling.
Nutrition
Carbohydrates: 43g |
Protein: 19g |
Fat: 49g |
Saturated Fat: 18g |
Polyunsaturated Fat: 6g |
Monounsaturated Fat: 21g |
Trans Fat: 0.4g |
Cholesterol: 99mg |
Sodium: 438mg |
Potassium: 416mg |
Fiber: 3g |
Sugar: 5g |
Vitamin A: 3593IU |
Vitamin C: 8mg |
Calcium: 92mg |
Iron: 3mg
Nutrition information is automatically calculated and is an approximation based on the ingredients used. It may vary depending on specific brands and preparation methods.
Additional Info
Julie Maestre
20 minutes
Entree, Main Course
American, Comfort Food
8
681
chicken pot pie with puff pastry, puff pastry chicken pot pie, easy chicken pot pie, comfort food, weeknight dinner, savory pie
Enjoyed this recipe? Share your thoughts below!
Your feedback helps our community of home cooks.