
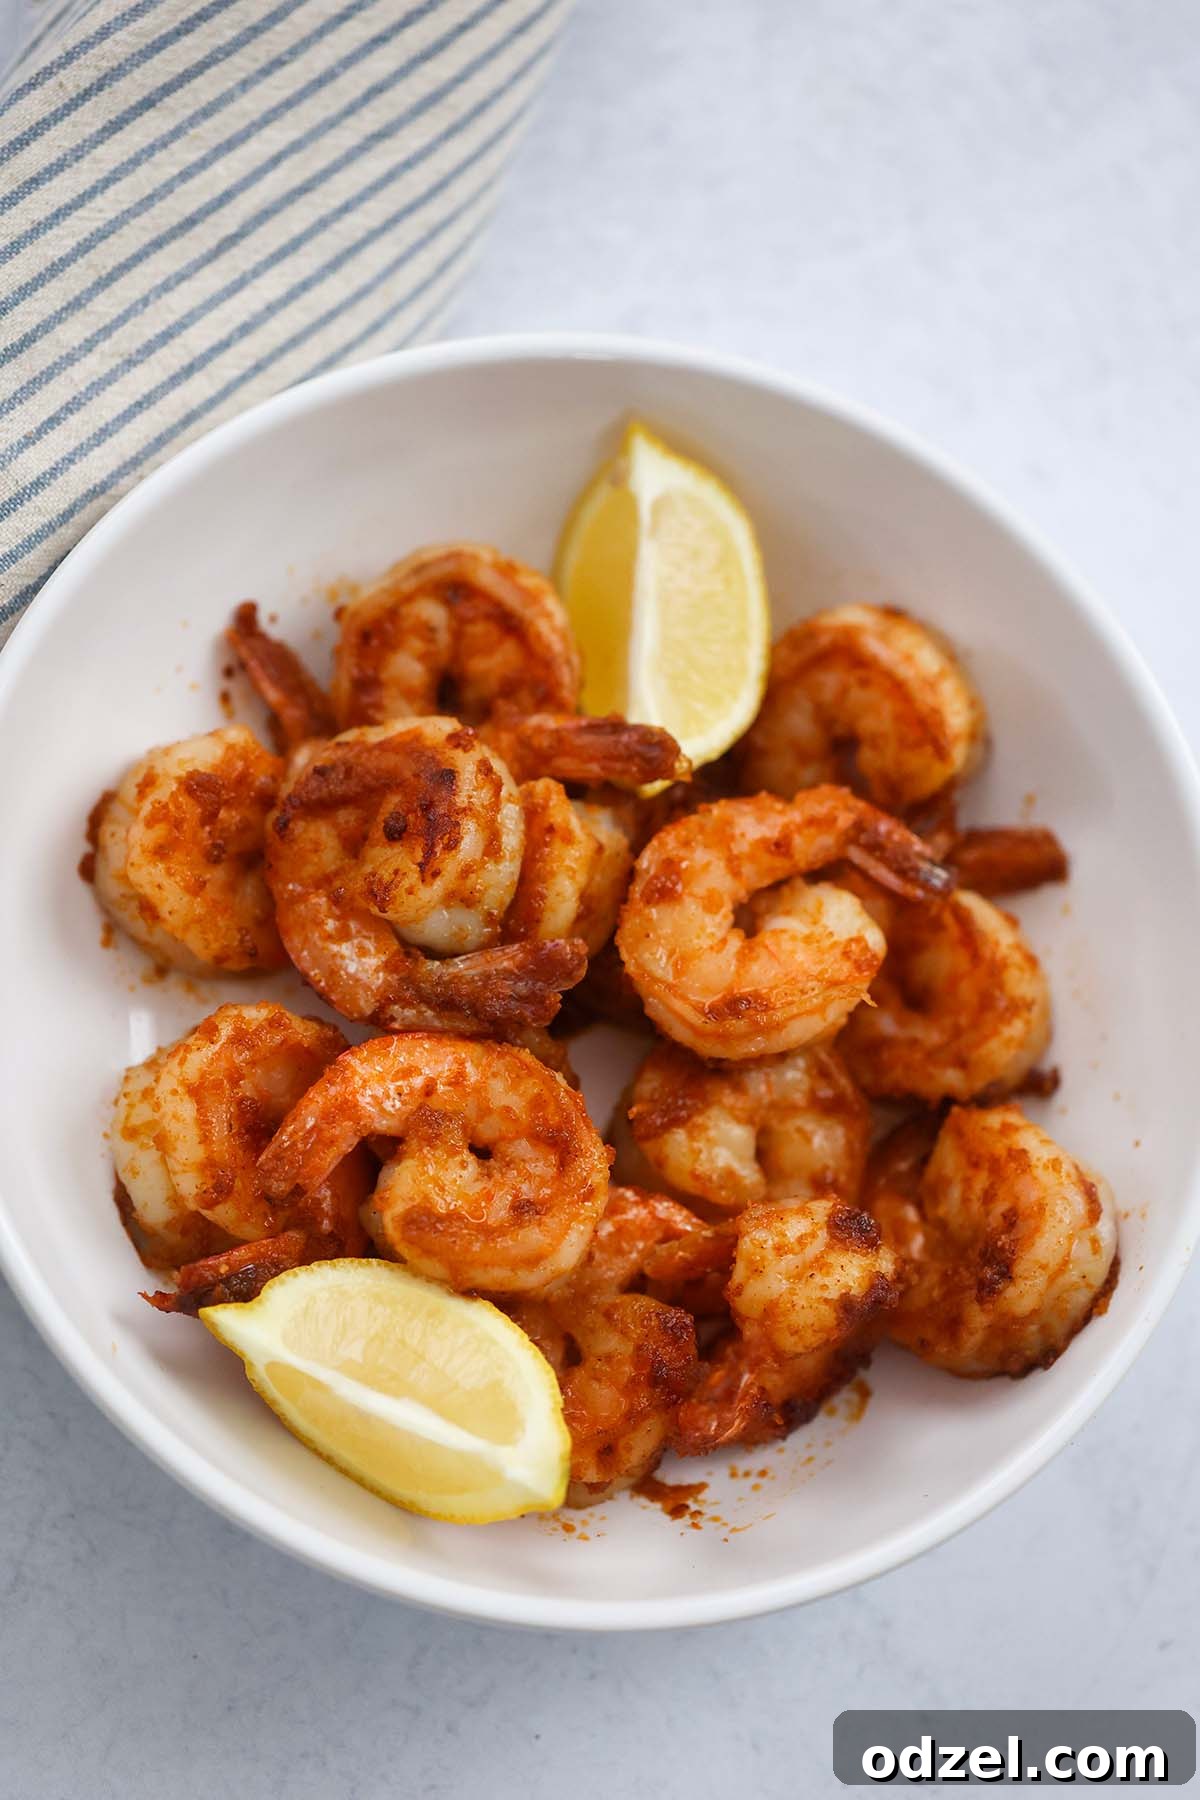
Welcome to your new favorite go-to recipe for a delicious, effortless meal! This **pan-seared shrimp** recipe is a game-changer, promising a flavorful dinner in a mere 10 minutes. Crafted with plump, peeled, and deveined shrimp, a carefully selected blend of spices, a hint of sweet honey, and a zesty squeeze of lemon, it’s designed for maximum taste with minimal fuss.
Transform this quick dish into a complete, satisfying dinner by serving it alongside fluffy garlic buttery rice and your choice of vibrant vegetables. It’s the perfect harmony of speed, flavor, and nutrition for any busy weeknight.
Shrimp truly stands out as one of my all-time favorite proteins to cook, and for good reason! Its versatility is unmatched, from freezing beautifully to cooking in just minutes, and always delivering a super delicious result. If you’re as big a fan of shrimp as I am, you’ll definitely want to explore more of my delightful shrimp creations. Don’t miss these other fantastic recipes: succulent Southern fried shrimp, perfectly baked shrimp, and my personal favorite, savory and spicy shrimp and grits. Each offers a unique way to enjoy this incredible seafood.
How Long Should You Cook Pan-Seared Shrimp?
Achieving perfectly cooked, tender, and juicy shrimp is crucial for any great shrimp dish, and with pan-searing, it’s remarkably fast. The key is to avoid overcooking. Generally, shrimp only require about **1 minute per side** in a hot skillet. Overcooking them will lead to a dry, rubbery texture that nobody enjoys. Keep in mind that the exact cooking time can vary slightly depending on the size of your shrimp. For instance, if you’re using jumbo shrimp, they might need an extra 30 seconds to a minute per side.
You can easily tell if shrimp is undercooked by its appearance – it will still be somewhat translucent. Perfectly cooked shrimp, on the other hand, will turn opaque and curl slightly into a “C” shape, showcasing a beautiful white color with pink lines. Watch them closely, as they transition from gray and translucent to pink and opaque very quickly. A slightly undercooked shrimp is often better than an overcooked one, as it will continue to cook slightly from residual heat once removed from the pan.
Should You Remove the Tails from Pan-Seared Shrimp?
When it comes to pan-seared shrimp, I almost always recommend **leaving the tails on**. There are several reasons for this culinary preference. Firstly, leaving the tails intact makes the shrimp appear larger and more appealing on the plate, enhancing its presentation, especially if you’re serving it as an appetizer or a main course where visual appeal matters.
Secondly, and perhaps more importantly, much of the shrimp’s delicious flavor is concentrated in the tail shell. Cooking shrimp with the tails on allows that additional flavor to seep into the meat during the searing process, resulting in a richer, more profound taste. While some prefer to remove the tails for easier eating, particularly if serving in pasta or tacos, for dishes where the shrimp is the star, keeping the tails on adds a layer of depth and often makes for a more enjoyable eating experience, as guests can easily grip the tail to eat the shrimp. It’s a small detail that makes a big difference in both flavor and presentation.
Should I Use Fresh or Frozen Shrimp for This Recipe?
Both fresh and frozen shrimp are excellent options for this pan-seared recipe, allowing for flexibility based on what’s available to you. The most important factor is the quality of the shrimp and ensuring it’s properly prepared before hitting the hot pan.
If you opt for **fresh shrimp**, look for plump, firm, and translucent shrimp with a mild, clean smell. Avoid any shrimp that have a strong “fishy” odor or appear slimy. Use fresh shrimp within a day or two of purchase for the best results.
For **frozen shrimp**, which is often more convenient and readily available, make sure to thaw them completely before cooking. The best way to thaw frozen shrimp is overnight in the refrigerator. If you’re in a hurry, you can place the frozen shrimp in a colander and rinse them under cold running water for about 5-10 minutes, gently separating them until fully thawed. Patting them thoroughly dry after thawing is crucial to achieve that perfect sear, regardless of whether you started with fresh or frozen. This recipe works beautifully with either, so choose what works best for your schedule and preferences!
Top Tips for Achieving the Perfect Pan-Seared Shrimp
To ensure your pan-seared shrimp turns out restaurant-quality every single time, pay close attention to these expert tips:
- **Bring Shrimp to Room Temperature & Pat Dry:** This is perhaps the most critical step for a beautiful sear. Remove your shrimp from the fridge at least 20 minutes before you plan to cook them. More importantly, thoroughly pat the shrimp dry with paper towels on both sides. Any excess moisture will steam the shrimp instead of searing it, preventing that coveted golden-brown crust. Ensure they are fully thawed, dry, and at room temperature right before cooking for even cooking and an irresistible sear.
- **Don’t Overcrowd the Pan:** For that perfect sear, the shrimp needs plenty of direct contact with the hot surface of the pan. If you overcrowd the skillet, the temperature will drop, and the shrimp will steam rather than sear, resulting in a less desirable texture. Cook the shrimp in batches if necessary, ensuring a single layer in the pan.
- **Use a Hot Skillet:** A well-heated skillet is essential for achieving a good sear. Use a cast-iron skillet or a heavy-bottomed pan and heat it over medium-high heat until it’s shimmering hot, but not smoking. The oil should also be hot before adding the shrimp.
- **Season Generously:** Don’t be shy with the seasonings! A good balance of salt, pepper, and your chosen spices will elevate the shrimp’s natural flavor. Add the spices and a good pinch of Kosher salt and freshly cracked black pepper just before cooking, ensuring each shrimp is coated.
- **Taste and Adjust Seasoning:** Once the shrimp are fully cooked through, taste one and adjust the seasoning to your liking. This is your chance to customize the dish. If you crave a little heat, a pinch of red crushed pepper flakes will do the trick. For a sweeter profile, add a bit more honey. A splash more lemon juice can brighten the flavors further.
- **Low-Carb and Keto-Friendly Option:** If you’re following a low-carb or keto diet, simply omit the honey from the recipe. The shrimp will still be incredibly flavorful with the spices and lemon. You can also add a touch of extra granulated garlic or onion for a deeper savory note.
- **Versatile Serving Ideas:** While delicious on its own, pan-seared shrimp is incredibly versatile. Feel free to transform it into delectable **shrimp tacos**! Serve the pan-seared shrimp on warm corn or flour tortillas with fresh guacamole, roasted peppers and onions, a dollop of sour cream, and a side of flavorful Spanish rice. It also pairs wonderfully with pasta, salads, or even alongside grits for a lighter twist on a classic.
Storage & Reheating for Pan-Seared Shrimp
Proper storage and reheating are key to enjoying your delicious pan-seared shrimp for days to come. If you have any leftovers, ensure they cool down to room temperature within two hours of cooking. Once cooled, place the shrimp in an air-tight container. They can be safely refrigerated for up to **2-3 days**. For longer storage, you can freeze the cooked shrimp for up to **3 months**. To freeze, spread the cooked shrimp in a single layer on a baking sheet and freeze until solid, then transfer to a freezer-safe bag or container to prevent them from sticking together. This method helps maintain their texture.
When you’re ready to enjoy them again, reheating is simple. You can gently reheat them in the microwave for a minute or two until warmed through, or for a more even reheat that preserves texture, use the stovetop. Simply heat a skillet over medium heat with a tiny bit of oil or butter, add the shrimp, and cook for about 1-2 minutes, stirring occasionally, until just warmed through. Be careful not to overcook them during reheating, as this will also make them rubbery.
More Delicious Shrimp Recipes You Might Enjoy
If you’ve loved this pan-seared shrimp recipe and are looking for more ways to incorporate this fantastic seafood into your meals, here are some other incredible shrimp recipes from my kitchen that I highly recommend you try:
- Creamy Shrimp Piccata: A luxurious and zesty dish that’s perfect for a special occasion.
- BBQ Grilled Shrimp Skewers: Ideal for grilling season, these skewers are packed with smoky, sweet, and tangy flavors.
- Crispy Po’Boy Shrimp Sandwich: A classic New Orleans-inspired sandwich, featuring perfectly fried shrimp.
- Crunchy Panko Shrimp: For those who love a satisfying crunch, this recipe delivers on texture and taste.
I genuinely hope you enjoy creating and savoring these dishes as much as I do. Shrimp is truly a versatile ingredient that can elevate any meal!
Tried this recipe? I would absolutely love to hear about your experience! Please consider leaving a star ⭐️⭐️⭐️⭐️⭐️ rating in the recipe card below and/or a detailed review in the comments section further down the page. Your feedback is invaluable and helps others discover and enjoy these recipes. And don’t forget to follow me on Facebook and Pinterest for more culinary inspiration and daily recipe updates!
Pan-Seared Shrimp
Rate Recipe
Print Recipe
Ingredients
- ½ lb shrimp, peeled and deveined
- 1 teaspoon granulated garlic
- 1 teaspoon granulated onion
- 1 teaspoon paprika
- ¼ teaspoon chili powder
- ½ lemon (juiced)
- 1 teaspoon honey
- salt and pepper to taste
- 2 tablespoons oil (high smoke point, such as avocado or grapeseed)
Instructions
-
Thoroughly pat dry the shrimp with a paper towel on both sides. This is crucial for achieving a good sear.
-
In a small bowl, combine the granulated garlic, granulated onion, paprika, and chili powder. Mix well.
-
Heat the oil in a large skillet (preferably cast iron) over medium-high heat until it shimmers.
-
Add the shrimp to the hot skillet in a single layer (cook in batches if necessary to avoid overcrowding). Season immediately with Kosher salt, black pepper, and the prepared spice mixture. Give it a good stir to coat all the shrimp evenly.
-
Cook the shrimp for about 1 minute on each side until they turn pink and opaque. Then, add the honey and fresh lemon juice, stirring quickly to combine. Check for seasoning and serve warm immediately for the best flavor and texture!
Notes
- For optimal searing, ensure your shrimp are at room temperature and thoroughly pat dry before cooking. Any moisture will prevent a proper sear.
- Always taste your cooked shrimp and adjust seasonings as needed. Add red pepper flakes for heat or more honey for sweetness, depending on your preference.
- To make this recipe low-carb and keto-friendly, simply omit the honey. The delicious spice blend and lemon will still provide plenty of flavor.
Nutrition
Nutrition information is automatically calculated, so should only be used as an approximation.
Additional Info
Enjoyed this recipe? Share your thoughts below!