
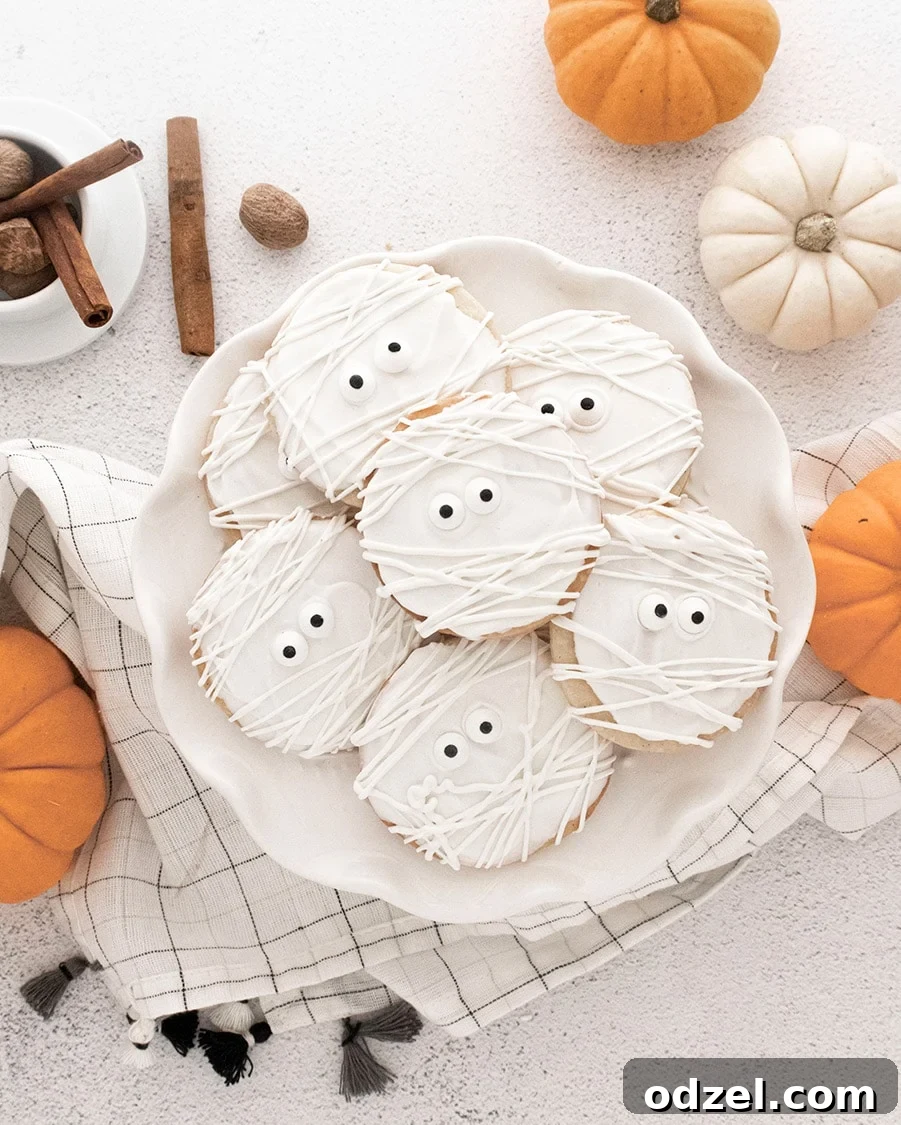
Spooky & Sweet Mummy Cookies: The Ultimate Halloween Treat for Your Halloween Party
As the air turns crisp and the leaves begin their colorful descent, the enchanting spirit of Halloween fills the air. It’s a season for costumes, carved pumpkins, and, of course, delightfully spooky treats! If you’re looking for a dessert that’s both adorable and incredibly easy to make, these **Mummy Cookies** are an absolute must-try. They perfectly blend the rich, comforting taste of homemade shortbread with a playful, ghoulish decoration that will charm everyone at your Halloween gathering.
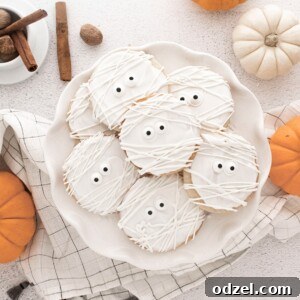
These soft, sweet mummy cookies are more than just a seasonal snack; they are the ideal centerpiece for any Halloween party. Crafted from a tender, buttery shortbread base infused with warm vanilla and a hint of cinnamon, each cookie offers a melt-in-your-mouth experience. What truly brings them to life is the simple yet striking pure white candy melt coating, artfully drizzled to resemble mummy wrappings, and finished with whimsical candy eyes. The result is a perfectly sweet and spooky goodie that’s guaranteed to be a hit with both kids and adults alike.
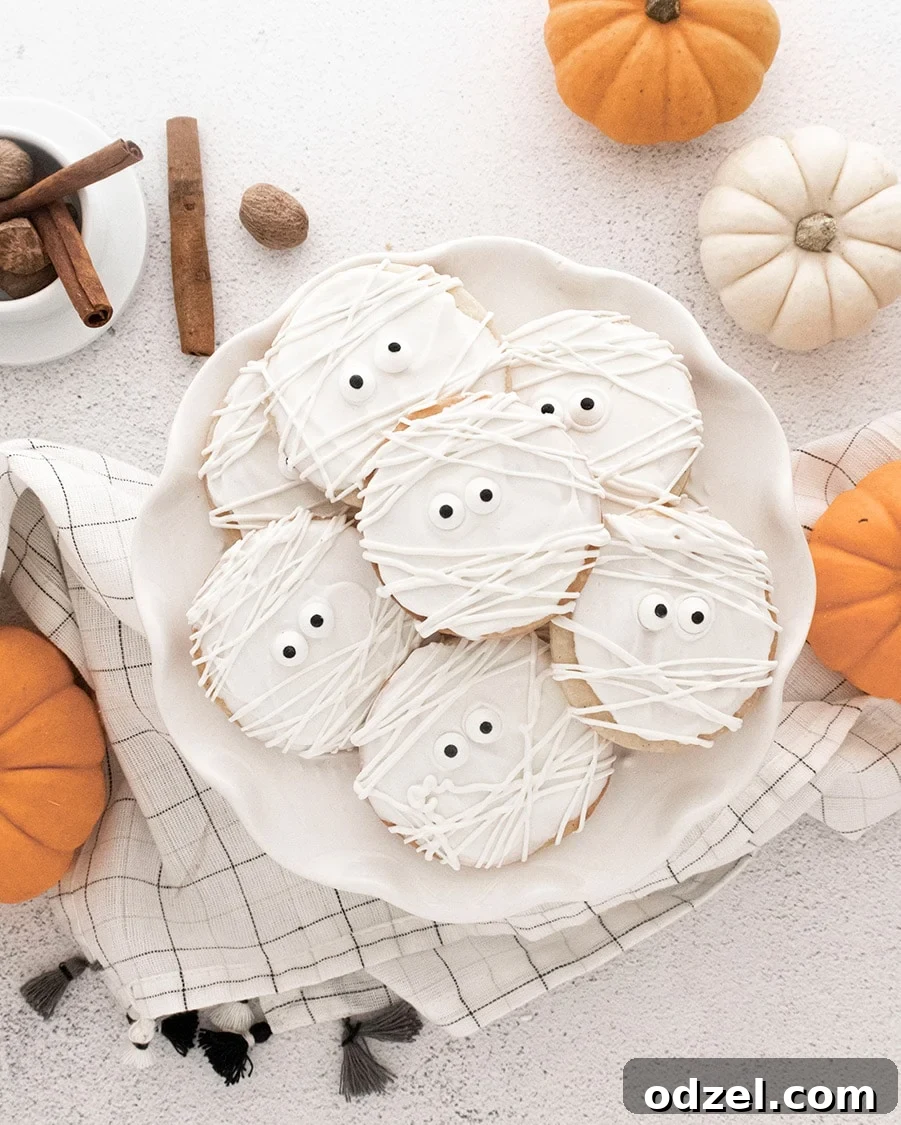
Why These Mummy Cookies Will Be Your New Halloween Favorite
Every Halloween season, the joy of baking takes center stage, and creating treats that are both delicious and visually appealing is a top priority. These mummy cookies perfectly encapsulate that festive spirit. They offer an irresistible combination of textures and flavors that will make them an instant hit. The foundation is a classic shortbread, celebrated for its tender bite and rich, buttery taste. Here, it’s elevated with subtle notes of vanilla and the comforting warmth of cinnamon and nutmeg, making each cookie a flavorful journey.
The true charm, however, lies in their transformation into friendly (or spooky!) mummies. A smooth, pure white candy melt coating provides the perfect canvas for those iconic “bandages” and the playful candy eyes. This simple decoration technique ensures that even novice bakers can achieve stunning results. The contrast between the tender, crumbly cookie and the smooth, creamy candy shell is utterly satisfying. You’ll find yourself reaching for more than one of these delightful confections – that’s a guarantee!
Crafting the Perfect Shortbread Base: A Step Towards Deliciousness
The secret to an exceptional mummy cookie begins with an outstanding shortbread. Known for its delicate texture and rich, buttery flavor, shortbread provides a sturdy yet tender foundation for our Halloween masterpiece. Our recipe carefully balances sweetness with aromatic spices, making it a truly comforting treat.
The process starts by creaming softened unsalted butter until it’s light and fluffy. This step is crucial as it incorporates air, contributing to the cookie’s signature tender texture. Powdered sugar is then blended in, creating a fine, smooth mixture. The magic truly begins with the fragrant additions of vanilla extract, ground cinnamon, and ground nutmeg. These spices are carefully chosen to evoke the warm, inviting aromas of autumn, perfectly complementing the rich butter and setting the stage for a truly seasonal flavor profile.
Next, all-purpose flour and a touch of whole milk are gradually incorporated. The goal is to bring the ingredients together into a soft, pliable dough without overworking it, which could lead to tough cookies. A brief chilling period of just 15 minutes is vital. This allows the butter to firm up, preventing the cookies from spreading excessively in the oven and ensuring they maintain their crisp, clean circular shape. This attention to detail ensures every mummy cookie is not only delicious but also holds its adorable form.
The Art of Adornment: Simple & Sweet Mummy Decoration
Transforming these delicious shortbread circles into recognizable mummies is arguably the most fun and creative part of the process! The key to their bright white, authentic “bandages” lies in the choice of coating: bright white candy melts. Unlike traditional white chocolate, candy melts are formulated to melt smoothly, set quickly, and provide a vibrant, opaque finish without the complexities of tempering. This makes them incredibly user-friendly, especially for intricate designs or for involving younger helpers in the decorating process.
Once your shortbread cookies are baked and completely cooled, they are ready for their transformation. Each cookie is generously dipped into the smooth, melted candy, ensuring an even, opaque base. While the candy is still wet and pliable, two playful candy eyes are carefully placed. These edible eyes instantly bring personality to your mummies, making each one unique. The final, iconic touch is created by drizzling the reserved melted candy melts in horizontal lines across the cookie. This seemingly simple step magically creates the classic wrapped appearance of a mummy. The beauty is that there’s no need for perfection; slightly uneven lines only add to the charm and handmade appeal of these spooky delights. Once set, your mummy army is ready to march onto your Halloween party platter!
How to Create Your Mummy Masterpieces: A Detailed Step-by-Step Guide
Follow these comprehensive instructions to bake and decorate your irresistibly charming Halloween Mummy Cookies:
-
Cream the Butter until Fluffy: In the bowl of a stand mixer fitted with a paddle attachment, beat the softened unsalted butter on medium speed for approximately 2 minutes. Continue beating until the butter is visibly light in color and has a fluffy, airy texture. This aeration is essential for achieving the tender, crumbly texture characteristic of perfect shortbread.
-
Infuse with Sweetness and Spice: Reduce the mixer speed to low. Gradually add the powdered sugar, ground cinnamon, ground nutmeg, salt, and vanilla extract to the creamed butter. Mix for about 1 minute, or until all the ingredients are just combined and the mixture appears smooth. Be careful not to overmix at this stage to maintain the cookie’s delicate structure.
-
Form the Dough Gently: With the mixer still on low speed, begin incorporating the all-purpose flour and whole milk alternately. Add half of the flour, mix until just combined, then add half of the milk. Repeat this process with the remaining flour and milk. Continue mixing only until the dough comes together and forms a soft, cohesive ball. Immediately stop mixing to avoid developing too much gluten, which can result in tough cookies. Remove the dough from the mixer and gently shape it into a flat disc.
-
Chill for Optimal Baking: Wrap the dough disc tightly in plastic wrap and place it in the refrigerator to chill for at least 15 minutes. This crucial chilling period allows the butter in the dough to firm up, which helps prevent the cookies from spreading excessively during baking and ensures they maintain a crisp, well-defined shape.
-
Preheat Oven and Prepare Baking Sheet: While the dough is chilling, preheat your oven to 375°F (190°C). Line a large baking sheet with parchment paper. This prevents the cookies from sticking and promotes even baking without scorched bottoms.
-
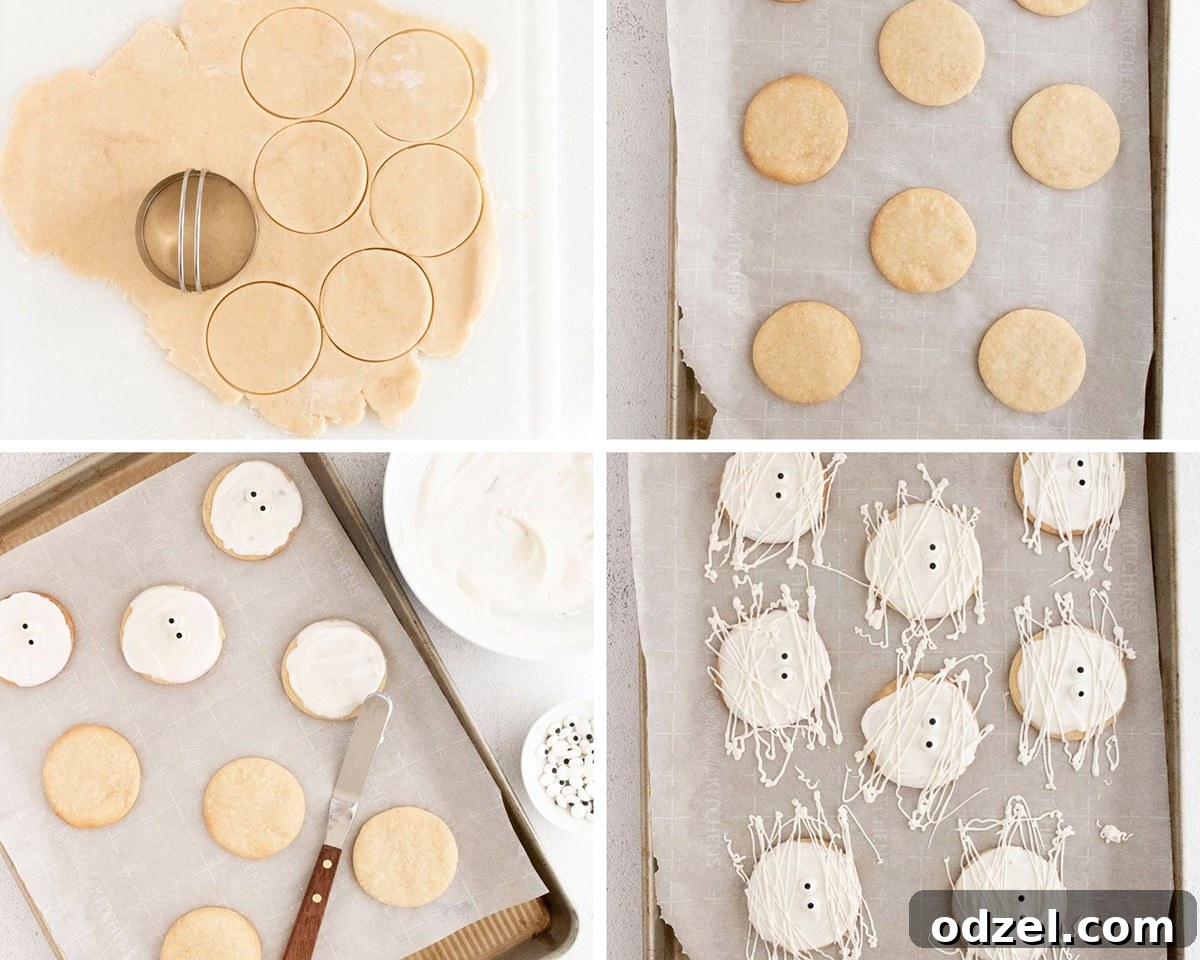
Roll and Cut Cookies Precisely: Lightly flour a clean work surface. Unwrap your chilled dough and, using a rolling pin, roll it out evenly to a consistent thickness of about ¼ inch (0.6 cm). Dip a 2-inch (5 cm) circular cookie cutter into flour to prevent sticking, then use it to cut out individual cookie shapes. Gently gather any dough scraps, re-roll them, and cut out more cookies until all dough is used. Try not to overwork the dough during this process.
-
Bake to a Golden Hue: Carefully transfer the cut-out cookies to the prepared baking sheet, ensuring you leave approximately 1 inch (2.5 cm) of space between each cookie. Bake for 10 to 12 minutes, or until the edges of the cookies just begin to turn a very light golden brown. The centers should still appear pale. Avoid overbaking to keep the cookies tender.
-
Cool Completely Before Decorating: Once baked, remove the baking sheet from the oven and allow the cookies to cool completely to room temperature directly on the tray. Attempting to decorate warm cookies will cause the candy melts to run, melt, or not set properly.
-
Melt the Candy Melts: Prepare your bright white candy melts according to the package instructions. Typically, this involves melting them in a microwave at half power, stirring thoroughly every 30 seconds, until they are completely smooth and free of lumps. Alternatively, you can use a double boiler method for a more controlled melting process.
-
First Dip and Attach Eyes: Set aside approximately ¼ of the total melted candy melts in a small piping bag or a corner of a sturdy Ziploc bag. This portion will be used later for creating the mummy wrappings. Dip each completely cooled cookie entirely into the remaining melted candy, ensuring it’s fully coated. Use an offset spatula or the back of a spoon to gently smooth any excess candy off the cookie. While the candy coating is still wet and unset, carefully place two candy eyes on each cookie to give your mummies their characteristic spooky gaze.
-
Create Mummy Wrappings: Once all the cookies are dipped and have their eyes in place, snip a tiny corner off the piping bag (or Ziploc bag) containing the reserved melted candy. Drizzle horizontal lines back and forth across each cookie, creating a random, bandage-like pattern. Don’t worry about achieving perfect lines; the slight imperfections will only enhance the authentic mummy look!
-
Set and Enjoy: Allow the decorated cookies to set completely. This can take about 15-30 minutes at cool room temperature, or you can expedite the process by placing them in the refrigerator for 5-10 minutes. Once the candy melts are firm and dry to the touch, your adorable and delicious Mummy Cookies are ready to be served and enjoyed! Store any leftovers in an airtight container once dry.
Top Tips for Baking Flawless and Fun Mummy Cookies
To ensure your Mummy Cookies turn out perfectly spooky and sweet every time, keep these expert tips in mind:
-
Elevate Vanilla Flavor: For an even richer and more intense vanilla aroma and taste, consider substituting the vanilla extract with an equal amount of high-quality vanilla bean paste. For a truly gourmet touch, scrape the flavorful seeds (often called “caviar”) from one whole vanilla bean directly into the dough.
-
Flexible Milk Options: This recipe is wonderfully adaptable! Feel free to use either dairy milk, such as the specified whole milk, or opt for a non-dairy alternative like almond milk, oat milk, or soy milk. Any of these will work beautifully to achieve the desired dough consistency.
-
Freshly Grated Nutmeg is Best: While pre-ground nutmeg is convenient, freshly grated nutmeg offers a significantly more potent and aromatic flavor profile. Invest in a whole nutmeg and a microplane grater; the difference in taste is truly remarkable and will elevate your cookies.
-
Consistency for Perfect Baking: To ensure all your cookies bake evenly and look uniform, roll your dough consistently to about ¼ inch (0.6 cm) thick. Using a 2-inch (5 cm) circular cookie cutter will yield approximately 12 perfectly sized mummy cookies, ideal for consistent presentation and portioning.
-
Prepare Dough in Advance: To save time on the day of baking, you can prepare the shortbread dough up to 24 hours ahead. Simply wrap the dough disc tightly in plastic wrap and store it in the refrigerator. Before you plan to roll and cut, allow the dough to come to room temperature for about 45 minutes; this makes it much easier to work with.
-
Choose Candy Melts for Ease: For the purest, brightest white coating and the most straightforward decorating process, stick with candy melts. Unlike traditional white chocolate, candy melts are specially formulated to melt smoothly and set quickly without requiring the intricate tempering process, making them foolproof for this kind of application.
-
Avoid Overbaking: Shortbread cookies are designed to be tender and slightly pale. Keep a close eye on your cookies during the final minutes of baking. Remove them from the oven as soon as the edges just begin to show a hint of golden brown. Overbaking can result in a dry, crumbly texture rather than the desired tender bite.
-
Ingredient Quality Matters: Given the simple nature of shortbread, the quality of your ingredients truly shines through. Opt for high-quality unsalted butter and good extracts for the best possible flavor outcome in your cookies.
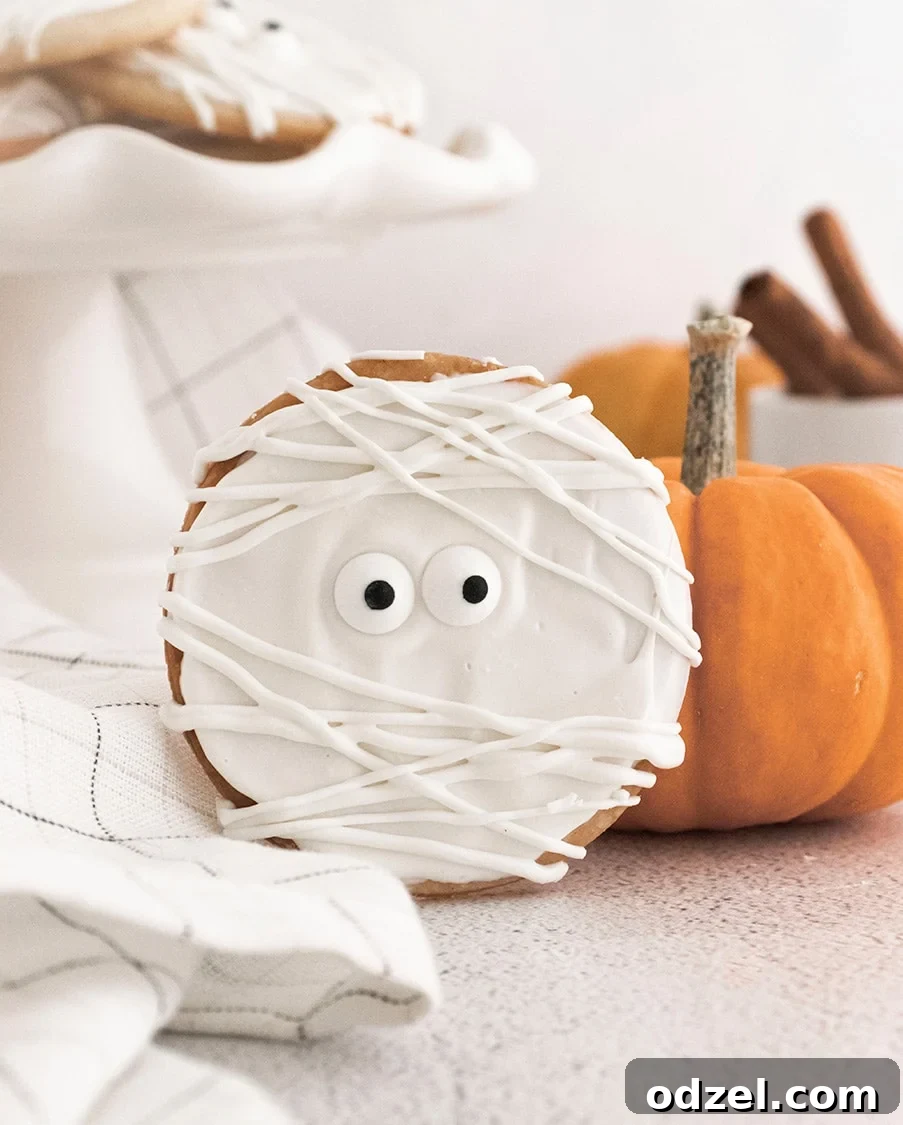
Creative Variations to Customize Your Spooky Treats
While the classic white mummy design is undeniably charming, don’t hesitate to get creative and personalize your cookies with these fun variations:
- Flavor Experimentation: Introduce different extracts into your shortbread dough. A few drops of almond extract can add a sophisticated, nutty undertone, or a touch of pure orange zest can infuse a bright, autumnal citrus note. Lemon zest would also be a delightful and zesty twist.
- Colorful Mummies: Instead of strictly using bright white candy melts, consider using other Halloween-themed colors like orange, purple, green, or even black. You could also drizzle contrasting colors over a white base for an extra vibrant and playful mummy effect, or use striped patterns.
- Add Spooky Sprinkles: Before your candy melt coating completely sets, sprinkle some festive Halloween-themed sprinkles (think tiny bats, ghosts, pumpkins, or even glitter) over the “bandages.” This adds extra texture and a burst of holiday cheer.
- Chocolate Chip Surprise: For a delightful treat within a treat, gently fold in a handful of mini chocolate chips into your shortbread dough before chilling. The little pockets of chocolate will be a pleasant surprise in every bite.
- Alternative Cookie Cutter Shapes: While classic circles are perfect for mummies, you’re not limited to them! Experiment with other Halloween-themed cookie cutters like ghosts, pumpkins, skulls, or even bat shapes. Just be mindful that different shapes and sizes might require slight adjustments to the baking time.
Storage and Make-Ahead Options for Convenience
These delightful Mummy Cookies are ideal for preparing in advance, which can significantly simplify your Halloween party preparations or ensure you always have a spooky snack on hand!
- Storing Baked and Decorated Cookies: Once the candy melts have completely set and are dry to the touch, store the cookies in an airtight container at room temperature. They will remain fresh and delicious for up to 3-4 days. For slightly longer storage, you can refrigerate them for up to a week. To prevent them from sticking together or damaging the decoration, arrange them in a single layer or separate layers with sheets of parchment paper.
- Freezing Baked Cookies: For extended freshness, baked and fully decorated mummy cookies can be frozen for up to 2 months. To do this, first place the cookies in a single layer on a baking sheet and freeze them until they are solid. Once frozen, transfer them to an airtight freezer-safe container or a heavy-duty freezer bag, again using parchment paper between layers to protect the decorations. When you’re ready to enjoy them, simply thaw the cookies at room temperature for a few hours before serving.
- Freezing Unbaked Dough: The shortbread dough itself is also freezer-friendly, allowing you to prepare it well in advance. After shaping the dough into a disc, wrap it tightly in plastic wrap, and then add an additional layer of aluminum foil for extra protection against freezer burn. The dough can be frozen for up to 3 months. When you’re ready to bake, transfer the frozen dough to the refrigerator to thaw overnight. Once thawed, let it sit at room temperature for about 45 minutes before rolling and baking as usual. This flexibility makes holiday baking much less stressful!
Recipe: Spooky & Sweet Mummy Cookies
Mummy Cookies
By Julie Maestre
These soft, sweet mummy cookies are the perfect spooky treat for your Halloween party. Simple but tender shortbread Halloween cookies are coated and drizzled with pure white candy melts for a perfectly sweet Halloween goodie.
Prep Time: 10 minutes
Cook Time: 10 minutes
Chill Time: 15 minutes
Total Time: 35 minutes
Servings: 12 cookies
Ingredients
For the Shortbread Cookies
- 1/2 cup (113g) unsalted butter, softened
- 1/4 cup (30g) powdered sugar
- 2 tsp vanilla extract
- 1/2 tsp ground nutmeg
- 1/2 tsp ground cinnamon
- 1/2 tsp salt
- 1 cup (120g) all-purpose flour
- 2 tbsp whole milk
To Decorate
- 1 cup (170g) bright white candy melts
- 24 candy eyes
Instructions
- Prepare the Dough: In a stand mixer with a paddle attachment, beat the softened butter for 2 minutes until light and fluffy. Add the powdered sugar, cinnamon, nutmeg, salt, and vanilla extract. Mix on low speed for 1 minute until just combined.
- Form the Dough: Keep the mixer on low and alternately add half the flour, then half the milk, repeating until all is incorporated and a soft dough ball forms. Do not overmix. Shape the dough into a disc, wrap it tightly in plastic wrap, and chill for 15 minutes.
- Preheat Oven & Prepare Sheet: Preheat your oven to 375°F (190°C). Line a baking sheet with parchment paper.
- Roll & Cut Cookies: On a lightly floured surface, roll the chilled dough out to ¼ inch thick. Use a 2-inch circular cookie cutter (floured) to cut out 12 cookies.
- Bake Cookies: Place cookies 1 inch apart on the prepared baking sheet. Bake for 10 to 12 minutes, or until the edges are just starting to brown. Remove from oven and let cool completely on the baking sheet.
- Melt Candy Melts: Melt bright white candy melts in the microwave at half power, stirring every 30 seconds until smooth, or follow package instructions.
- Decorate Base & Eyes: Reserve ¼ of the melted candy in a small piping bag. Dip each cooled cookie into the remaining melted candy, ensuring full coverage. Smooth with an offset spatula. While the candy is still wet, attach two candy eyes to each cookie.
- Create Wrappings: Snip a tiny corner off the piping bag with the reserved candy. Drizzle horizontal lines across each cookie to create the mummy wrappings.
- Set & Serve: Allow the decorated cookies to set completely at room temperature or in the refrigerator. Once firm, enjoy! Store in an airtight container for up to 2 days.
Nutrition (per cookie, approximation)
Calories: 120 kcal | Carbohydrates: 11g | Protein: 1g | Fat: 8g | Saturated Fat: 5g | Cholesterol: 21mg | Sodium: 99mg | Potassium: 14mg | Fiber: 1g | Sugar: 3g | Vitamin A: 236IU | Calcium: 8mg | Iron: 1mg
Nutrition information is automatically calculated and should only be used as an approximation.
Additional Info
Author: Julie Maestre
Prep Time: 10 minutes
Cook Time: 10 minutes
Refrigerate for: 15 minutes
Total Time: 35 minutes
Course: Dessert
Cuisine: American
Servings: 12
Keywords: Halloween Cookies, How to make Halloween cookies, Mummy Cookies, Halloween Shortbread, Spooky Baking, Easy Halloween Treats
More Festive Treats from Our Kitchen You’ll Love
If you’ve enjoyed baking and decorating these fun mummy cookies, we know you’ll love exploring more delicious recipes perfect for any occasion, especially during the festive seasons. Our kitchen is always buzzing with new ideas to inspire your culinary adventures!
- For another colorful and delightfully chewy cookie experience, you absolutely must try these M&M Cookies. They’re a classic for a reason and bring a burst of color to any dessert table.
- Looking for something with a unique, zesty, and delicately tender flavor? Our Italian Lemon Ricotta Cookies are a fantastic choice, offering a lighter, moist bite with a refreshing citrus kick that’s hard to resist.
Stay connected with us for even more delicious recipes, helpful cooking tutorials, and baking inspiration! You can find our engaging videos and updates on Youtube and Facebook. We love sharing our passion for baking and cooking with our community!
Loved This Recipe? We’d Love to Hear From You!
Your feedback truly means the world to us. If you had a blast making and tasting these Spooky & Sweet Mummy Cookies, please consider leaving a comment below. Share your baking adventures, tips, or even photos of your festive creations! We’d be absolutely thrilled to see how your mummies turned out!