
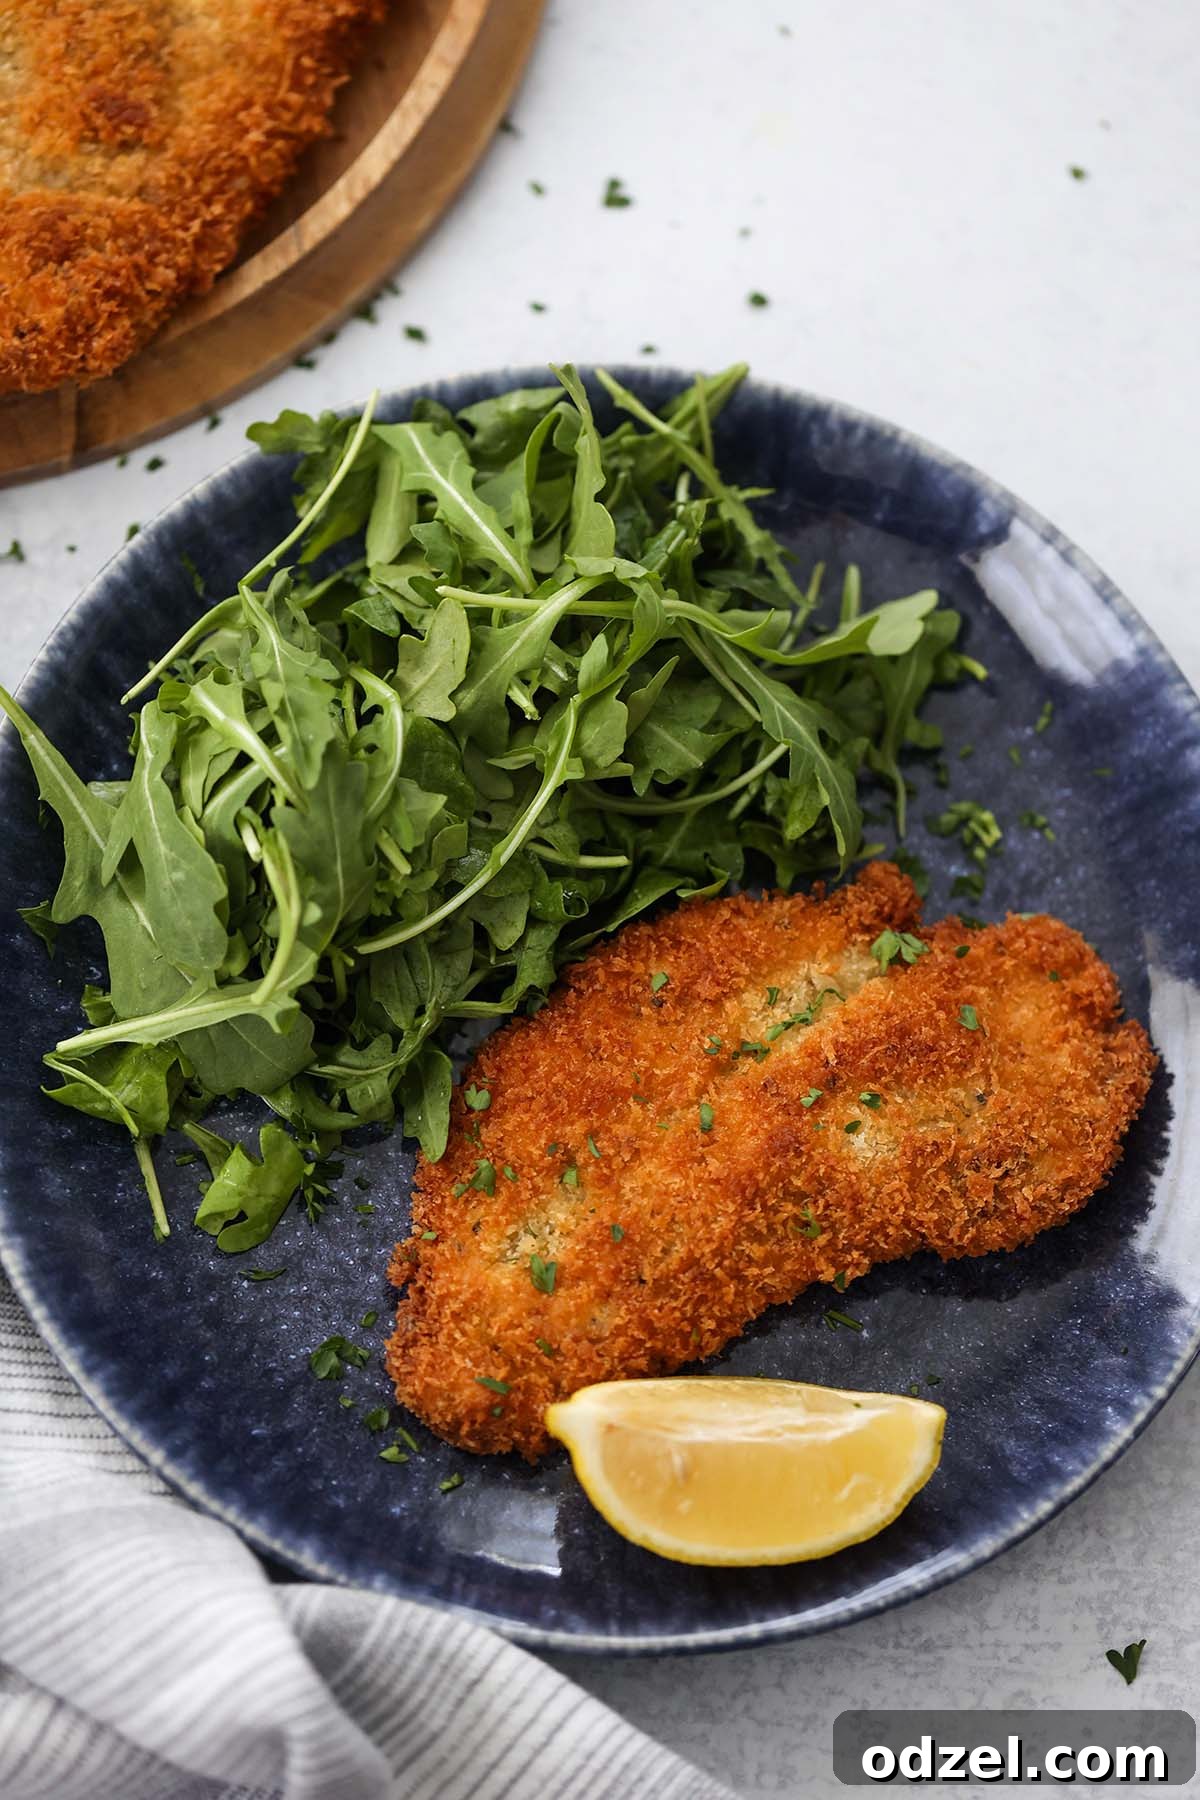
Classic Crispy Chicken Milanese: Your Ultimate Guide to Perfect Pan-Fried Chicken Cutlets
Craving a dish that’s effortlessly elegant yet incredibly satisfying? Look no further than this sensational Chicken Milanese recipe! Renowned for its irresistibly crunchy exterior and wonderfully juicy interior, this classic Italian-American entrée is a culinary masterpiece that comes together quicker than you might imagine. Whether you’re preparing a special meal or just need a delicious solution for a busy weeknight, our ultimate guide ensures you’ll create perfect pan-fried chicken cutlets every time.
Chicken Milanese is more than just fried chicken; it’s a celebration of simple, high-quality ingredients transformed into a dish bursting with flavor and texture. This recipe will empower you to achieve restaurant-quality results in your own kitchen, delivering tender, golden-brown chicken that’s thin, crisp, and seasoned to perfection. Get ready to impress your family and friends with this timeless favorite!
What is Chicken Milanese? A Brief History and Culinary Appeal
Chicken Milanese, or Cotoletta alla Milanese, is a traditional Italian dish, famously originating from Milan. While the original version is often made with thinly pounded veal, the chicken rendition gained immense popularity, especially within Italian-American cuisine, becoming a beloved staple in homes and restaurants alike. It features tender chicken cutlets, meticulously pounded thin, coated in seasoned breadcrumbs, and pan-fried until golden and shatteringly crispy. The enduring appeal of this dish lies in its exquisite simplicity and the delightful textural contrast between the crunchy coating and the tender, moist meat within. It’s a versatile dish that can be served simply with a refreshing squeeze of lemon or as part of a more elaborate meal, making it a truly adaptable classic.
Why You’ll Adore This Easy Chicken Milanese Recipe
This isn’t just another chicken recipe; it’s a culinary experience designed for maximum enjoyment and minimal stress. Here’s why this particular Chicken Milanese recipe will become a cherished part of your cooking repertoire:
- Unbeatable Crispiness: We leverage the magic of panko breadcrumbs, which are specifically chosen for their superior ability to create an incredibly light and airy crunch. Each bite offers a satisfying crisp that traditional breadcrumbs simply can’t match.
- Incredibly Juicy & Tender: Our method ensures the chicken remains exceptionally moist and tender. Pounding the chicken to an even, thin thickness facilitates rapid cooking, effectively locking in all the natural juices before they have a chance to escape.
- Quick & Effortless for Weeknights: Say goodbye to long hours in the kitchen! This recipe is specifically designed for efficiency, requiring minimal prep time and a quick fry, making it an ideal choice for those hectic weeknights when you still crave a homemade, delicious meal.
- Restaurant Quality, Home Comfort: You don’t need a five-star chef to create gourmet food. This recipe empowers you to achieve professional-level results in your own kitchen, serving up a dish that tastes like it came from your favorite Italian restaurant, all while enjoying the comfort of your home.
- Versatile Serving Options: From a light and fresh arugula salad to a hearty pasta dish or steamed vegetables, Chicken Milanese adapts beautifully to various side dishes. Its neutral yet flavorful profile makes it the perfect canvas for your preferred accompaniments.
If you’re a fan of simple yet impressive chicken breast recipes, you might also enjoy our Classic Chicken Parmesan for a cheesy, saucy delight, or these comforting Homestyle Smothered Chicken Breasts for a hearty, savory option.
Essential Ingredients for Your Perfect Chicken Milanese
Crafting mouth-watering Chicken Milanese begins with selecting and understanding the role of each ingredient. Here’s a detailed look at what you’ll need to achieve culinary perfection:
- Boneless, Skinless Chicken Breasts: The very heart of our dish. Always opt for the freshest chicken breasts available. While their initial size isn’t paramount, their quality is, as you’ll be slicing and pounding them thin to create uniform cutlets.
- Panko Breadcrumbs: This is unequivocally your secret weapon for achieving that signature, superior crispiness. Panko breadcrumbs, hailing from Japan, are distinctively coarser, lighter, and flakier than traditional breadcrumbs. This unique texture results in a significantly crispier coating that also absorbs less oil during frying, leading to a lighter and crunchier finish.
- All-Purpose Flour: This forms the foundational first layer of our three-step breading station. Its purpose is to create a dry surface that allows the subsequent egg wash to adhere uniformly and effectively to the chicken, ensuring an even coating.
- Eggs: Whisked eggs serve as the crucial “binder” or “glue” in our breading process, bridging the flour and the panko. They ensure that the panko breadcrumbs cling firmly and evenly to the chicken, creating a robust and delicious crust.
- Salt and Black Pepper: Generous seasoning is absolutely paramount. Flavoring the chicken directly, on both sides, rather than solely relying on seasoning the flour or panko, ensures that the flavor penetrates deep into the meat, resulting in a truly delicious and well-balanced Milanese. Do not be timid with these essential seasonings!
- Garlic Powder: This provides an aromatic, savory depth that beautifully complements the chicken’s natural flavors. While entirely optional, its inclusion is highly recommended for an additional layer of nuanced taste that elevates the dish.
- Italian Seasoning: A thoughtfully balanced blend of dried herbs such as oregano, basil, thyme, and rosemary, Italian seasoning infuses the breading with an authentic Mediterranean flavor profile, delivering that quintessential Italian touch.
- Oil for Frying: Reliable choices include vegetable oil, canola oil, or light olive oil. The key here is to select an oil with a high smoke point that can comfortably sustain medium-heat frying without breaking down or imparting burnt flavors. This oil is indispensable for achieving that desired golden, crispy crust.
- Goat Cheese (Optional): A truly delightful and sophisticated addition for serving! A generous crumbling of fresh goat cheese over the warm Chicken Milanese introduces a creamy, tangy element that creates a magnificent contrast with the rich, crispy chicken. Alternatively, freshly grated Parmesan cheese offers a wonderful salty, umami kick.
- Fresh Arugula & Lemon Wedges (for Serving): This is the quintessential classic pairing. The vibrant, peppery bite of fresh arugula and the bright, zesty acidity of fresh lemon juice are not merely garnishes; they are crucial components that cut through the richness of the fried chicken, balancing and enhancing the overall flavor experience perfectly.
Step-by-Step Instructions: Mastering the Art of Crispy Chicken Milanese
Follow these meticulously detailed steps to achieve perfectly crispy and irresistibly juicy Chicken Milanese every single time. Precision in preparation and attention to detail will ensure your success!
- Prepare the Chicken Cutlets: Begin by placing your boneless, skinless chicken breasts on a clean cutting board. Carefully inspect and trim off any excess fat or undesirable connective tissue. For optimal tenderness and quick, even cooking, you will need to create thin cutlets. Hold the top of each chicken breast firmly with one hand and, using a very sharp chef’s knife, carefully slice the chicken horizontally through the thickest part to create two thinner, more manageable cutlets. Repeat this precise process for all remaining chicken breasts.
- Pound to Even Thickness: Lay one chicken cutlet on a sturdy surface, covered with a layer of plastic wrap. Place a second piece of plastic wrap (or parchment paper) over the chicken. Using a meat mallet, or if one is unavailable, the flat bottom of a heavy saucepan or cast-iron skillet, gently but firmly pound the chicken breast evenly until it achieves a uniform thickness of approximately 1/4 inch. This crucial step ensures rapid and consistent cooking, preventing the chicken from drying out and guaranteeing maximum tenderness. Repeat for all prepared cutlets.
- Season Generously: Once all your cutlets are uniformly pounded, liberally season both sides of each chicken breast. Sprinkle generously with salt, freshly ground black pepper, garlic powder, and Italian seasoning. Ensure every surface is well-coated; this thorough seasoning penetrates the meat and builds a strong flavor foundation.
- Set Up Your Breading Station: Prepare three separate shallow dishes, pie plates, or wide bowls. In the first dish, place your all-purpose flour. In the second, whisk the two eggs vigorously until they are well combined and a uniform yellow color. In the third dish, spread out the panko breadcrumbs evenly.
- Breadline the Chicken Meticulously: Take one seasoned chicken cutlet and first dip it thoroughly into the all-purpose flour, ensuring both sides are completely and evenly coated. Gently shake off any excess flour – too much flour can create a gummy texture. Next, transfer the floured chicken to the whisked egg mixture, ensuring both sides are fully moistened. Lift the chicken and allow any excess egg to drip back into the bowl. Finally, place the chicken breast into the panko breadcrumbs. Press the breadcrumbs firmly and thoroughly onto both sides of the chicken, ensuring a thick, even, and complete coating. This firm press is vital for the panko to adhere properly and for achieving that desirable super crispy crust. Repeat this three-step breading process for all remaining chicken cutlets.
- Heat the Frying Oil: Pour about 1/4 inch of your chosen frying oil (vegetable, canola, or light olive oil) into a large, heavy-bottomed skillet over medium heat. Allow the oil to heat gradually until it shimmers and appears slightly wavy, indicating it’s hot enough for frying. You can test the temperature by dropping a tiny pinch of panko into the oil; if it sizzles gently and immediately, it’s ready.
- Fry to Golden Perfection: Carefully place one or two breaded chicken cutlets into the hot oil, ensuring you do not overcrowd the skillet. Overcrowding will significantly lower the oil temperature, leading to steamed (and consequently soggy) chicken rather than beautifully fried and crispy results. Fry each side for approximately 2 minutes, or until the chicken is a deep golden brown and cooked through. To ensure safety and optimal doneness, the internal temperature of the thickest part of the chicken should reach 165 degrees F (74 degrees C) when measured with a meat thermometer.
- Rest and Serve Immediately: Once cooked to perfection, carefully transfer the crispy chicken Milanese cutlets to a baking sheet fitted with a wire rack. This allows any excess oil to drain away and facilitates air circulation, helping to maintain the chicken’s crispiness as it rests for 2-3 minutes. Serve your impeccably made Chicken Milanese immediately, garnished with fresh arugula, bright lemon wedges, and a sprinkle of optional goat cheese or grated Parmesan. Savor every glorious bite!
Top Tips for Achieving the Perfect Chicken Milanese Every Time
While making outstanding Chicken Milanese is inherently simple, a few expert tips and tricks can elevate your dish from merely good to truly unforgettable. Pay close attention to these details for consistently spectacular results:
- Master the Art of Thinness: Do not underestimate the critical importance of pounding the chicken cutlets to an even 1/4-inch thickness. This uniform thinness is paramount for ensuring they cook quickly, evenly, and prevents any part of the meat from becoming dry or tough. It’s the secret to achieving that perfect tender interior.
- Bring Chicken to Room Temperature: For optimal cooking, allow your chicken breasts to rest at room temperature for at least 20 minutes before you begin the frying process. This simple step promotes more even cooking throughout the cutlet and prevents the exterior breading from burning before the interior meat is fully cooked.
- Ensure Complete Panko Coverage: To achieve the ultimate crunch and a robust crust, it is vital that each chicken breast is completely and thoroughly coated in panko breadcrumbs. Don’t just dip, actively press the breadcrumbs firmly onto the chicken until no bare chicken is visible underneath. This creates a protective and incredibly delicious crispy shell. If panko is unavailable, you can still make excellent Crispy Chicken Cutlets using regular breadcrumbs.
- Never Overcrowd the Skillet: This is a golden rule for frying! Always fry the chicken Milanese in small batches. Overcrowding your skillet drastically lowers the oil’s temperature, which leads to the chicken steaming rather than frying. The result is a soggy, greasy crust instead of a beautifully golden, crispy one.
- Maintain Optimal Oil Temperature: Keep a watchful eye on your oil temperature. Medium heat is typically ideal. If the oil is too cool, the chicken will absorb excessive amounts of oil and become greasy. Conversely, if the oil is too hot, the breading will scorch and burn long before the chicken has a chance to cook through. The oil should consistently shimmer and sizzle gently when a small test crumb of panko is dropped in.
- Avoid the Peril of Overcooking: Due to their thinness, Chicken Milanese cooks very rapidly. Overcooking is the arch-nemesis of a tender chicken breast, leading to dry, rubbery, and unappetizing results. Always aim for an internal temperature of precisely 165°F (74°C) using an instant-read meat thermometer for perfect doneness.
- Keep Cooked Batches Warm: When preparing multiple batches for a larger gathering, ensure your previously cooked Chicken Milanese stays warm and crispy. Place the finished cutlets on a wire rack set over a baking sheet and hold them in a warm oven, typically around 200°F (95°C), until all cutlets are ready to be served.
- Elevate with Finishing Toppings: A simple sprinkle of creamy goat cheese crumbles or freshly grated Parmesan cheese over the warm chicken adds a fantastic layer of creamy texture, tangy zest, or salty umami. And, never forget the transformative power of a generous squeeze of fresh lemon juice – its bright acidity is absolutely essential for balancing the richness of the fried chicken.
Delicious Serving Suggestions for Your Crispy Chicken Milanese
Chicken Milanese is wonderfully versatile and pairs beautifully with an array of side dishes. Its delicate yet crispy profile makes it an excellent centerpiece for both light and hearty meals. Here are some of our favorite ways to enjoy it:
- The Classic Arugula Salad: This is arguably the most traditional and perfect accompaniment. A simple, peppery arugula salad, lightly dressed with a classic vinaigrette and a refreshing squeeze of lemon juice, offers a delightful bitterness that brilliantly cuts through the richness of the pan-fried chicken, creating a perfectly balanced bite.
- Light Pasta Dishes: For those seeking a more substantial and comforting meal, serving your Milanese alongside a light pasta dish is an excellent choice. Our Easy Cherry Tomato Pasta is a fantastic, vibrant option. Alternatively, a simple pasta aglio e olio (garlic and oil) provides an understated yet flavorful complement.
- Fresh Roasted or Steamed Vegetables: For a healthy and flavorful side, consider serving roasted or lightly steamed vegetables. Asparagus, crisp green beans, or tender broccoli, simply prepared with a drizzle of olive oil, a touch of garlic, and a pinch of salt, make for an ideal and nutritious pairing.
- Abundant Lemon Wedges: This is non-negotiable! Always serve Chicken Milanese with plenty of fresh lemon wedges. The bright, zesty, and essential acidity of freshly squeezed lemon juice is not merely a garnish; it is crucial for enhancing the chicken’s flavors and adding a delightful zing that elevates the entire dish.
- Comforting Potato Sides: Various potato preparations can make for excellent companions. Creamy mashed potatoes, savory roasted potatoes, or even a light, herb-infused potato salad can provide a satisfying contrast to the crispy chicken.
Can I Make This Chicken Milanese Ahead of Time? Practical Meal Prep & Storage Tips
Absolutely! Chicken Milanese can be partially prepared in advance, making it a fantastic option for meal planning, entertaining, or simply streamlining your cooking process. However, a few considerations will ensure the best quality:
- Breaded, Uncooked Chicken: This is the ideal stage for make-ahead preparation. You can bread the chicken breasts up to 8 hours before you plan to fry them. Arrange the breaded cutlets in a single layer on a baking sheet lined with parchment paper, ensuring they do not touch each other. Loosely cover them with plastic wrap and refrigerate until you are ready to fry. This resting period not only saves precious time just before cooking but also helps the breading adhere even more securely to the chicken.
- Freezing Uncooked Chicken: For longer-term storage, freezing the breaded, uncooked chicken is a great option. Place the breaded cutlets in a single layer on a baking sheet and freeze until they are completely solid. Once frozen, transfer them to a freezer-safe bag or an airtight container, separating layers with parchment paper to prevent sticking. They can be stored effectively for up to 1-2 months. For best results, thaw them overnight in the refrigerator before frying. You can also fry them from frozen, though you’ll need to adjust the cooking time slightly to ensure they cook through.
- Cooked Chicken Milanese Storage: While the pinnacle of crispiness is achieved when served fresh, cooked Chicken Milanese can be stored in an airtight container in the refrigerator for up to 3 days. Be mindful that the characteristic crispiness will naturally diminish over time.
- Reheating Cooked Milanese: To restore as much crispiness as possible, avoid reheating cooked Milanese in the microwave, as this will inevitably make the chicken soggy. The best methods for reheating are in a preheated oven at 350°F (175°C) for 10-15 minutes, or in an air fryer at 375°F (190°C) for 5-7 minutes, until the chicken is heated through and the crust has regained some of its crunch.
Frequently Asked Questions About Chicken Milanese
Here are answers to some common questions about preparing and enjoying this classic dish:
- Can I bake Chicken Milanese instead of frying?
- While frying is key to the signature Milanese crispiness, you can certainly bake it for a lighter alternative. To do so, place your breaded cutlets on a wire rack set on a baking sheet. Lightly spray them with cooking spray or a drizzle of olive oil, then bake in a preheated oven at 400°F (200°C) for 15-20 minutes, flipping halfway, until they are golden brown and cooked through. While it won’t achieve the exact same depth of crispiness as frying, it’s a delicious and healthier option.
- What if I don’t have a meat mallet?
- No specialized equipment? No problem at all! You can easily improvise by using the flat bottom of a heavy saucepan, a sturdy rolling pin, or even a robust wine bottle to pound the chicken cutlets evenly thin. Just ensure you protect your countertops and the chicken by placing plastic wrap both above and below the meat.
- Can I use other types of meat for a “Milanese” style dish?
- Absolutely! The “Milanese” technique, which involves thinly pounding, breading, and frying, is highly adaptable to other proteins. Veal Milanese is the venerable and classic Italian preparation. You can also successfully apply this method to thin pork cutlets or even turkey breast slices for a similar and equally delicious effect.
- How do I prevent the breading from falling off the chicken?
- The key to a well-adhered breading lies in a meticulous breading station setup and firm pressing. Ensure your chicken is as dry as possible before dredging in flour. Shake off any excess flour, allow excess egg to drip off, and crucially, press the panko breadcrumbs firmly onto the chicken on all sides. Another excellent tip is to let the breaded chicken rest for 10-15 minutes before frying; this allows the coating to set and adhere better.
- How can I make this recipe gluten-free?
- Making this recipe gluten-free is straightforward. Simply substitute the all-purpose flour with a high-quality gluten-free all-purpose flour blend, and use gluten-free panko breadcrumbs, which are widely available. The rest of the ingredients in this recipe are naturally gluten-free.
More Delicious Chicken Recipes You Might Enjoy
If you thoroughly enjoyed preparing and savoring this Classic Crispy Chicken Milanese, we invite you to explore some of our other fantastic and flavorful chicken creations. There’s always something new to discover!
- Creamy Mushroom Chicken Fettuccine Alfredo
- Crispy Air Fryer Chicken Tenders
- Elegant Champagne Chicken
- Rich Creamy Garlic Parmesan Chicken
Thank you for trying our recipe! We hope you thoroughly enjoyed creating and indulging in this delicious dish. Your feedback is incredibly valuable to us, so please consider leaving a star rating and/or a review in the comments section further down the page. We also warmly invite you to connect with us and follow for more culinary inspiration on Facebook, Instagram, or Pinterest!
Chicken Milanese
Author: Julie Maestre
Summary: This chicken Milanese is super crunchy on the outside and juicy on the inside. The perfect meal for a busy weeknight!
Prep Time: 30 minutes
Cook Time: 4 minutes
Total Time: 34 minutes
Yields: 4 servings
Cuisine: Italian American
Course: Entree
Keywords: Chicken Milanese, chicken milanese recipe, how to make chicken milanese, crispy chicken cutlets
Rating: 5 out of 5 stars (Based on 1 vote)
Ingredients
- 2-3 boneless, skinless chicken breasts
- 1/2 cup all-purpose flour
- 2 eggs, whisked
- 2 cups panko breadcrumbs
- 2 teaspoons garlic powder
- 1 teaspoon Italian seasoning
- Salt and pepper to taste
- Oil, for frying (vegetable, canola, or light olive oil)
- Goat cheese, optional, for serving
- Arugula, optional, for serving
- Lemon wedges, for serving
Instructions
- Place the chicken breasts on a cutting board and trim off any fat. Hold the top of the chicken breast with one hand and slice the chicken horizontally with the other hand using a sharp knife to create thinner cutlets. Repeat with the remaining chicken breasts.
- Place each chicken breast on top of a plastic wrap layer and cover with a second piece of plastic wrap (or use parchment paper). Pound the chicken breast to an even thickness, about 1/4 inch, using a meat mallet or the bottom of a heavy saucepan.
- Liberally season both sides of the chicken breasts with salt, pepper, garlic powder, and Italian seasoning.
- Prepare your breading station: Dip each chicken cutlet first in the all-purpose flour, ensuring both sides are completely coated. Shake off any excess flour. Then dip the chicken breast in the whisked egg, allowing any excess egg to drip back into the bowl. Finally, coat the chicken breast thoroughly in the panko breadcrumbs, making sure to press the breadcrumbs firmly onto the chicken for a full coating.
- Heat about 1/4 inch of oil in a large skillet over medium heat until the oil shimmers.
- Carefully fry the chicken breasts in batches for approximately 2 minutes on each side, or until they are golden brown and reach an internal temperature of 165 degrees F (74 degrees C). Do not overcrowd the skillet.
- Place the cooked chicken Milanese on a baking sheet with a wire rack and allow it to cool for 2-3 minutes. Serve immediately with fresh arugula and lemon wedges, if desired. Enjoy!
Recipe Notes
- If cooking for a large crowd, place cooked chicken Milanese in the oven at 200°F (95°C) to keep them warm while you cook subsequent batches.
- Ensure the chicken breasts are completely coated in panko breadcrumbs; you shouldn’t be able to see the chicken underneath.
- Allow the chicken breasts to sit at room temperature for at least 20 minutes before cooking for more even results.
- Don’t overcook the chicken, as it can become dry and tough.
- Top the chicken Milanese with a little bit of goat cheese or parmesan cheese for an extra boost of flavor.
- Always fry the chicken Milanese in batches to prevent overcrowding the skillet and to ensure maximum crispiness.
Nutrition Facts (Approximate per Serving)
(Based on 4 servings)
- Calories: 278 kcal
- Carbohydrates: 35g
- Protein: 21g
- Fat: 5g
- Saturated Fat: 1g
- Polyunsaturated Fat: 1g
- Monounsaturated Fat: 2g
- Trans Fat: 0.01g
- Cholesterol: 118mg
- Sodium: 318mg
- Potassium: 339mg
- Fiber: 2g
- Sugar: 2g
- Vitamin A: 144 IU
- Vitamin C: 1mg
- Calcium: 82mg
- Iron: 3mg
Nutrition information is automatically calculated and should only be used as an approximation.