
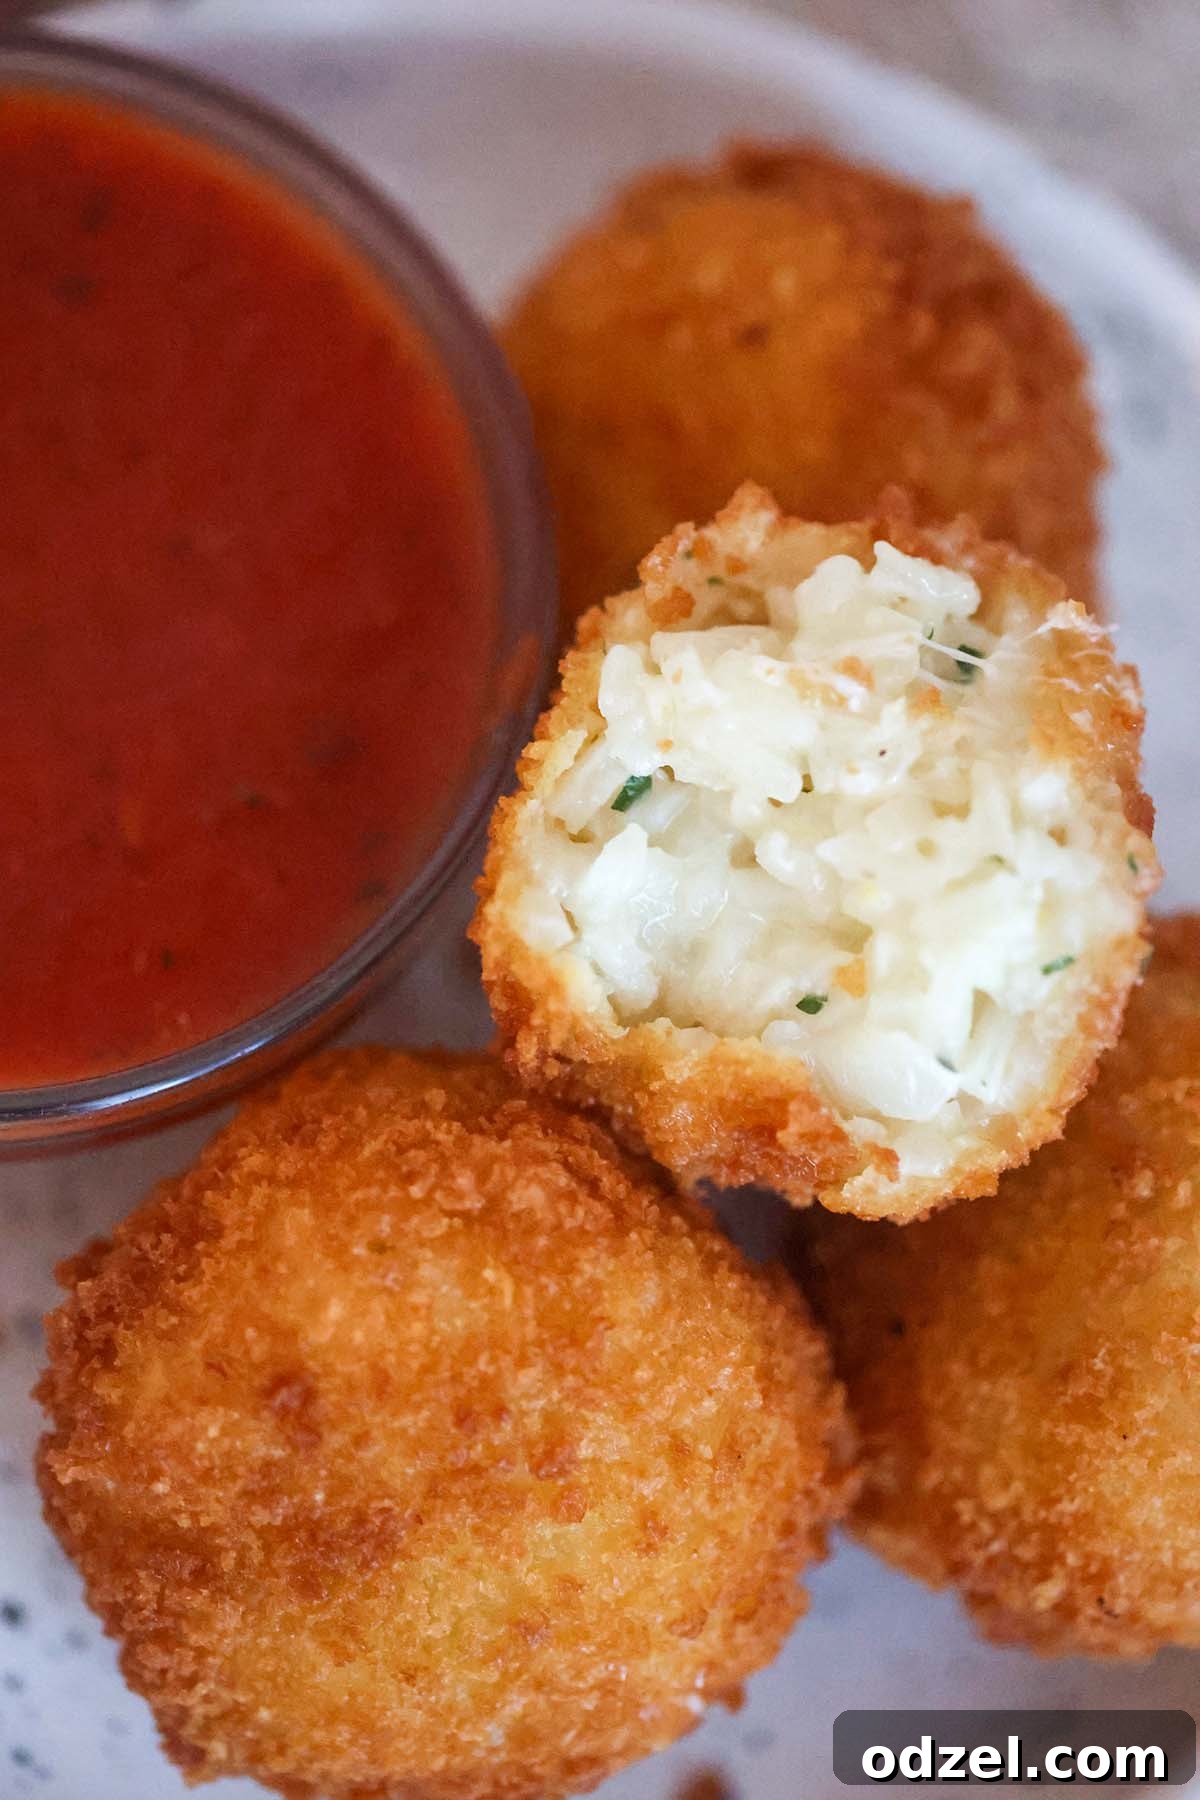
Authentic Three Cheese Arancini: Your Guide to Perfect Fried Risotto Balls
Prepare to be enchanted by the quintessential Italian delicacy: Three Cheese Arancini. These golden, crispy fried risotto balls, also lovingly known as arancini di riso, are a true culinary masterpiece. Imagine a perfectly cooked arborio rice interior, infused with the rich flavors of Parmesan, gooey mozzarella, and creamy mascarpone cheese, all enveloped in a golden, crunchy coating. They are light, fluffy, intensely cheesy, and utterly irresistible – truly the best way to enjoy a taste of Italy right in your home. Whether you’re hosting a dinner party, looking for an impressive appetizer, or simply craving a gourmet snack, these arancini promise to be a showstopper.
For an unparalleled culinary experience, always serve these delightful arancini with a classic marinara sauce or a luxurious vodka sauce. The bright tang of the sauce perfectly complements the rich, savory flavors of the cheese-filled rice balls, creating a harmonious and unforgettable bite.
What Are Arancini Balls? A Taste of Italian Tradition
Arancini, meaning “little oranges” in Italian due to their shape and beautiful golden color, are traditional Sicilian fried rice balls. They are a beloved street food and appetizer found across Italy, with numerous regional variations reflecting local ingredients and culinary traditions. At their core, arancini are made from cooked risotto, often utilizing leftover rice, which is then skillfully shaped into balls or cones. These delicious parcels are typically filled with various ingredients such as meat ragù, vegetables, or, in our case, a delightful medley of cheeses, before being coated in breadcrumbs and deep-fried until gloriously crisp and golden brown.
The history of arancini dates back to 10th-century Sicily, a period when the island was under Arab rule. It is believed that the Arabs introduced rice cultivation and the tradition of shaping rice with saffron into balls, which were then fried. Over centuries, these humble rice balls evolved, becoming a staple in Italian cuisine, particularly in Sicily, where they are cherished during celebrations like the Feast of Santa Lucia. The beauty of arancini lies in their incredible texture contrast: a crunchy, golden exterior giving way to a soft, flavorful, and often molten interior. They embody the Italian culinary philosophy of transforming simple, wholesome ingredients into extraordinary, comforting dishes, making them perfect for celebrations, family gatherings, or an indulgent snack any time of the day.
Why You’ll Love This Three Cheese Arancini Recipe
Beyond being a classic Italian delight, this particular Three Cheese Arancini recipe stands out for several reasons:
- Unbeatable Flavor Profile: The harmonious blend of sharp Parmesan, mild and gooey mozzarella, and rich, creamy mascarpone creates a deeply complex and utterly satisfying cheesy flavor that appeals to all palates.
- Perfect Texture Achieved: We provide detailed steps and crucial tips to ensure your arancini are wonderfully crispy and golden on the outside, giving way to an incredibly light, fluffy, and tender risotto interior, complete with a delightful molten cheese core.
- An Elevated Appetizer: These fried risotto balls are far from ordinary. They present as a sophisticated and impressive appetizer that will undoubtedly wow your guests, transporting their taste buds straight to the heart of Italy.
- Freezer-Friendly Convenience: Learn how to easily prepare and freeze these arancini ahead of time. This makes them perfect for entertaining without last-minute stress or having a gourmet snack ready whenever the craving strikes.
- Clear, Simple Instructions: Our comprehensive, step-by-step guide is designed to ensure success, even if you are new to making arancini. We break down each stage to make the process enjoyable and foolproof.
- Authentic Italian Experience: This recipe captures the essence of homemade Italian cooking, offering a taste that feels genuinely authentic and comforting.
Ingredient Notes & Substitutions for Perfect Arancini
Crafting the perfect arancini begins with selecting the right ingredients. Here’s a detailed look at what you’ll need and potential substitutions to help you achieve culinary perfection:
- Arborio Rice: This Italian short-grain rice is absolutely essential for authentic arancini. Its high starch content is key to creating the creamy, binding texture required for risotto that holds its shape when formed into balls and fried. While other short-grain rice types might work in a pinch, arborio rice is highly recommended for its ability to produce the desired creamy, yet firm, risotto base.
- The Three Cheeses (Parmesan, Mozzarella, Mascarpone): This trio is paramount for the rich, multi-layered “three cheese” experience.
- Parmesan Cheese: Adds a crucial layer of sharp, salty, and umami flavor that is the hallmark of classic Italian cuisine. Always opt for freshly grated Parmesan for the best texture and most intense flavor; pre-grated varieties can be drier and less aromatic.
- Mozzarella Cheese: This is what delivers that irresistible gooey, stretchy pull when your arancini are cut open. Use good quality fresh mozzarella, either diced into small cubes for the filling or shredded and mixed into the risotto.
- Mascarpone Cheese: This luxurious Italian cream cheese contributes an unparalleled richness, subtle sweetness, and silky smoothness to the risotto, greatly enhancing the “light and fluffy” interior texture. If mascarpone is difficult to find, full-fat cream cheese, softened to room temperature, can be used as a substitute, although the flavor profile will be slightly different. For a lighter touch, well-drained ricotta cheese is another option.
- Shallots & Garlic: These aromatic vegetables form the foundational flavor base of our risotto. Finely dicing them ensures their flavors are evenly distributed and they melt seamlessly into the rice without being chunky. Yellow or white onion can be a suitable substitute for shallots if needed.
- Olive Oil: Used for sautéing the aromatics and toasting the rice. A good quality extra virgin olive oil will impart a subtle, beautiful flavor to the dish.
- Chicken Stock: The primary liquid that cooks and infuses the risotto with savory flavor. It is crucial to keep the chicken stock warm throughout the cooking process for gradual absorption and optimal starch release. For a vegetarian version, simply swap with vegetable stock.
- White Wine: A dry white wine, such as Pinot Grigio or Sauvignon Blanc, adds a wonderful layer of acidity and complexity to the risotto, helping to deglaze the pan and enhance the overall taste. If you prefer to omit alcohol, simply replace the white wine with an additional ½ cup of warm chicken stock.
- Butter: Incorporated at the very end of the risotto cooking process, butter adds a luxurious richness and a glossy finish, contributing to the creamy consistency (a technique known as *mantecatura*).
- Panko Breadcrumbs: These Japanese-style breadcrumbs are celebrated for their light, airy, and flaky texture, which results in an exceptionally crispy and less oily coating compared to traditional breadcrumbs. While regular Italian breadcrumbs can be used, panko delivers a superior crunch.
- All-Purpose Flour: Used for the initial dredge in the breading process. It creates a dry surface that allows the egg wash to adhere more effectively to the rice balls.
- Eggs: Whisked eggs act as the essential binding agent between the flour and the breadcrumbs, ensuring a robust and crispy crust forms during frying.
- Fresh Parsley: Finely minced fresh parsley is an excellent addition, providing a touch of vibrant color and a fresh, herbaceous note that brightens the overall flavor of the arancini.
- Salt & Pepper: Fundamental for seasoning the risotto to perfection. Always taste and adjust as you go.
- Oil for Frying: Canola oil or vegetable oil are highly recommended for deep-frying due to their neutral flavor and high smoke points. This ensures the arancini fry evenly to a golden brown without imparting unwanted flavors.
Expert Tips for Flawless Arancini Every Time
Making arancini can seem daunting, but with these expert tips, you’ll achieve perfection, ensuring your fried risotto balls are a resounding success:
- Achieve the Right Risotto Consistency: Do not be alarmed if your cooked risotto seems very creamy and even a bit loose immediately after cooking. This is the ideal consistency! A creamy, somewhat fluid risotto base is crucial for producing light, fluffy, and tender arancini. If your risotto is too dry, your finished arancini will likely turn out dense and unappetizingly dry. The ultimate goal for the rice itself is al dente – tender with a slight bite – enveloped in a rich, creamy sauce.
- Thorough Chilling is Paramount: This step is arguably the most critical for successful arancini. The risotto *must* be completely cooled and significantly firmed up before you even attempt to shape the balls. Chilling it in the refrigerator for at least 1-2 hours (or even overnight) allows the starches to fully set, making the mixture much easier to handle and dramatically reducing the chance of the balls falling apart during frying. Freezing the *shaped* balls for an additional 30 minutes to an hour further guarantees they maintain their integrity and contribute to a superior crispy crust.
- Maintain Optimal Oil Temperature: For the best results – meaning perfectly golden, crispy, and non-greasy arancini – the frying oil should be consistently maintained at approximately 350°F (175°C). We highly recommend using a deep-fry thermometer to accurately monitor the temperature. If the oil is too cold, the arancini will absorb excessive oil and become soggy and heavy. Conversely, if the oil is too hot, the exterior will burn quickly before the delicious cheesy interior has a chance to properly melt and warm through.
- Season Generously and Taste: Always taste your risotto before you begin forming the balls and adjust the seasoning (salt and pepper) as needed. Remember that the frying process can sometimes mellow flavors slightly, so don’t be afraid to season boldly to ensure a flavorful final product.
- Avoid Overcrowding the Fryer: When frying, always work in small batches. Overcrowding the pot will cause the oil temperature to drop significantly, leading to uneven cooking and potentially soggy arancini. Give each ball ample space to fry evenly and crisp up beautifully.
- Consider a Double Crumb for Extra Crispness (Optional): For an exceptionally thick and robustly crispy crust, you can implement a double-crumbing technique. After completing the first flour-egg-panko coating, dip the balls again into the whisked egg, and then roll them once more thoroughly in the panko breadcrumbs. This creates an extra layer of protection and crunch.
- White Wine Substitution Note: As mentioned in the ingredients, if you prefer not to use white wine in your risotto, simply omit it and substitute with an additional ½ cup of chicken stock to maintain the correct liquid balance and creamy consistency in the risotto.
Storage and Reheating Leftover Arancini
Have leftovers? Congratulations, you’re in for another treat! Arancini are wonderfully delicious even the next day, and they reheat beautifully. To properly store and reheat your fried risotto balls, follow these guidelines:
- Refrigeration: Place any leftover cooked arancini in an airtight container and refrigerate for up to 3 days.
- Reheating for Optimal Crispness: For the absolute best and crispiest results, reheating in an air fryer or oven is highly recommended:
- Air Fryer: Preheat your air fryer to 350°F (175°C). Place the arancini in a single layer in the air fryer basket and cook for 5-7 minutes, or until they are heated through to the center and the exterior is wonderfully crispy.
- Oven: Preheat your oven to 375°F (190°C). Arrange the arancini on a baking sheet and bake for 10-15 minutes, or until they are piping hot and the crust has regained its crispness.
- Microwave (Convenient, but Less Crispy): While quick and convenient, reheating in the microwave will inevitably make the arancini softer rather than crispy. Heat for 30-60 seconds, or until warmed through. This method is best if you prioritize speed and don’t mind a softer texture.
Make Ahead & Freezing Uncooked Arancini: Arancini are fantastic for meal prepping! You can prepare and freeze them uncooked for future enjoyment. After you have shaped and rolled the arancini balls thoroughly in panko breadcrumbs (step 10 in the recipe), place them on a parchment-lined baking sheet and freeze until they are completely solid (this usually takes 1-2 hours). Once solid, transfer them to a freezer-safe zippered bag or airtight container. They can be stored in the freezer for up to 1-2 months. When you’re ready to cook, you can deep-fry them directly from frozen, adding a few extra minutes to the frying time (typically 5-7 minutes) until they are golden brown, crispy, and heated through to the center.
Frequently Asked Questions About Arancini
What kind of rice is best for arancini?
Arborio rice is unequivocally the best choice for arancini. Its unique starch content (amylopectin) is responsible for creating the creamy, cohesive texture of risotto, which is crucial for the balls to bind well and hold their shape during the delicate frying process. This results in a superior, authentic texture compared to other rice varieties.
Can I bake arancini instead of frying them?
Yes, you can certainly bake arancini as a healthier alternative to deep-frying. However, it’s important to note that the texture will not be as deeply crispy or as richly golden as a deep-fried version. To bake, preheat your oven to 400°F (200°C). Lightly spray the breaded arancini with cooking oil or olive oil spray, then bake for approximately 20-25 minutes, flipping them halfway through, until they are golden brown and heated through.
What’s the best way to get a crispy crust on arancini?
Achieving that coveted crispy crust involves several key factors: 1) Using Panko breadcrumbs, which are lighter and flakier than traditional breadcrumbs. 2) Ensuring your frying oil is maintained at the correct temperature (around 350°F / 175°C) – too low and they’ll be greasy, too high and they’ll burn. 3) Not overcrowding the frying pan, which causes the oil temperature to drop. 4) Thoroughly chilling or freezing the shaped arancini before frying, which helps the coating set and crisp up beautifully.
Can I prepare the risotto ahead of time?
Absolutely! Preparing the risotto in advance is not only possible but highly recommended. Cold, firm risotto is significantly easier to handle and shape into balls than warm risotto. You can cook the risotto a day in advance, allow it to cool completely at room temperature, and then refrigerate it overnight in an airtight container. This not only saves you time on the day of serving but also helps the arancini hold their shape much more effectively during the preparation and frying stages.
More Delicious Recipes You Might Enjoy…
If you loved these Three Cheese Arancini, you’ll surely enjoy these other crispy and comforting recipes:
- Fried Mac and Cheese Balls
- Southern Fried Shrimp
- Fried Calamari
- Southern Fried Pickles
If you tried this incredible Three Cheese Arancini recipe, please consider leaving a star ⭐⭐⭐⭐⭐ rating in the recipe card below and/or a review in the comments section further down the page. Your feedback is truly appreciated and helps other home cooks discover delicious recipes! And don’t forget to follow us on Facebook or Pinterest for more delicious inspiration and cooking tips!
Three Cheese Arancini Recipe Card
Crispy, cheesy, and bursting with authentic Italian flavor, these homemade fried risotto balls are an irresistible appetizer or snack. Perfect for any occasion!
Author: Julie Maestre
Prep Time: 30 minutes
Cook Time: 30 minutes
Chill/Freeze Time: 2 hours
Total Time: Approximately 3 hours (including chilling)
Yields: 12 servings
Course: Appetizer
Cuisine: Italian American
Keywords: fried risotto balls, risotto balls, three cheese arancini, Italian appetizer
Rating: ⭐⭐⭐⭐⭐ (Based on 1 user vote)
Pin Recipe | Print Recipe

Ingredients
- 1 cup arborio rice
- 1 small shallot, finely diced
- 2 garlic cloves, finely minced
- 2 tablespoons olive oil
- 5 cups chicken stock (warm)
- ½ cup dry white wine (e.g., Pinot Grigio; or ½ cup additional chicken stock, see notes)
- 2 tablespoons unsalted butter
- 2 tablespoons mascarpone cheese
- ¾ cup freshly grated Parmesan cheese
- ¾ cup shredded or diced mozzarella cheese (for mixing into risotto and filling)
- ½ cup all-purpose flour
- 1 cup panko breadcrumbs
- 2 large eggs, whisked
- 2 teaspoons fresh parsley, finely minced (optional, for garnish or mixing into risotto)
- Salt and freshly ground black pepper to taste
- Oil, for frying (e.g., canola, vegetable, or sunflower oil, approximately 2-3 inches deep in your pot)
Instructions
- Prepare the Stock: In a small saucepan, bring the chicken stock to a gentle simmer over medium-low heat. Keep it warm throughout the risotto cooking process.
- Sauté Aromatics: Heat the olive oil in a large, heavy-bottomed skillet or Dutch oven over medium-high heat. Add the finely diced shallots and minced garlic. Cook for about 20-30 seconds until fragrant, being careful not to let the garlic brown or burn.
- Toast the Rice: Stir in the arborio rice and cook for 1 minute, toasting the grains lightly until they appear translucent around the edges. This step helps the rice absorb liquid more evenly.
- Deglaze with Wine (Optional): If using, pour in the white wine. Cook for 1 minute, stirring constantly, until the wine is completely absorbed by the rice. This adds depth and acidity to the flavor.
- Cook the Risotto: Add one ladle full (about ½ cup) of the warm chicken stock to the arborio rice. Stir continuously until the stock is completely absorbed. Repeat this process, adding one ladle of stock at a time and stirring until absorbed, until you run out of stock or the arborio rice is cooked al dente (tender with a slight bite in the center). This process typically takes about 25-30 minutes and requires frequent stirring. The finished risotto should be creamy and slightly loose.
- Finish the Risotto: Once the arborio rice is creamy and fully cooked, remove the skillet from the heat. Stir in the Parmesan cheese, mascarpone cheese, and butter. Add the finely minced parsley (if using). Season generously with salt and freshly ground black pepper to taste. Cover the skillet and let the risotto rest for 5 minutes.
- Chill the Risotto: Transfer the cooked risotto to a large, shallow bowl or baking sheet, spreading it out evenly to cool faster. Allow it to cool completely at room temperature for at least 20-30 minutes. Then, transfer it to the refrigerator and chill for a minimum of 1 hour, or preferably 2 hours, until it is thoroughly cold and firm enough to handle easily. This step is crucial for successful shaping.
- Form the Arancini Balls: Once the risotto is thoroughly chilled, scoop out portions (approximately 2 tablespoons each). Gently form each portion into a 1-inch ball. Make a small indentation in the center of each rice ball, place a small piece of mozzarella cheese inside, and carefully press the risotto around it to fully enclose the cheese. Ensure there are no visible cracks where the cheese could escape during frying. Place the shaped arancini on a parchment-lined baking sheet.
- First Freeze: Place the baking sheet with the shaped arancini into the freezer for 30 minutes. This helps them firm up and hold their shape during the breading process.
- Set Up Breading Station: While the arancini are freezing, prepare your breading station. Set up three shallow dishes: one with the all-purpose flour, one with the whisked eggs, and one with the panko breadcrumbs.
- Bread the Arancini: Gently coat each chilled arancini ball first in the all-purpose flour, shaking off any excess. Then, dip it into the beaten egg, ensuring it’s fully coated. Finally, roll it thoroughly in the panko breadcrumbs, pressing gently to ensure the crumbs adhere well and completely cover the ball. Place each breaded arancini back on the parchment-lined baking sheet.
- Second Freeze: Return the baking sheet with the breaded arancini to the freezer for another 30 minutes. This second chilling period is vital for a sturdy, crispy crust that won’t fall apart when fried.
- Deep-Fry the Arancini: Heat about 2-3 inches of canola or vegetable oil in a deep, heavy-bottomed pot or Dutch oven to 350°F (175°C). Carefully lower the arancini into the hot oil, frying in small batches to avoid overcrowding the pot (this prevents the oil temperature from dropping too much). Fry for 3-4 minutes, turning occasionally, until they are beautifully golden brown and crispy on all sides.
- Drain and Serve: Remove the fried arancini using a slotted spoon and transfer them to a plate lined with paper towels to drain any excess oil. Serve immediately while hot, alongside your favorite warm marinara sauce or vodka sauce for dipping. Enjoy your homemade Italian masterpiece!
Recipe Notes
- Wine Substitution: If you prefer to make this recipe without alcohol, simply omit the white wine and substitute it with an additional 1/2 cup of warm chicken stock in step 5.
- Oil Temperature is Critical: Maintaining a consistent frying oil temperature of around 350°F (175°C) is paramount for achieving perfectly crispy, non-greasy arancini. We highly recommend using a kitchen thermometer.
- Risotto Texture Matters: Remember, a slightly creamy and somewhat loose risotto will yield light, fluffy, and tender arancini. Avoid an overly dry risotto base, which can result in dense, dry fried balls.
- Seasoning: Always taste and adjust the seasoning (salt and pepper) of your risotto before you begin forming the balls.
- Freezing is Essential: Do not skip the chilling and freezing steps! Allowing the risotto to chill completely and freezing the formed arancini balls (both before and after breading) for at least an hour combined is crucial to prevent them from falling apart during frying and to ensure a robust, crispy exterior.
Nutrition Information
(Approximate per serving, based on 12 servings)
- Calories: 249kcal
- Carbohydrates: 26g
- Protein: 10g
- Fat: 11g
- Saturated Fat: 5g
- Polyunsaturated Fat: 1g
- Monounsaturated Fat: 4g
- Trans Fat: 0.1g
- Cholesterol: 48mg
- Sodium: 352mg
- Potassium: 171mg
- Fiber: 1g
- Sugar: 2g
- Vitamin A: 234IU
- Vitamin C: 1mg
- Calcium: 134mg
- Iron: 2mg
Nutrition information is automatically calculated and should only be used as an approximation. Individual results may vary based on specific ingredient brands, exact quantities, and preparation methods.