
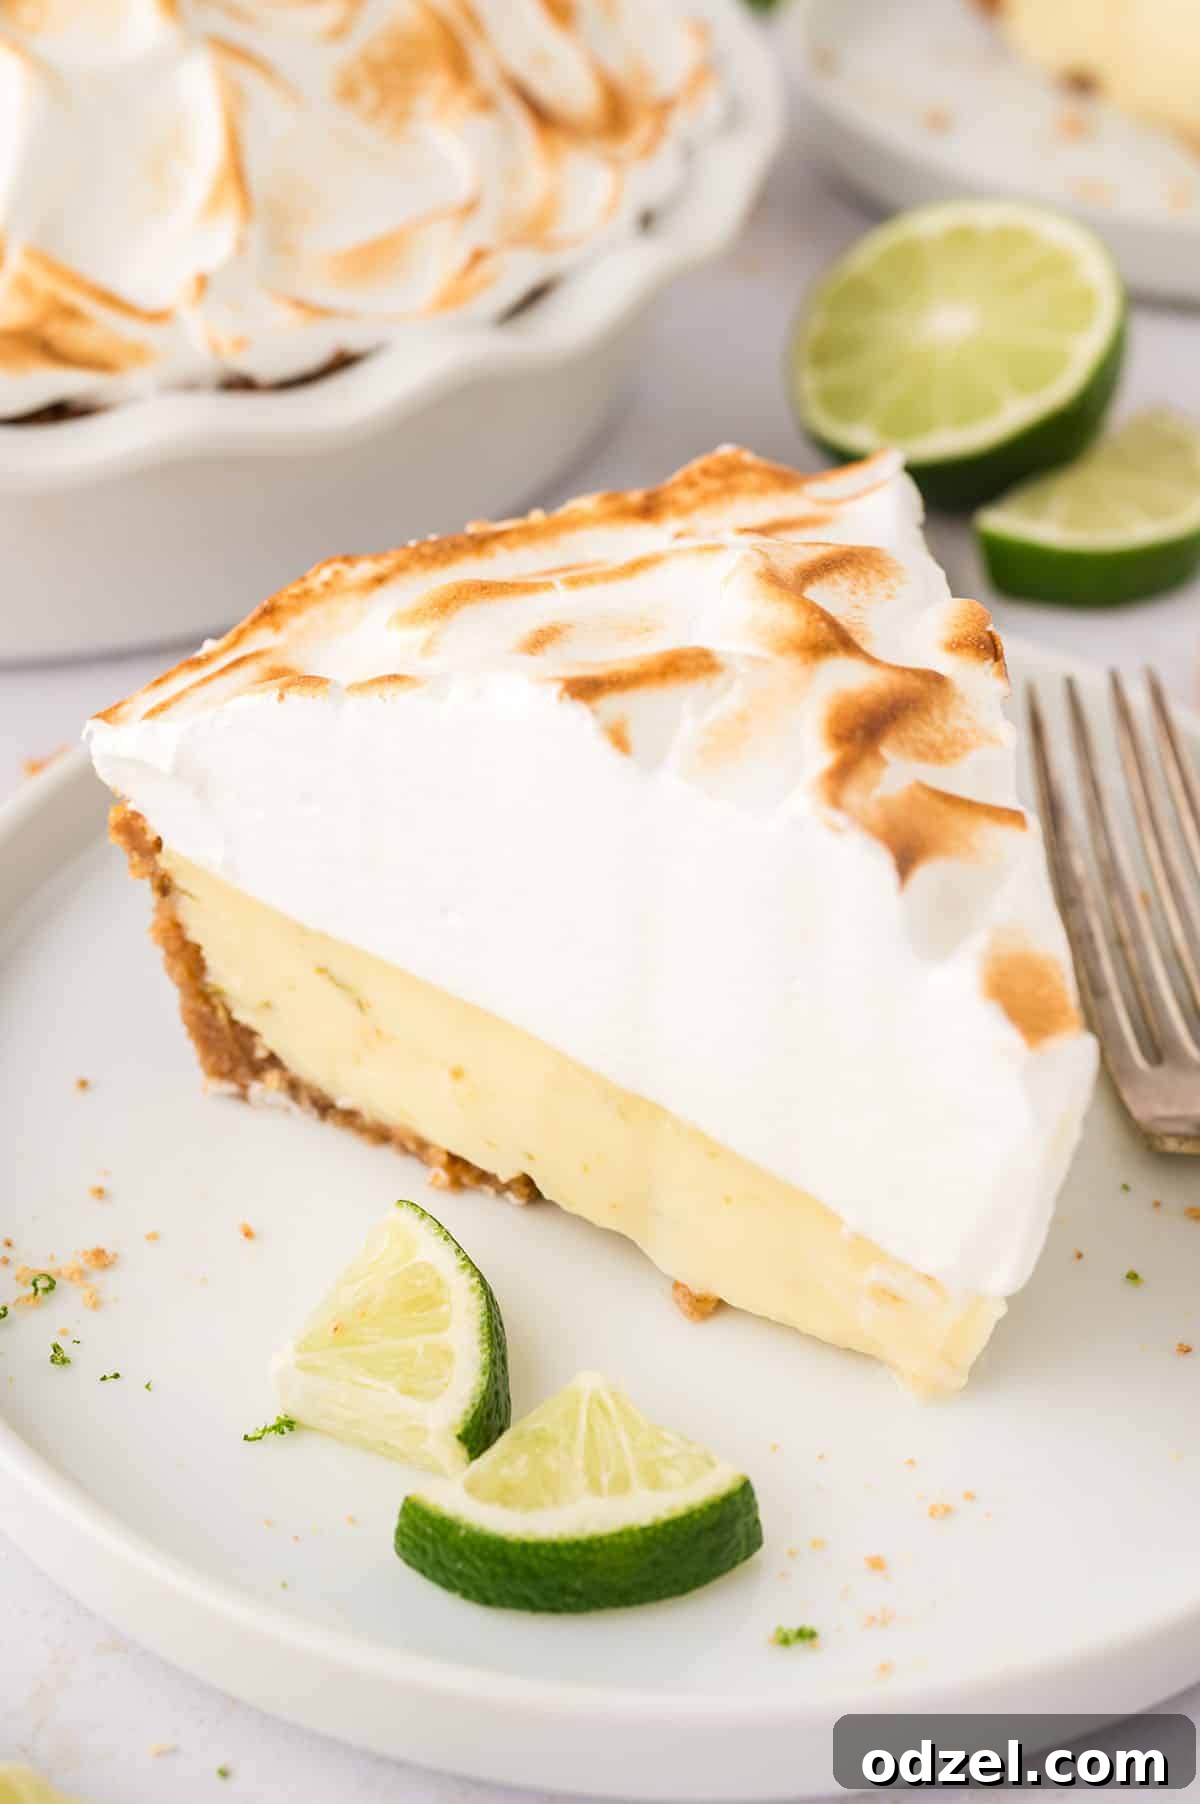
The Ultimate Classic Key Lime Pie with Toasted Italian Meringue
Prepare to be transported straight to the sun-drenched shores of the Florida Keys with this exquisite Classic Key Lime Pie recipe. This isn’t just any pie; it’s a culinary journey featuring a buttery graham cracker crust, a lusciously creamy, perfectly sweet, and delightfully tart lime filling, crowned with a light and airy, subtly toasted Italian meringue. It’s an iconic dessert that captures the vibrant essence of its origins in every single bite.
For more of my favorite dessert creations that are sure to impress, don’t miss this decadent pecan cream pie and the comforting flavors of Southern sweet potato pie.
If you’ve ever had the pleasure of visiting the Florida Keys, you know that Key Lime Pie isn’t just a dessert there; it’s a way of life. The island’s signature treat comes in various forms, with some establishments preferring a simple whipped cream topping while others champion the elegant Italian meringue. My personal preference leans strongly towards the Italian meringue, as its cloud-like texture and slightly toasted peaks perfectly complement the zesty filling. However, feel absolutely free to customize this pie with your favorite topping – whether it’s a dollop of fresh whipped cream or even a simple garnish of lime zest!
Crafting the Perfect Key Lime Pie: Essential Ingredients
The magic of this classic dessert lies in its minimal yet impactful ingredients. Each component plays a crucial role in achieving that signature creamy, tart, and sweet balance. Below, we delve into the key ingredients, ensuring you pick the best for an unforgettable pie.
- Graham Cracker Crumbs: The foundation of our pie, a crisp and buttery graham cracker crust provides the perfect counterpoint to the creamy filling. You can easily find pre-crushed graham cracker crumbs at most grocery stores, or opt for a premade crust for ultimate convenience. For the freshest taste and texture, however, I highly recommend crushing 11 full sheets of graham crackers in a food processor until fine. This allows you to control the consistency and ensures maximum flavor.
- Sweetened Condensed Milk: This ingredient is the undisputed star of our Key Lime Pie filling. It provides the signature smooth, custardy texture and rich sweetness that defines the pie. It’s crucial to use *sweetened condensed milk* and not to confuse it with evaporated milk, which is unsweetened and will not yield the same results. The high sugar content and thick consistency of sweetened condensed milk are what allow the lime juice to ‘set’ the filling without excessive baking, creating that iconic creamy custard.
- Fresh Lime Juice: While authentic Key limes can sometimes be a challenge to find outside of Florida, this recipe brilliantly utilizes fresh Persian limes – the more common green limes found in nearly every grocery store. Their bright, vibrant acidity works beautifully here. If you happen to find genuine Key limes, by all means, use them for an even more authentic flavor! While bottled Key lime juice is available, for the freshest and most authentic flavor, always prioritize freshly squeezed juice.
- Lime Zest: Don’t skip this vital component! Zesting your limes *before* juicing them is a golden rule. The zest holds a concentrated burst of lime oil, offering an intense aromatic lime flavor without adding extra acidity. It provides a deeper, more complex citrus note that elevates the pie beyond just tartness.
- Eggs: Fresh, large eggs are always best for baking. In this recipe, we cleverly divide the eggs: the yolks contribute to the rich, custard-like texture of the filling, while the whites are reserved for our magnificent Italian meringue topping. Bringing them to room temperature beforehand can help them whip up more effectively.
- Lemon Juice or Cream of Tartar: These acidic ingredients are essential for creating a stable, light, and fluffy Italian meringue. Adding a touch of acid to the egg whites helps to denature the proteins, creating a stronger, more resilient foam that holds its shape beautifully and prevents the meringue from weeping or collapsing.
Mastering Your Key Lime Pie: Expert Tips for Success
Achieving a show-stopping Key Lime Pie with a perfect Italian meringue requires a few key techniques. Pay close attention to these tips to ensure your pie turns out flawlessly every time.
- Meringue Prep is Paramount: When preparing your Italian meringue, meticulous cleaning of your stand mixer bowl and whisk attachment is non-negotiable. Even the slightest trace of grease or oil can prevent egg whites from whipping up properly. After washing, thoroughly wipe the bowl and whisk with lemon juice or white vinegar, then dry completely. This extra step guarantees a pristine environment for your egg whites to reach their full, voluminous potential.
- Precision Egg Separation: This recipe uses four large eggs, separating the yolks for the rich pie filling and the whites for the meringue. It is absolutely crucial that no trace of egg yolk contaminates the egg whites. Yolk contains fat, which, like oil, will prevent the egg whites from forming stiff peaks, resulting in a flat or runny meringue. Separate them carefully, perhaps cracking each egg into a small bowl first before adding the white to your main meringue bowl.
- Italian Meringue – A Delicate Dance: Italian meringue, while stunning, can be a bit finicky due to the hot sugar syrup involved. Don’t be intimidated, but do read the instructions thoroughly multiple times before you begin. Understanding each step, especially the sugar syrup temperature and the slow pouring technique, will greatly increase your chances of success. Patience and precision are your best friends here!
- Chill Time is Your Friend: While it’s tempting to dive right into your freshly baked pie, the chilling period is essential. It allows the filling to fully set, firm up, and develop its rich, creamy texture. Rushing this step can lead to a pie that is too soft or runny.
- Don’t Overbake the Filling: The Key Lime Pie filling sets as it cools. Overbaking can lead to a dry or curdled filling. The goal is for the center to be just slightly wobbly when gently shaken, like a perfectly set cheesecake. It will continue to firm up as it chills.
Make-Ahead & Storage Instructions
Planning ahead can make dessert preparation a breeze, and this Key Lime Pie offers some flexibility. Knowing how to store it correctly ensures you can enjoy its fresh taste for longer.
Make-Ahead Tips:
You can prepare elements of this pie a few days in advance to streamline your baking process. The graham cracker crust can be prepared and baked, then covered tightly and stored at room temperature for up to 2-3 days. Similarly, the key lime filling can be mixed (without the egg yolks), covered, and refrigerated for up to 2 days. When you’re ready to assemble, simply whisk in the egg yolks to the chilled filling, pour it into your cooled crust, and bake. However, the Italian meringue is best prepared just before serving. Meringue, especially Italian meringue, is delicate and can begin to deflate and weep (release moisture) if left to sit for too long, typically within a few hours. For the freshest and most impressive presentation, make the meringue last.
Storage Recommendations:
Once assembled and chilled, store your Key Lime Pie in an airtight container in the refrigerator for up to 3 days. This helps to maintain its freshness and prevents it from absorbing other odors from the fridge. For longer storage, you can freeze the pie. Wrap it tightly in plastic wrap first, then a layer of aluminum foil, and place it in an airtight freezer-safe container. It will keep well in the freezer for up to 3 months. Be aware that the texture of the meringue might change slightly after thawing from the freezer, becoming a bit softer. To thaw, simply transfer the pie to the refrigerator overnight.
Loved this recipe? I’d be thrilled if you could leave a star ⭐️⭐️⭐️⭐️⭐️ rating and/or a review in the comments section below the recipe card. Your feedback is incredibly valuable! And don’t forget to follow me on Facebook or Pinterest for more delicious recipes!

Classic Key Lime Pie
By Julie Maestre
A zesty, tart, and creamy pie consisting of a sweet and buttery graham cracker crust, a thick custardy lime filling, topped with an elegant Italian meringue that is subtly toasted to perfection.
Prep Time: 30 mins
Cook Time: 40 mins
Chill Time: 5 hrs
Total Time: 6 hrs 10 mins
Servings: 8
Enjoy this recipe? Share it or save it for later!
- Pin Recipe
- Rate Recipe
- Print Recipe
Ingredients
Crust
- 1 ½ cups graham cracker crumbs (about 11 full crackers, finely crushed)
- ¼ cup granulated sugar
- 6 tablespoons butter, melted
Filling
- 28 oz sweetened condensed milk (two 14 oz cans)
- 1 cup lime juice (zest limes before juicing)
- 2 teaspoons lime zest (from about 2 limes)
- 1 teaspoon vanilla extract
- 4 large egg yolks
Italian Meringue
- 4 large egg whites, at room temperature
- 1 teaspoon lemon juice or cream of tartar
- 1 cup granulated sugar
- ½ cup water
Instructions
-
FOR THE CRUST:
In a 9-inch pie dish, combine the graham cracker crumbs, ¼ cup granulated sugar, and melted butter until thoroughly mixed. Press the mixture firmly and evenly into the bottom and up the sides of the pie dish. You can use your fingers or the bottom of a glass cup to ensure the crumbs are compact and no longer crumbly. This firm base is crucial for a stable crust. Bake the crust at 350°F (175°C) for 10 minutes to set it, then allow it to cool completely on a wire rack before adding the filling. A well-cooled crust prevents the filling from becoming soggy.
-
FOR THE FILLING:
In a medium bowl, whisk together the sweetened condensed milk, lime juice, lime zest, and vanilla extract until well combined and smooth. Next, thoroughly whisk in the four large egg yolks until the mixture is uniform. Pour this vibrant filling into your completely cooled graham cracker crust. Bake at 350°F (175°C) for 23-24 minutes. The center should appear mostly set but still have a slight jiggle when gently shaken, indicating a creamy texture. Avoid overbaking, as this can make the pie rubbery. Once baked, let the pie cool to room temperature on a wire rack, then refrigerate for a minimum of 4 hours, or ideally overnight, to allow the filling to fully set and firm up.
-
FOR THE ITALIAN MERINGUE:
Please read these instructions carefully and entirely before beginning, as Italian meringue can be delicate to master! Start by thoroughly washing and drying the whisk attachment and the bowl of your stand mixer. To eliminate any lingering oils, wipe down the bowl and whisk with a small amount of lemon juice or white vinegar, then dry again completely. Pour your room temperature egg whites into the impeccably clean bowl, ensuring they are entirely free of any egg yolk contamination. Add the lemon juice or cream of tartar. Begin whipping the egg whites on medium-low speed. It’s important to keep the mixer running throughout the sugar syrup preparation.
-
While the egg whites are whipping, combine the 1 cup of granulated sugar and ½ cup of water in a small, heavy-bottomed saucepan. Heat this mixture over medium-high heat, stirring frequently until the sugar dissolves and it begins to boil. Once boiling vigorously, refrain from stirring. Keep an eye on the sugar syrup; it may begin to crystallize along the sides of the pot just above the liquid line. If this happens, use a pastry brush dipped in a little water to gently brush down the sides of the pot, dissolving the sugar crystals back into the syrup. This prevents further crystallization. The sugar syrup must reach a temperature of 243°F (118°C) on a reliable candy thermometer. This process typically takes about 20 minutes on most stovetops, depending on your heat setting.
-
Once the sugar syrup reaches precisely 243°F (118°C), immediately remove it from the heat and set it aside to cool for less than a minute. During this very brief cooling period, increase your stand mixer’s speed to high. Now, with the mixer still running on high, slowly and carefully pour the hot sugar syrup down the side of the mixer bowl in a thin, steady stream. It is absolutely crucial to avoid pouring the syrup directly onto the whisk or into the center of the egg whites, as this will cook the eggs and ruin the meringue. The slow, steady stream against the side of the bowl allows the syrup to be incorporated gradually and safely. Ensure the syrup is fully incorporated. If the whisking speed is too low during this step, the hot syrup will cook the eggs, resulting in a grainy, bubbly meringue instead of a smooth, voluminous one. You will notice the meringue mixture significantly expand in size and become glossy during this process.
-
After all the sugar syrup has been incorporated, continue to whisk the meringue on high speed for another 7-8 minutes. The meringue will transform into a thick, glossy, and incredibly fluffy consistency, forming stiff peaks. You’ll know it’s ready when the bowl of the stand mixer feels only slightly warm or even cool to the touch. Turn off the mixer and lift the whisk attachment; the meringue should hold its shape beautifully in firm, distinct peaks.
-
Carefully scoop generous dollops of the Italian meringue over your chilled Key Lime Pie, ensuring the entire surface, including the edges of the crust, is covered. Use the back of a spoon to create decorative swirls and peaks in the meringue – this adds to the visual appeal and provides more surface area for toasting. Finally, use a kitchen torch to lightly toast the peaks of the meringue until they are beautifully golden brown. This step adds a wonderful caramelized flavor and a professional finish.
-
To serve your magnificent Key Lime Pie, the best method for clean slices is to use a long, thin knife. Before each cut, dip the knife into hot water and wipe it clean. This warmth helps the knife glide smoothly through the creamy filling and stable meringue, preventing sticking and creating perfectly neat slices. Repeat this hot water and wipe technique for every slice as necessary.
Notes
- Achieving a successful Italian meringue hinges on absolutely clean equipment. Any residual oils or grease on your mixer bowl or whisk will prevent the egg whites from whipping to stiff peaks. Wiping them down with lemon juice or vinegar after washing and then drying thoroughly is a crucial step.
- When separating the egg yolks from the whites, be extremely careful not to let any yolk contaminate the whites. Even a tiny amount of fatty yolk can compromise the meringue’s ability to whip properly, resulting in a flat and unstable topping.
Nutrition
(Approximate values per serving, calculated automatically)
- Calories: 626 kcal
- Carbohydrates: 100g
- Protein: 12g
- Fat: 21g
- Saturated Fat: 12g
- Polyunsaturated Fat: 1g
- Monounsaturated Fat: 6g
- Trans Fat: 0.3g
- Cholesterol: 148mg
- Sodium: 331mg
- Potassium: 472mg
- Fiber: 1g
- Sugar: 90g
- Vitamin A: 665 IU
- Vitamin C: 12mg
- Calcium: 314mg
- Iron: 1mg
Nutrition information is automatically calculated and should only be used as an approximation. Individual results may vary based on exact ingredients and preparation methods.
Additional Info
Author: Julie Maestre
Prep Time: 30 minutes
Cook Time: 40 minutes
Chill Time: 5 hours
Total Time: 6 hours 10 minutes
Course: Dessert
Cuisine: American
Servings: 8
Keywords: classic key lime pie, homemade key lime pie, key lime pie, key lime pie with meringue
Like this recipe? Leave a comment below!
Your feedback helps me create more delicious content for you.