
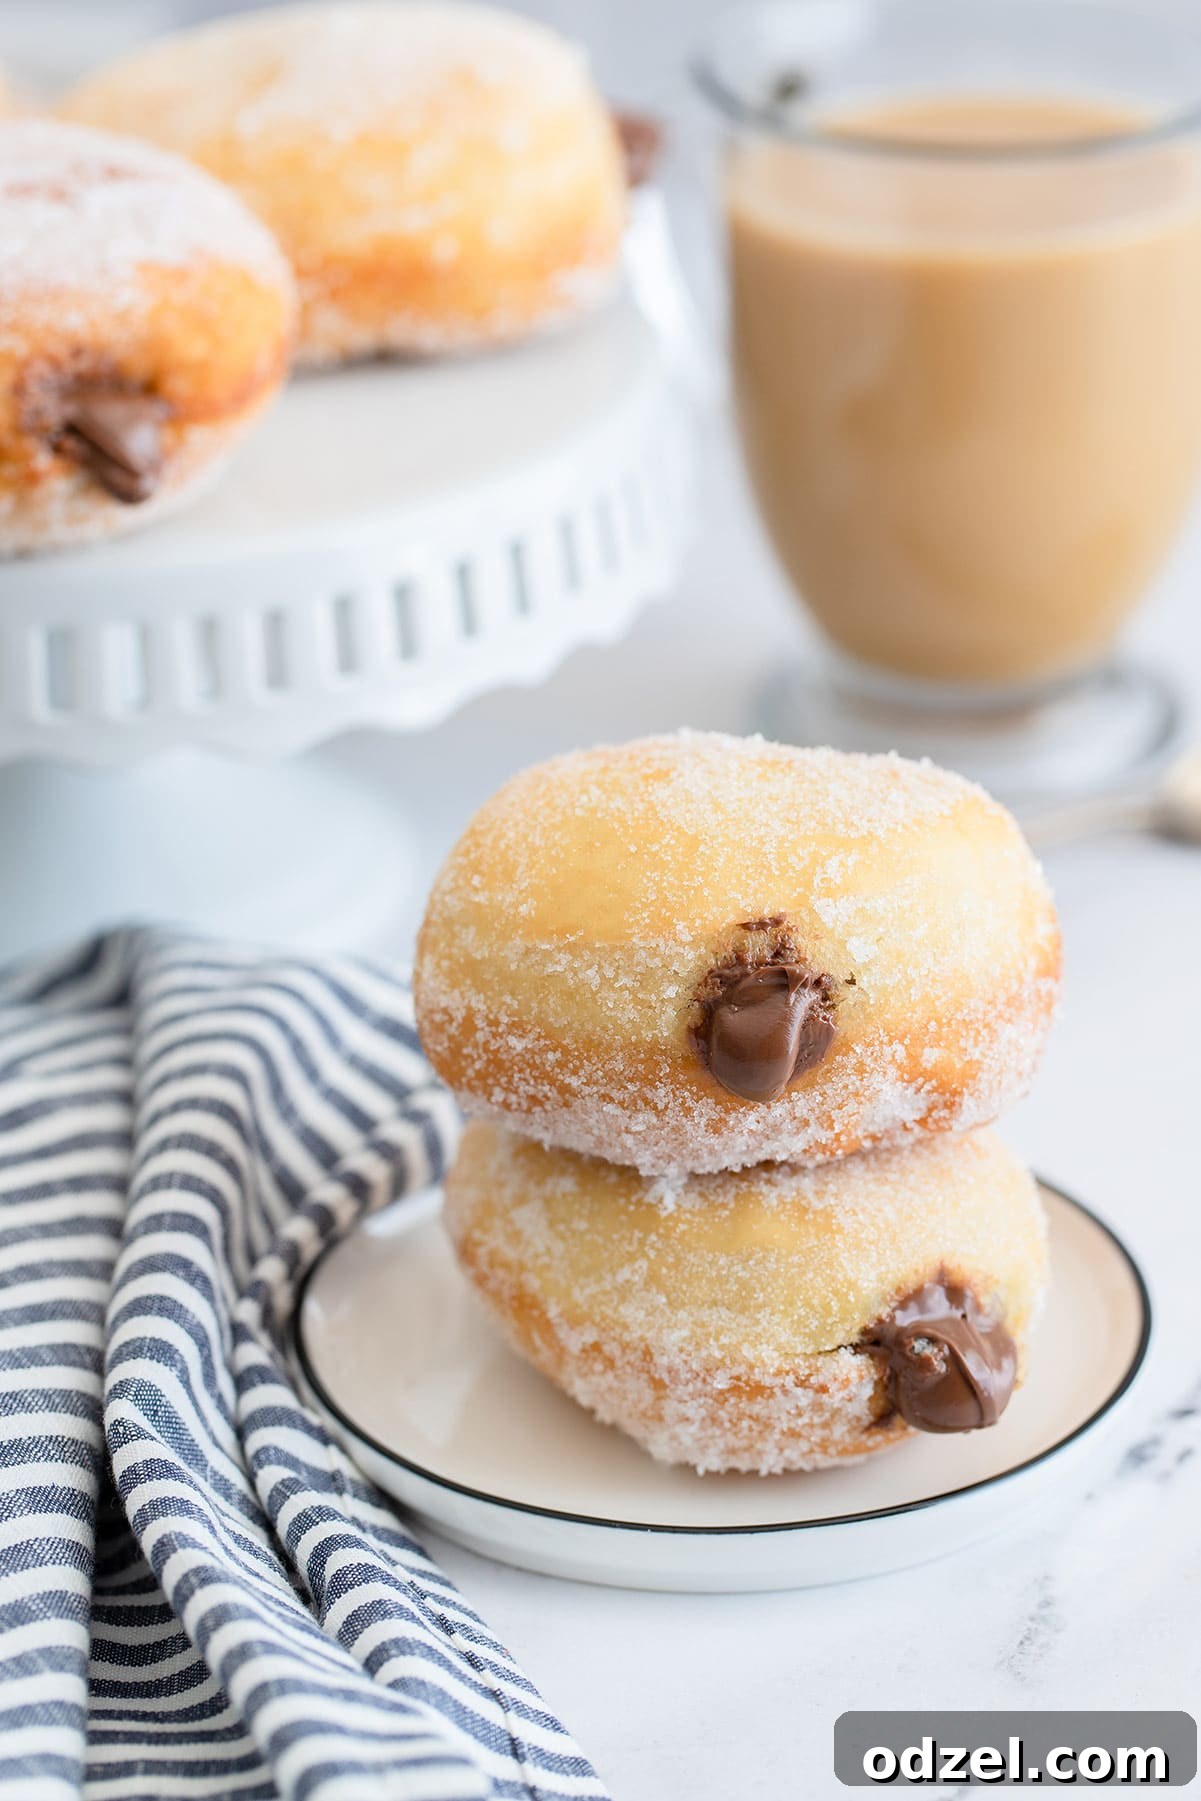
Irresistible Nutella Stuffed Donuts (Bombolini): Your Ultimate Homemade Treat
Prepare to elevate your culinary skills and tantalize your taste buds with this sensational recipe for **Nutella Stuffed Donuts**, affectionately known as Italian Bombolini. Imagine sinking your teeth into a perfectly golden, airy, and wonderfully soft fried dough, only to discover a warm, luscious core of rich hazelnut spread. Dusted with a delicate coat of granulated sugar, these delectable pastries are more than just a treat; they’re an experience, a journey into the heart of sweet indulgence that promises to become a firm family favorite.
This comprehensive guide will walk you through every step of crafting these amazing Nutella Stuffed Bombolini, from activating the yeast and mastering the dough to achieving that perfect golden fry and, of course, generously filling each donut with the irresistible Nutella. Whether you’re a seasoned baker looking for a new challenge or a kitchen novice eager to impress, you’ll find joy and satisfaction in creating these delightful bombolini. They are perfectly suited for a memorable breakfast, a luxurious dessert, or a cherished afternoon snack, bringing a touch of Italian bakery charm right into your home.
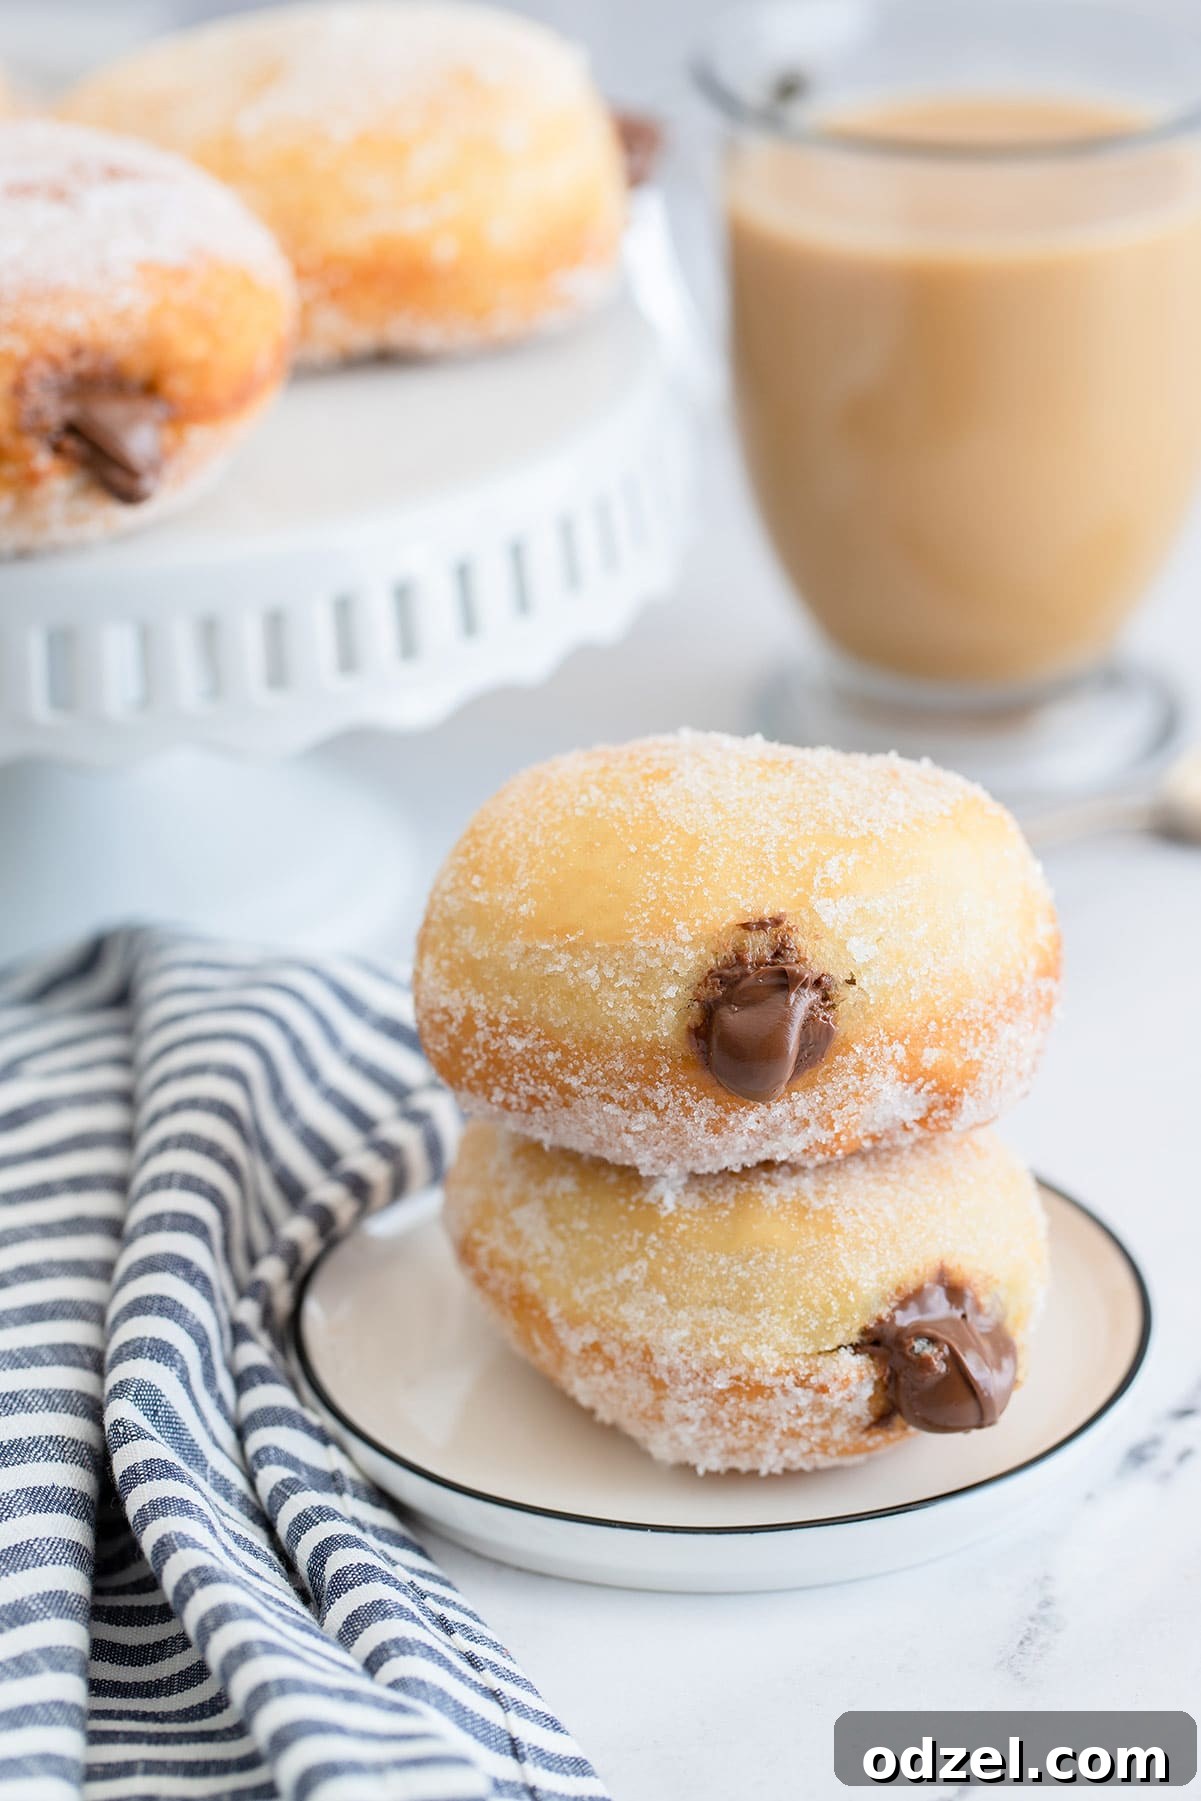
The Sweet Allure of Nutella and Italian Bombolini
There’s an undeniable magic in hazelnut spread, isn’t there? For many, it’s more than just a condiment; it’s a culinary obsession, a jar of pure joy waiting to be unleashed. Every dish it graces transforms into something truly special, almost as precious as gold. In this recipe, the beloved Nutella finds its perfect partner in bombolini, the Italian version of fried doughnuts. Unlike the typical ring-shaped donuts often seen, bombolini are traditionally round, unfilled until after frying, and then generously pumped with a sweet filling. This design offers a delightful, unexpected burst of flavor with every single bite.
My personal journey into the world of Nutella recipes has been extensive and wonderfully delicious. While it’s tough to pick an absolute favorite from countless creations, these Nutella Stuffed Donuts undoubtedly hold a top spot in my heart. The anticipation of biting into a warm, soft donut bursting with creamy hazelnut is unparalleled. If I had to narrow down my top three Nutella delights, these bombolini, along with my beloved Nutella Cupcakes and the silky smooth Nutella Mousse, would definitely top the chart. These recipes showcase the incredible versatility and sheer indulgence of Nutella, proving it’s a pantry staple for any dessert lover.
Mastering the Dough: A Step-by-Step Guide to Perfect Nutella Stuffed Donuts
Creating homemade donuts might seem like a daunting task, but with these clear, easy-to-follow steps, you’ll be a bombolini master in no time. The key to light and airy donuts lies in careful dough preparation and patience, particularly during the crucial rising phases.
-
Activate the Yeast for Fluffy Dough
Begin by combining warm water and sprinkling dry active yeast over it in a large stand mixer bowl. The water should be comfortably warm, ideally between 105-115°F (40-46°C). This temperature range is crucial for properly activating the yeast without killing it (if too hot) or hindering its growth (if too cold). Let this mixture sit undisturbed for about 5-10 minutes. You’ll know the yeast is active and thriving when a foamy, bubbly layer appears on the surface, indicating it’s ready to work its magic and help your dough rise beautifully and become wonderfully airy.
-
Mix the Wet and Dry Ingredients
Once your yeast is active and foamy, add the remaining ingredients for the dough: warm milk, granulated sugar (for the dough itself), salt, shortening (melted and slightly cooled to avoid shocking the yeast), eggs, and precisely half of the all-purpose flour. Attach a dough hook to your stand mixer and mix these ingredients on low speed until they are well combined and begin to form a somewhat loose and sticky dough. This initial mixing ensures all ingredients are integrated before adding the rest of the flour.
-
Develop the Dough and First Rise
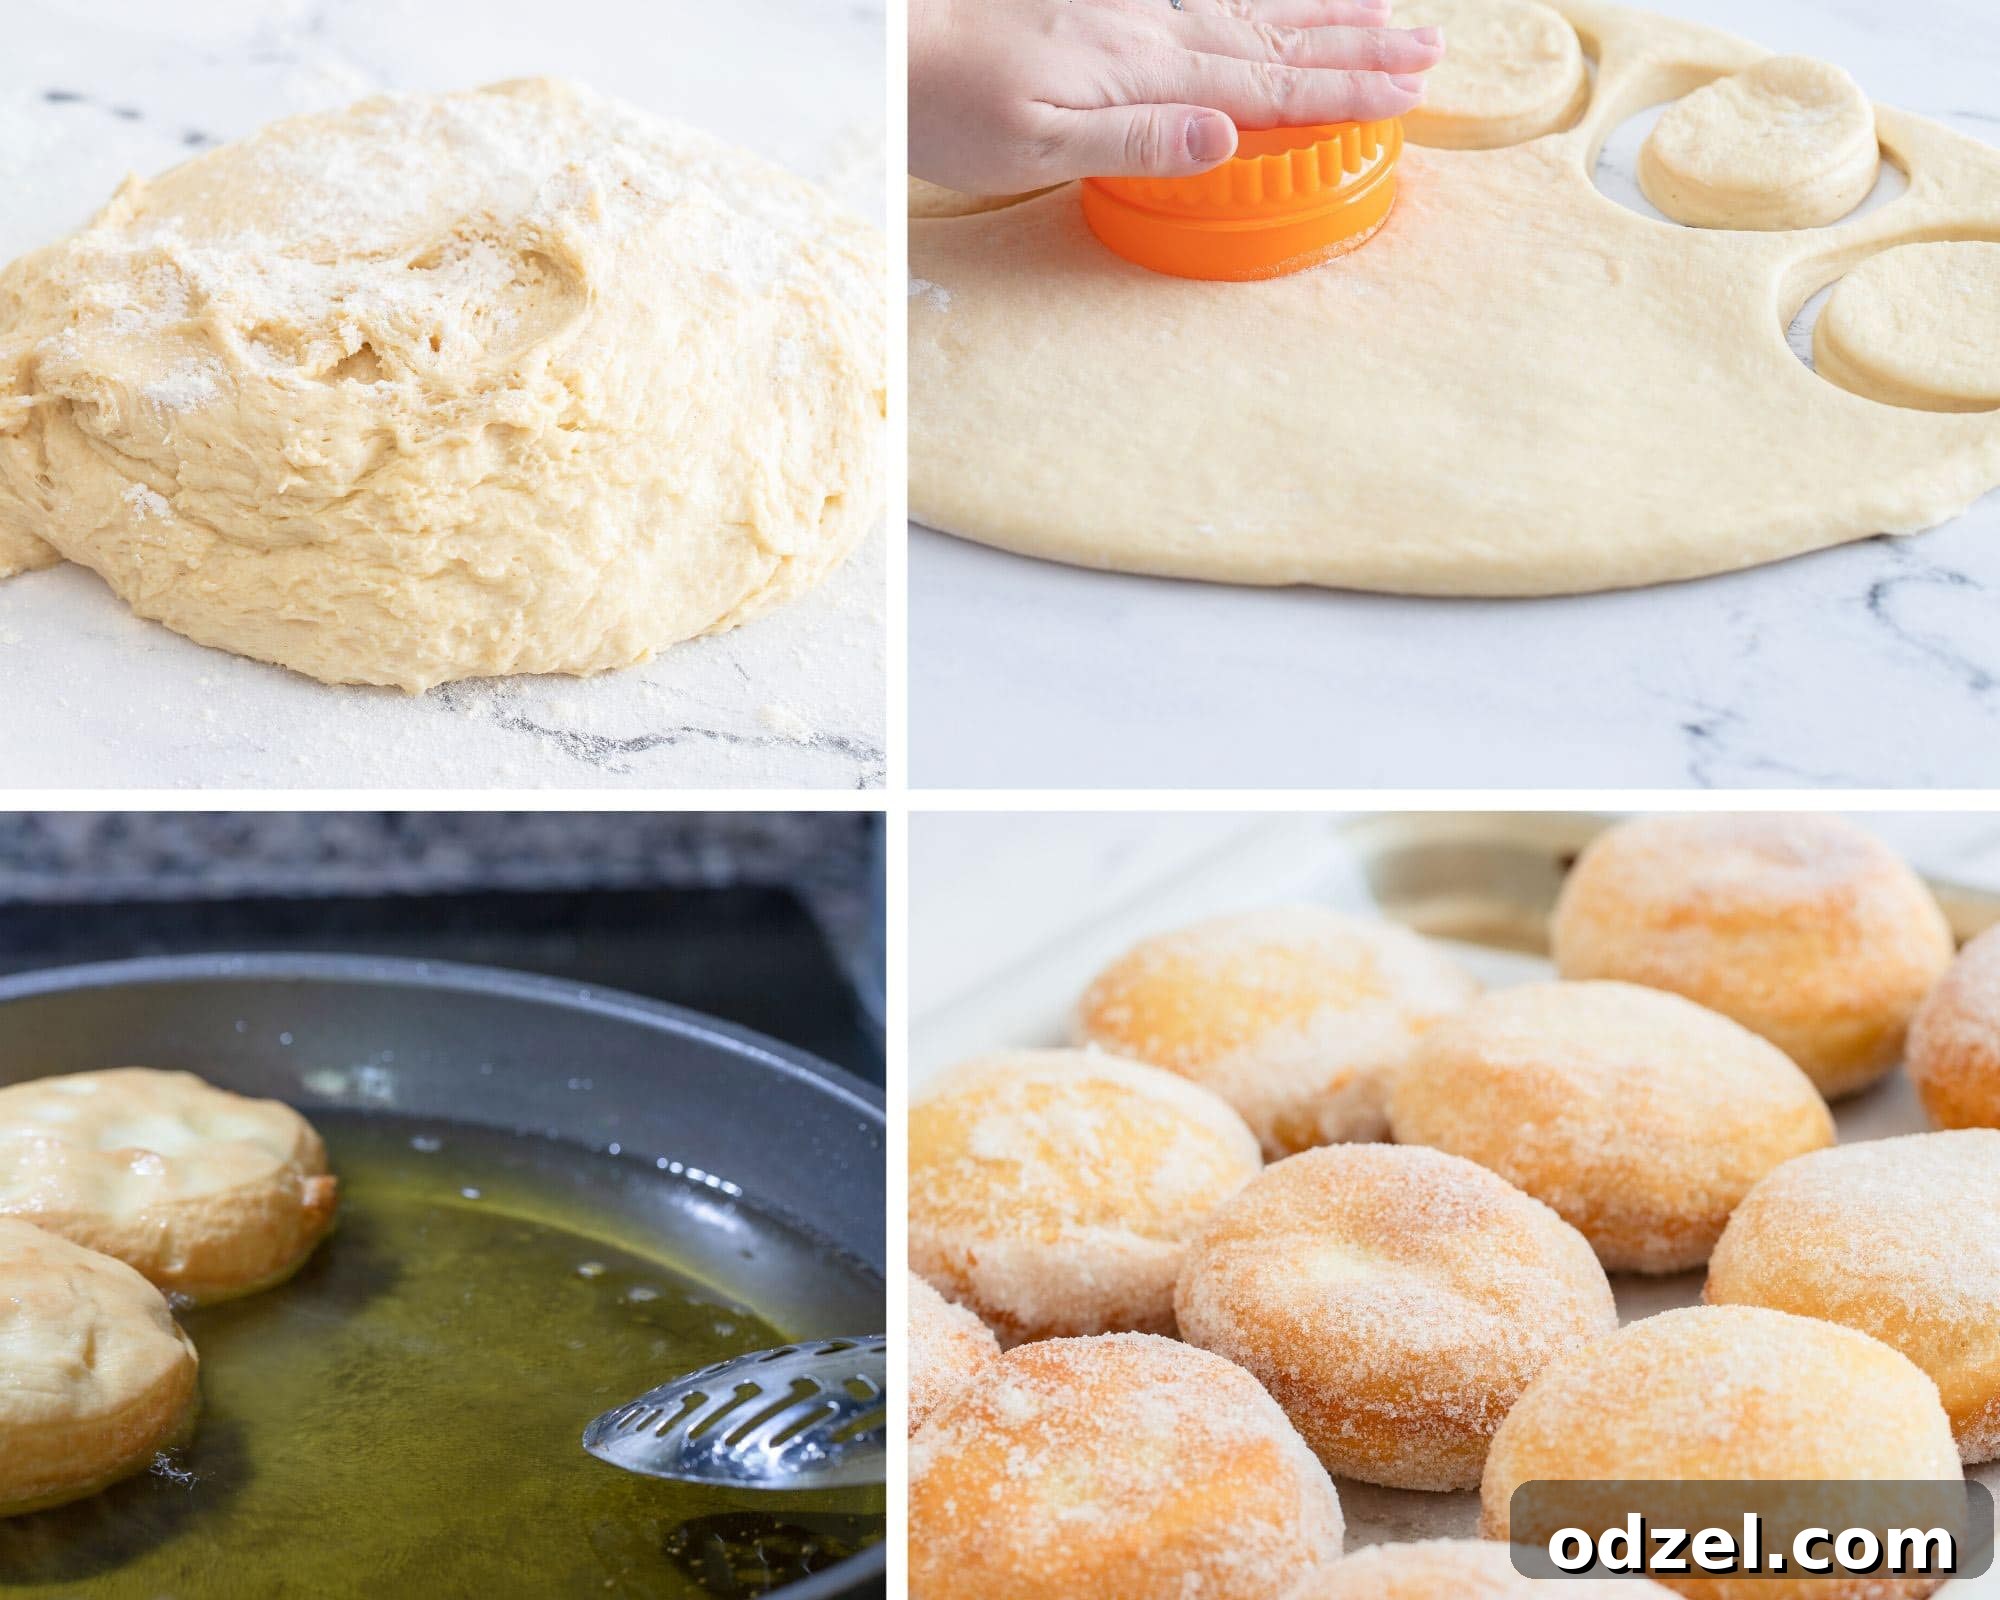
Gradually add the remaining all-purpose flour, a little at a time, continuing to mix until the dough comes together. It should be smooth and elastic, yet still slightly sticky to the touch – it shouldn’t be overly dry or stiff. Avoid adding too much flour, as this can result in tough donuts. Transfer the dough to a lightly greased large bowl, turning it once to coat all sides. Cover the bowl tightly with plastic wrap or a clean kitchen towel and let it rise in a warm, draft-free environment for approximately 2 hours, or until it has noticeably doubled in size. This first rise is absolutely crucial for developing deep flavor and achieving a wonderfully light texture.
-
Shape Your Bombolini
After the dough has completed its first rise, gently punch it down to release the accumulated air. Transfer the dough to a lightly floured surface and knead it for just a minute or two. This brief kneading helps to redistribute the yeast and creates an even smoother, more manageable dough for rolling. Using a floured rolling pin, roll the dough out evenly to about ½ inch thickness. Now, using a donut cutter or a round drinking glass (typically 2.5-3 inches in diameter for bombolini), cut out your donut shapes. Re-gather any dough scraps, gently re-knead them, and re-roll once to cut out additional donuts, being careful not to overwork the dough, which can make it tough.
-
Second Rise and Golden Frying
Carefully place the cut donut rounds on a parchment-lined baking sheet, ensuring there’s ample space between each one to allow for expansion. Cover them again with plastic wrap or a clean kitchen towel and let them rise for another 45 minutes. This second rise is vital for ensuring the donuts are incredibly light and fluffy when fried. While they rise, heat about 3-4 inches of vegetable oil in a deep pot or Dutch oven to approximately 350°F (175°C). Maintaining a consistent oil temperature with a thermometer is essential for even cooking and a beautiful golden-brown crust without over-browning or undercooking the interior. Fry the donuts in batches for about 2 minutes per side, or until they turn a beautiful golden brown and are puffed up. Using a slotted spoon, carefully remove the fried donuts and place them on a wire rack set over paper towels to drain any excess oil. While still warm, generously coat them with granulated sugar, which adheres best when the donuts are still hot from the oil.
-
Fill with Nutella and Serve Warm
Once the donuts are slightly cooled but still warm to the touch, it’s time for the star of the show – the Nutella filling! Use a skewer, a thin knife, or a chopstick to create a small hole on the side of each donut, gently wiggling it to create a cavity inside. Transfer your room-temperature Nutella into a piping bag fitted with a small, round tip (or a sturdy plastic freezer bag with one corner snipped off). Insert the tip into the hole you created and pipe in a generous amount of Nutella until the donut feels weighty and satisfyingly full. Serve these glorious Nutella Stuffed Bombolini immediately to enjoy them at their absolute best, experiencing the irresistible contrast of warm dough and creamy hazelnut!
Expert Tips and Delightful Variations for Your Homemade Bombolini
Making these Nutella Stuffed Donuts is a rewarding culinary adventure, and a few expert tips can ensure your success, along with creative ideas to personalize your batch and make them truly your own.
-
Optimal Storage Solutions
For the freshest and most delicious experience, these donuts are undeniably best enjoyed on the day they are made. However, if you find yourself with delightful leftovers, proper storage will extend their enjoyment. Store them in an airtight container to maintain their softness. At room temperature in a cool, dry pantry, they will remain delicious for up to 2 days. If you need them to last longer, storing them in the refrigerator can keep them fresh for up to a week. For extended preservation, you can freeze un-filled donuts in an airtight container for up to a month. Thawing them gradually in the refrigerator before reheating or filling is recommended.
-
Reheating for Freshness and Warmth
To bring refrigerated Nutella Stuffed Donuts back to life with a warm, soft texture, a quick reheat in the microwave for only a few seconds (typically 5-10 seconds, depending on your microwave’s power) will do the trick. If you’re enjoying donuts stored in the pantry, reheating isn’t typically necessary as they retain their delightful softness well at room temperature. For frozen donuts, always allow them to thaw completely at room temperature or in the refrigerator before giving them a brief microwave warm-up if you prefer them served warm.
-
Creative Filling Alternatives and Flavor Twists
While Nutella is the undisputed star of this recipe, don’t hesitate to unleash your culinary creativity and experiment with other delicious fillings! The possibilities are truly endless. Consider a classic vanilla bean custard, various vibrant fruit jams (raspberry, strawberry, apricot, or even a spicy pepper jelly), creamy peanut butter or almond butter, a rich chocolate ganache, tangy lemon curd, or even a comforting spiced apple butter. Each alternative offers a unique flavor profile that beautifully complements the fluffy donut dough, allowing you to cater to different tastes or simply enjoy a variety. You could even create a mixed batch for an exciting dessert platter!
-
Achieving the Perfect Donut Shape
For consistent, professional-looking bombolini, a donut cutter with a sharp, clean edge is an ideal tool. However, if you don’t have one readily available, a simple drinking glass with a rim of about 2.5 to 3 inches in diameter works perfectly. Just make sure to dip the rim of the glass in flour before each cut to prevent the dough from sticking and ensure clean, well-defined edges. For a more rustic, hand-crafted aesthetic, you can also gently shape small balls of dough by hand, though consistency might vary.
-
Effortless Piping of the Filling
A piping bag fitted with a medium-sized round tip is the most efficient and cleanest way to fill your donuts, ensuring an even and generous distribution of Nutella or your chosen filling. If a piping bag isn’t on hand, a sturdy Ziploc or freezer bag with one corner carefully snipped off will serve as an excellent improvised alternative. For even greater precision, especially with thinner fillings, a baking syringe or even a small, clean pastry tip attached to a cut-off corner of a plastic bag can be utilized. Always ensure your Nutella or other filling is at room temperature for easier and smoother piping.
-
Beyond Granulated Sugar: Elevating the Coating
While a simple dusting of granulated sugar is classic and delicious, consider other coatings to enhance your bombolini. Rolling your warm donuts in powdered sugar creates a delicate, melt-in-your-mouth finish. A cinnamon-sugar mixture adds a delightful warmth and spice. For an even richer experience once the donuts have cooled slightly, a light glaze made from powdered sugar and milk or citrus juice can be drizzled over them, adding an extra layer of sweetness and visual appeal.

Demystifying Donut Terminology: Donut vs. Doughnut
Have you ever found yourself pondering the semantic difference between “donut” and “doughnut”? The answer might surprise you with its simplicity: there isn’t one! Both terms refer to the exact same beloved fried pastry. The distinction lies purely in linguistic evolution and regional preference. “Doughnut” is recognized as the original, more traditional, and formal spelling, steeped in the etymological history of the word, literally referring to “nuts of dough.” However, Americans, known for their tendency to shorten and simplify words for efficiency, enthusiastically adopted “donut” as a common, informal, and now widely accepted alternative spelling. Today, you’ll likely encounter the shortened “donut” spelling more frequently in everyday usage, from the bustling counters of coffee shops to the aisles of grocery stores, making it a familiar and ubiquitous sight across the United States and beyond, though “doughnut” still holds its ground in more formal contexts.
The Curious Origin: Why Are They Called Donuts?
The naming of this universally popular dessert doesn’t stem from a grand, pre-planned strategy or a sophisticated marketing campaign, but rather from a casual yet impactful observation. The term “doughnut” was notably coined by American author Washington Irving in the early 1800s. In his 1809 work, “A History of New York,” Irving made reference to “doughnuts,” specifically describing small, round pieces of fried dough that, to him, bore a resemblance to nuts. These small fried pieces were likely the ancestors of what we now affectionately call donut holes – the doughy centers or leftover bits from cutting larger rings. While the precise reasoning behind his choice of “nut” as a descriptor remains a topic of mild conjecture among food historians, it’s quite easy to visualize how small, irregular pieces of dough, fried until golden brown and puffed, could indeed evoke the appearance of walnuts, hazelnuts, or other tree nuts. This simple, perhaps accidental, coining of the term stuck, evolving over centuries into the iconic name we use today for these delicious fried treats, forever linking their shape to nature’s own small, edible kernels.
Your Complete Nutella Stuffed Donuts (Bombolini) Recipe

Nutella Stuffed Donuts (Bombolini)
These incredibly light and fluffy donuts are generously filled with the creamiest Nutella, making them a perfect, deliciously sinful treat for any occasion. A true delight for hazelnut lovers!
Author: Julie Maestre
Prep Time: 1 hour 55 minutes
Cook Time: 5 minutes
Total Time: 2 hours
Servings: 12 servings
Course: Breakfast, Dessert
Cuisine: American
Keyword: Stuffed Nutella Donuts, Bombolini, Fried Doughnuts
Ingredients
- 1 envelope (about 2 1/4 teaspoons) dry active yeast
- 1/4 cup warm water (105-115°F / 40-46°C)
- 1 1/2 cups milk, warmed to lukewarm
- 1/2 cup granulated sugar (for the dough)
- 1 teaspoon salt
- 1/4 cup shortening, melted and slightly cooled
- 2 large eggs, at room temperature
- 5 cups all-purpose flour, divided
- 1/4 cup powdered sugar (for coating, or more to taste)
- 1/2 cup Nutella (or more, to taste), at room temperature
- Vegetable oil for frying (approximately 3-4 inches deep in your pot)
Instructions
- In a large stand mixer bowl, pour the warm water and sprinkle the dry active yeast over the top. Let it sit undisturbed for 5-10 minutes, allowing the yeast to activate and become foamy.
- Once the yeast is active, add the warm milk, melted shortening, granulated sugar, salt, eggs, and 2.5 cups (half) of the all-purpose flour to the bowl. Mix with a dough hook attachment on low speed until all ingredients are well incorporated and a sticky dough begins to form.
- Gradually add the remaining 2.5 cups of all-purpose flour, mixing until the dough is smooth, elastic, and slightly sticky, but no longer adheres excessively to the sides of the bowl. Do not overmix.
- Lightly grease a large clean bowl. Transfer the dough into the greased bowl, turning it once to coat all sides. Cover the bowl tightly with plastic wrap or a clean kitchen towel. Let the dough rise in a warm, draft-free place for approximately 2 hours, or until it has doubled significantly in size.
- After the first rise, gently punch down the dough to release the air. Transfer it to a lightly floured working surface and knead it gently for about 1-2 minutes until smooth.
- Using a floured rolling pin, gently roll the dough out evenly to a thickness of about ½ inch.
- Use a donut cutter or a 2.5-3 inch round drinking glass (dipped in flour for each cut) to cut out individual donut shapes. Gather any dough scraps, gently re-knead, and re-roll once to cut out any remaining donuts.
- Carefully place the cut donuts on a parchment-lined baking sheet, ensuring there’s ample space between each. Cover them again with plastic wrap or a clean towel and let them rise for an additional 45 minutes.
- While the donuts are undergoing their second rise, heat about 3-4 inches of vegetable oil in a deep pot or Dutch oven to 350°F (175°C). Use a candy thermometer or deep-fry thermometer to monitor and maintain the oil temperature accurately.
- Once the oil is at temperature, carefully place the risen donuts into the hot oil in batches, making sure not to overcrowd the pot. Fry for about 2 minutes on each side, or until they are puffed, golden brown, and cooked through.
- Using a slotted spoon, carefully remove the fried donuts and transfer them to a wire rack set over paper towels to drain any excess oil. While still warm, generously dust them with powdered sugar (or granulated sugar, if preferred).
- Once the donuts are slightly cooled but still warm, use a skewer or a thin knife to make a small hole on the side of each donut. Gently wiggle it to create a cavity inside for the filling.
- Transfer the room-temperature Nutella into a piping bag fitted with a small, round tip (or a heavy-duty plastic freezer bag with a corner snipped off). Insert the tip into the hole and pipe a generous amount of Nutella into each donut until it feels full.
- Serve immediately and savor every bite of these decadent Nutella Stuffed Bombolini! Enjoy!
Nutrition Information (Approximate per serving)
Calories: 366kcal | Carbohydrates: 59g | Protein: 7g | Fat: 10g | Saturated Fat: 5g | Cholesterol: 30mg | Sodium: 223mg | Potassium: 156mg | Fiber: 2g | Sugar: 19g | Vitamin A: 90IU | Calcium: 60mg | Iron: 3.1mg
Nutrition information is automatically calculated and should be used as an approximation. Individual results may vary based on ingredients and preparation methods.
More Donut Recipes You’re Sure to Love:
If you’ve enjoyed crafting these irresistible Nutella Stuffed Donuts, you’ll be delighted to explore more of our fantastic donut recipes. Each offers a unique twist on this classic fried pastry, perfect for satisfying any craving:
- Classic Jelly Donuts: A timeless treat bursting with fruity goodness.
- Easy Homemade Donut Holes: Perfect bite-sized delights for sharing (or not!).
- Delightful Fresh Strawberry Donuts: A seasonal favorite, light and full of berry flavor.
- Rich Baked Chocolate Donuts: A healthier, yet equally indulgent, chocolatey option.
Connect with Us and Share Your Creations!
We truly hope you thoroughly enjoyed making and, more importantly, tasting these magnificent Nutella Stuffed Donuts! Your culinary journey is important to us, so if you have any questions, insightful comments, or simply wish to share photos of your delightful bombolini creations, please feel free to connect with us in the comments section below. We love hearing from our community! You can also find an abundance of other delicious recipes, helpful cooking tips, and engaging tutorial videos on our YouTube channel and Facebook page. Don’t forget to follow us for daily inspiration and sweet treats. Happy baking and happy eating!