
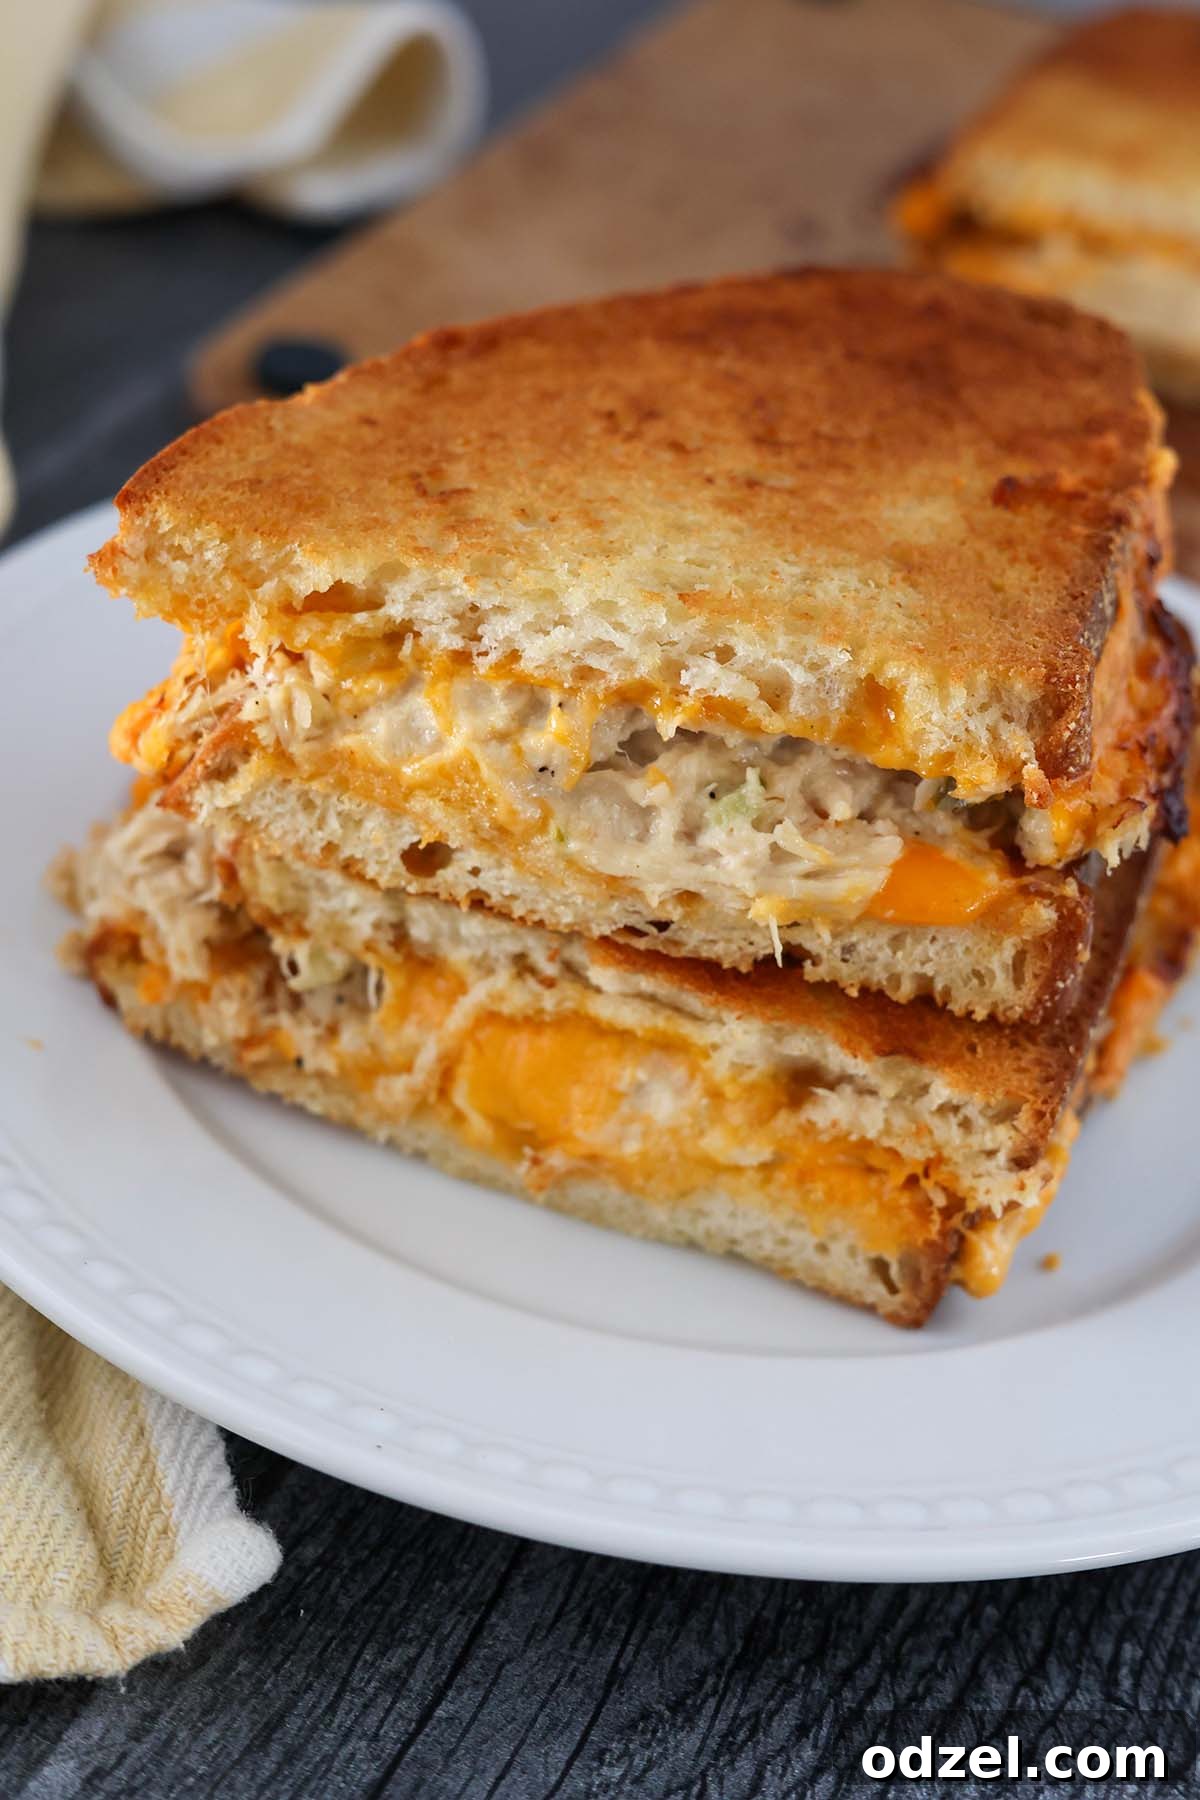
Craving a quick, comforting, and irresistibly crispy meal? Look no further than this incredible Air Fryer Tuna Melt recipe! It’s the ultimate easy weeknight dinner or satisfying lunch that promises a golden, toasted exterior, gooey melted cheese, and a flavorful tuna filling – all ready in under 15 minutes. Forget soggy sandwiches; the air fryer elevates this classic comfort food to a whole new level of deliciousness, making it a guaranteed family favorite.
Effortless Perfection: The Ultimate Air Fryer Tuna Melt
The tuna melt sandwich holds a special place in the hearts of many, a nostalgic comfort food often enjoyed during childhood weekends. My mom’s go-to, it was always a delicious and incredibly easy meal to whip up. Today, we’re taking that beloved classic and giving it a modern twist with the magic of an air fryer, making it even faster and more consistently crispy than ever before. If you’ve never experienced the joy of an air-fried sandwich, prepare to be amazed!
What makes a tuna melt truly exceptional? While the creamy tuna salad and gooey cheese are vital, the foundation of a perfect tuna melt lies in choosing the right bread. The bread is not just a vessel; it’s a crucial component that contributes significantly to the sandwich’s texture and overall enjoyment. A good, fresh loaf will elevate your tuna melt from good to extraordinary. For this recipe, I highly recommend sourdough or rye bread due to their sturdy texture and subtle tang, which beautifully complement the rich tuna and cheese. However, feel free to use your favorite fresh bread – the key is freshness!
Essential Ingredients for Your Air Fryer Tuna Melt
Crafting the perfect air fryer tuna melt begins with a selection of quality ingredients. Each component plays a vital role in achieving that desirable balance of flavor and texture. Here’s a closer look at what you’ll need:
- Canned Tuna: While various types of canned tuna are available, I personally prefer albacore tuna packed in olive oil. Albacore offers a firmer texture and milder flavor, while the olive oil contributes richness and helps prevent the tuna salad from becoming dry. If you opt for tuna packed in water, be sure to drain it exceptionally well to avoid a watery filling.
- Bread: As mentioned, sourdough or rye bread are my top recommendations. Their robust structure holds up beautifully to the filling and butter, resulting in a wonderfully crisp exterior in the air fryer. Other great options include hearty white bread, whole wheat, or even thick-sliced brioche for a touch of sweetness. Ensure your slices are thick enough to contain the filling without breaking.
- Cheese: The melty heart of any tuna melt! Sliced cheddar cheese is a classic choice for its sharp flavor and excellent melting properties. However, don’t hesitate to experiment! American cheese offers an incredibly creamy, smooth melt. Colby Jack provides a mild, marbled flavor, and Swiss cheese adds a nutty, savory note. Provolone or mozzarella can also work well for a milder, stretchier cheese pull.
- Mayonnaise: For a consistently delicious tuna salad, I recommend a good quality mayonnaise like Hellmann’s (or your preferred brand). It binds the ingredients, adding creaminess and flavor. For those looking for an alternative, plain Greek yogurt can be used for a lighter, tangier profile.
- Lemon Juice: A splash of fresh lemon juice brightens the tuna salad, cutting through the richness and adding a subtle zest.
- Sweet Relish: Adds a delightful sweet and tangy crunch to the tuna mixture, enhancing its overall complexity.
- Dijon Mustard: Just a touch of Dijon mustard provides a sophisticated, slightly sharp undertone that complements the tuna and other ingredients perfectly.
- Salt and Pepper: Essential for seasoning to taste, bringing out the best in all the flavors.
- Unsalted Butter: Softened butter is key for achieving that golden-brown, crispy crust in the air fryer. It also adds a rich, savory flavor.
Step-by-Step Guide to Crafting Your Air Fryer Tuna Melt
Making a mouthwatering tuna melt in your air fryer is surprisingly simple. Follow these easy steps for a perfectly crispy and cheesy sandwich every time:
- Prepare the Tuna: Begin by thoroughly draining your canned tuna. This is a crucial step to prevent a watery tuna salad. Use a fork to break up the tuna into flakes in a medium-sized bowl.
- Mix the Tuna Salad: To the flaked tuna, add the mayonnaise, fresh lemon juice, sweet relish, Dijon mustard, and a good pinch of salt and pepper. Mix all the ingredients until they are well combined and the tuna is evenly coated. Taste the mixture and adjust the seasoning as needed. If the tuna salad appears a bit dry for your liking, add a little more mayonnaise until it reaches your desired creamy consistency.
- Butter the Bread: Take your slices of bread and spread about 1 tablespoon of softened unsalted butter evenly on one side of each slice. This buttered side will be the exterior that gets wonderfully crispy and golden in the air fryer.
- Assemble the Sandwich: Place two slices of cheese on the unbuttered side of one slice of bread. Spoon approximately 1/2 cup of the prepared tuna salad evenly over the cheese. Top the tuna salad with another slice of cheese, and then gently place the second slice of bread (buttered side facing up) on top to complete your sandwich. Adding cheese to both the bottom and top of the tuna salad helps create a solid, gooey layer that holds everything together and ensures maximum cheesiness.
- Air Fry to Perfection: Carefully place the assembled tuna melt sandwich into your air fryer basket, ensuring the buttered side is facing down first. Cook at 400°F (200°C) for 5-6 minutes. After the initial cooking time, carefully flip the sandwich, so the other buttered side can crisp up, and cook for an additional 3-4 minutes, or until both sides are golden brown and the cheese is beautifully melted and bubbly. Cooking times may vary slightly depending on your air fryer model and the thickness of your bread, so keep an eye on it!
Pro Tips for Air Fryer Tuna Melt Perfection
To ensure your air fryer tuna melt turns out absolutely perfect every time, consider these expert tips and variations:
- Mayo Alternatives: If you’re not a fan of mayonnaise or are looking for a lighter option, plain Greek yogurt is an excellent substitute. It provides a similar creamy texture with a pleasant tang. Avocado can also be mashed into the tuna for a richer, healthier fat source.
- Seasoning is Key: Don’t underestimate the power of proper seasoning. Always taste your tuna salad mixture before assembling the sandwich and adjust the salt and pepper as needed. A well-seasoned filling makes all the difference.
- Add Crunch and Flavor: Elevate your tuna mixture with finely diced celery for a refreshing crunch, or thinly sliced scallions (green onions) for a mild oniony bite. Other delicious additions include chopped red onion, capers, fresh dill, or a pinch of paprika.
- Don’t Overcrowd the Air Fryer: For optimal crispiness and even cooking, avoid overlapping sandwiches in the air fryer basket. Cook them in a single layer, in batches if necessary, to allow hot air to circulate freely around each sandwich.
- Preheat Your Air Fryer: While not always strictly necessary, preheating your air fryer for 2-3 minutes at 400°F (200°C) can help achieve a more consistent and quicker crisp.
- Serving Suggestions: A classic tuna melt pairs wonderfully with a side of crispy potato chips and a dill pickle spear. For a more substantial meal, serve it alongside a fresh green salad, coleslaw, or a hearty deviled egg pasta salad. The contrasting textures and flavors create a complete and satisfying meal.
- Rest Before Slicing: Allow the air-fried tuna melt to cool for 2-3 minutes before slicing into it. This brief resting period helps the cheese set slightly, preventing the filling from oozing out and making it easier to handle.
Achieving the Ideal Crispy, Cheesy Melt: Air Fryer Cooking Times
One of the most common questions about air frying is regarding the perfect cooking duration. The total cooking time for your air fryer tuna melt will depend primarily on the thickness and type of bread you use, as well as the specific model of your air fryer. For the recipe provided, using fairly thick slices of sourdough or rye bread, a total of 9-10 minutes yielded a perfectly crispy exterior and thoroughly melted cheese.
Typically, this involves cooking the sandwich at 400°F (200°C) for an initial 5-6 minutes on one side, then flipping it and cooking for an additional 3-4 minutes on the other. This two-stage cooking ensures even browning and maximum crispiness. If you opt for thinner slices of white sandwich bread, you might find that your tuna melt cooks much quicker. I recommend checking the sandwich at the 4-minute mark, and then every minute or two thereafter, until it reaches your desired level of golden crispiness and the cheese is gloriously gooey. Always rely on visual cues – a rich golden-brown color on the bread and bubbling cheese are your best indicators.
No Air Fryer? No Problem! Stovetop Tuna Melt Instructions
Don’t have an air fryer yet? No worries! You can still enjoy a fantastic tuna melt using a traditional skillet on your stovetop. The key to a great stovetop tuna melt is low and slow cooking to ensure the cheese melts without burning the bread. Here’s how to do it:
Assemble your tuna melt sandwich as directed in the recipe, ensuring both exterior sides of the bread are generously buttered. Place the sandwich directly onto a cold skillet. This allows the butter and bread to heat up gradually, creating a more even toast. Cook the sandwich over medium-low heat for approximately 4-5 minutes per side. Gently press down on the sandwich with a spatula occasionally to ensure good contact with the pan, which helps with even browning and melting. The tuna melt is ready when both sides are golden brown and crispy, and the cheese inside is fully melted and warm. This method might take a few minutes longer than the air fryer, but the result is equally delicious!
Delicious Variations & Customizations
While the classic air fryer tuna melt is undoubtedly fantastic, there’s plenty of room for creativity and customization to suit your taste:
- Spicy Tuna Melt: Add a pinch of red pepper flakes, a dash of hot sauce, or a tablespoon of finely diced jalapeño to your tuna salad mixture for a zesty kick.
- Gourmet Additions: Elevate the flavor profile with capers, chopped black olives, sun-dried tomatoes, or fresh herbs like parsley or chives mixed into the tuna salad.
- Cheese Blends: Experiment with combining different cheeses. A mix of sharp cheddar and creamy provolone, or Swiss and gruyere, can add layers of flavor.
- Veggies for Extra Goodness: Finely shredded carrots, bell peppers, or even a handful of spinach can be incorporated into the tuna salad for added nutrients and texture.
- Open-Faced Melt: If you prefer less bread, make an open-faced tuna melt. Toast one slice of bread in the air fryer for a few minutes, then top with tuna salad and cheese, and return to the air fryer until the cheese is melted and bubbly.
Storage & Reheating Tips
While tuna melts are best enjoyed fresh, you might have leftovers or wish to prep some components in advance:
- Tuna Salad Storage: The tuna salad mixture can be prepared ahead of time and stored in an airtight container in the refrigerator for up to 2-3 days. This makes assembly even quicker when you’re ready to make a sandwich.
- Storing Leftover Sandwiches: If you have a fully assembled and cooked tuna melt leftover, allow it to cool completely before wrapping it tightly in plastic wrap or aluminum foil. Store in the refrigerator for up to 1 day. Note that the bread might lose some of its crispiness.
- Reheating: The best way to reheat a tuna melt to restore its crispy texture is to use the air fryer. Place the cold sandwich in the air fryer at 350°F (175°C) for 3-5 minutes, or until heated through and crispy. You can also use a skillet over medium-low heat for similar results. The microwave is not recommended, as it will make the bread soggy.
Frequently Asked Questions (FAQs)
Here are some common questions about making air fryer tuna melts:
- Can I use frozen tuna? While possible, it’s generally recommended to use canned tuna for convenience and consistent texture in tuna melts. If using frozen tuna, ensure it’s fully thawed and thoroughly drained before flaking and mixing.
- What are the best side dishes for tuna melt? Classic pairings include potato chips, dill pickles, and a simple green salad. Other great options are coleslaw, tomato soup, or a light pasta salad.
- How do I prevent my tuna melt from becoming soggy? The air fryer helps significantly with this! Ensure your tuna is well-drained, and don’t overload the sandwich with too much tuna salad. Buttering the bread also creates a barrier against moisture.
- Can I add vegetables to the tuna melt? Absolutely! Finely diced celery, red onion, bell peppers, or even a few thin slices of tomato can be added to the tuna salad or layered in the sandwich.
More Delicious Air Fryer Sandwich Recipes You’ll Enjoy
If you loved this air fryer tuna melt, you’re in for a treat! The air fryer is fantastic for making all sorts of crispy, cheesy sandwiches and more. Be sure to check out these other mouthwatering recipes:
- Air Fryer Grilled Cheese
- Fried Fish Sandwiches
- Air Fryer Grilled Ham and Cheese
- Philly Cheesesteak Sandwiches
Tried this recipe? We’d love to hear your thoughts! Please leave a star ★★★★★ rating in the recipe card below and/or a review in the comments section further down the page. And consider following me on Facebook, Instagram, or Pinterest for more delicious recipes and cooking inspiration!

Air Fryer Tuna Melt
Equipment
- air fryer
Ingredients
- 2 5 ounce cans of tuna , drained
- 1/4 cup plus 1 tbsp mayo
- 1 tbsp sweet relish
- 1 tsp dijon mustard
- 1 tsp lemon juice
- salt and pepper to taste
- 4 tbsp unsalted butter , softened
- 4 slices sourdough or rye bread
- 4-8 slices cheese
Instructions
- Start by draining the canned tuna and breaking it up with a fork.
- Add the mayo, lemon juice, sweet relish, mustard, salt, and pepper, and mix well. Check for seasoning. If the tuna is a bit dry, add more mayo.
- Spread about 1 tbsp of softened butter on one side of each slice of bread.
- Add two slices of cheese on each slice of bread, add about 1/2 cup of the tuna salad on top of the bread, and then cover with the other slice of bread.
- Place the tuna melt sandwich in the air fryer basket butter-side-down and cook at 400 degrees F for 5 minutes. Once the 5 minutes are up, flip the sandwich and cook for an additional 3 minutes.
Notes
Nutrition
Nutrition information is automatically calculated, so should only be used as an approximation.