
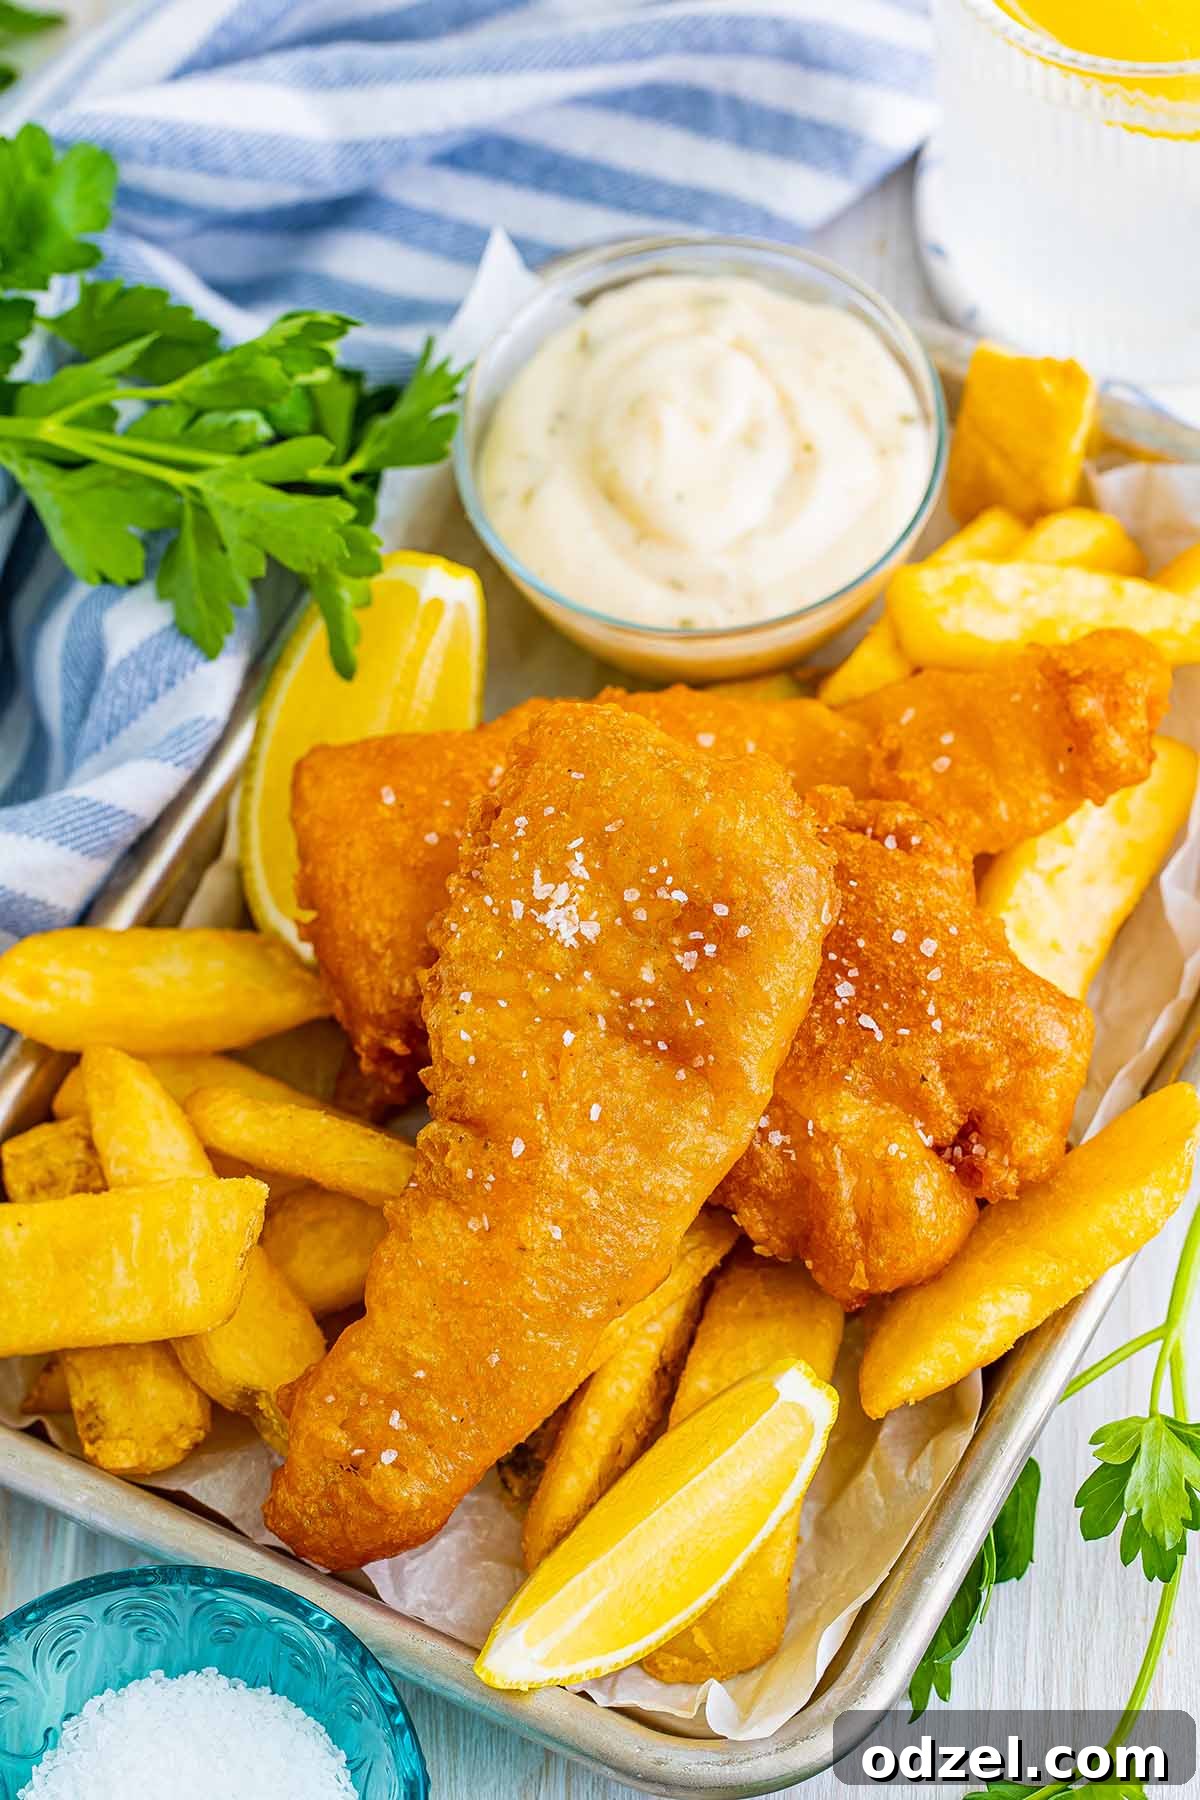
Ultimate Crispy Beer-Battered Cod Fish: Your Go-To Recipe for Flaky, Golden Perfection
Craving that iconic restaurant-quality fish and chips experience right in your own kitchen? Look no further! This recipe for Beer-Battered Cod Fish is incredibly quick, surprisingly simple, and delivers an irresistibly crispy, crunchy, and utterly delicious result. Served traditionally with a tangy tartar sauce and bright lemon wedges, it’s a meal that will impress your family and friends and become a staple in your repertoire. Get ready to dive into golden perfection!
Why This Beer-Battered Fish Stands Out
There’s something uniquely satisfying about biting into a piece of fish with a perfectly crisp, golden-brown crust, giving way to tender, flaky white fish. This recipe doesn’t just promise that; it delivers it consistently. Here’s why you’ll absolutely fall in love with it:
- Effortlessly Delicious: Don’t let the thought of deep-frying intimidate you. This recipe is designed for ease, bringing restaurant-quality taste right to your dining table without complex steps.
- Remarkably Quick: From prep to plate, you can have this incredible meal ready in under 20 minutes. It’s ideal for busy weeknights or when unexpected cravings strike.
- Budget-Friendly Ingredients: Utilizing common pantry staples and readily available cod fillets, this recipe proves that gourmet flavors don’t have to come with a hefty price tag.
- Unbeatable Texture: The magic of the beer batter lies in its ability to create an incredibly light, airy, and super crunchy coating that locks in moisture, ensuring the fish remains tender and juicy.
- Versatile Pairing: While fantastic on its own, this fried cod is a blank canvas for a variety of side dishes, making it perfect for any meal occasion.
- Easy to Scale: Whether you’re cooking for one or a crowd, this recipe is easily adjustable to suit your needs.
Frequently Asked Questions About Beer-Battered Fish
Got questions before you start frying? We’ve got answers to help you achieve the perfect crispy fish every time.
Can I use a different type of fish for this recipe?
Absolutely! While cod is a classic choice for its mild flavor and flaky texture, this versatile beer batter recipe works wonderfully with almost any firm white fish. Excellent alternatives include tilapia, catfish, haddock, pollock, or even halibut. The key is to choose a fish that isn’t too oily and can hold up well to frying. Just ensure your fillets are of similar thickness for even cooking to ensure they cook evenly and simultaneously.
What should I serve alongside my crispy fried fish?
The possibilities are endless when it comes to pairing sides with this delicious breaded cod. For a truly traditional “fish and chips” experience, homemade French fries or thick-cut potato wedges are an absolute must. Other fantastic options include a vibrant and creamy coleslaw, fluffy hush puppies (or even sweet crab hush puppies for an elevated twist), or a refreshing green salad. Don’t forget the indispensable tartar sauce and fresh lemon wedges to brighten every bite. Consider adding some appetizers like onion rings or fried pickles for a truly indulgent meal.
Why did my fried cod turn out tough or rubbery?
A common culprit for tough or rubbery fried fish is overcooking. Cod, like most white fish, cooks very quickly. If left in the hot oil for too long, the delicate proteins tighten up, expelling moisture and resulting in a dry, rubbery texture. To avoid this, keep a close eye on your fish, removing it from the oil as soon as the batter turns a beautiful golden brown and is visibly crisp. Use an instant-read thermometer to check for an internal temperature of 145°F (63°C) in the thickest part of the fillet, which indicates it’s perfectly cooked through. Frying in small batches also helps maintain a consistent oil temperature and prevents steaming, contributing to a crispier, tender result.
What type of beer is best for beer batter?
For the crispiest, lightest batter, opt for a cold, light lager beer. The carbonation (bubbles) in lager beers helps create air pockets in the batter, which expand when heated, resulting in a wonderfully airy and crunchy texture that is characteristic of classic beer-battered fish. Good choices include readily available options like Pabst Blue Ribbon, Coors Banquet, Old Milwaukee, or any other inexpensive, light-colored lager. Avoid dark or heavily flavored beers, such as stouts or porters, as they can overpower the delicate taste of the fish and often result in a denser, heavier batter.
Can I make this recipe gluten-free?
Yes, with a few thoughtful adjustments, you can absolutely make this recipe gluten-free! The primary change involves substituting the all-purpose flour with a good quality gluten-free all-purpose flour blend. Look for a blend that specifically states it’s good for baking and frying, and ideally one that contains xanthan gum for the best texture. Additionally, you’ll need to ensure your beer is gluten-free. There are several excellent gluten-free lagers available on the market today that will work perfectly for the batter, maintaining that signature light and crispy texture without compromising on flavor.
Essential Ingredients for Perfect Beer-Battered Cod
Crafting this irresistible beer-battered fish requires a few simple, yet carefully selected, ingredients. Each plays a crucial role in achieving that sought-after crispy exterior and tender, flaky interior. Here’s a closer look at what you’ll need and why:
- Cod Fillets: The undeniable star of our recipe! For the most exquisite results, I highly recommend using fresh cod due to its mild flavor and beautifully flaky texture, which holds up perfectly to frying. If fresh isn’t available, high-quality frozen cod works too; just ensure it’s completely thawed and meticulously patted dry to remove any excess moisture. This crucial step prevents a soggy batter and ensures maximum crispness. Slice your fillets into roughly 2-inch wide strips for manageable, evenly cooking portions.
- All-Purpose Flour: This forms the foundational dry base for our batter. It provides the necessary structure and helps create that desirable golden-brown crust, giving the fish its fried integrity.
- Baking Powder: A critical leavening agent that works wonders in creating a light and airy batter. When combined with the carbonation from the beer, it generates tiny gas bubbles that expand during frying. This expansion results in a wonderfully delicate, crispy, and crunchy texture, making every bite a delight.
- Granulated Sugar: A small but mighty ingredient! Just a pinch of sugar helps to subtly balance the savory flavors of the spices and significantly aids in the caramelization process, contributing to the beautiful, inviting golden color of the fried fish.
- Aromatic Spices: This carefully selected blend is what elevates our fried cod from good to truly exceptional. A combination of garlic powder, onion powder, smoked paprika, kosher salt, black pepper, and a hint of cayenne pepper infuses the batter with layers of savory, slightly smoky, and gently spicy notes. This seasoning makes your homemade version even more flavorful and complex than many restaurant offerings. Adjust the cayenne pepper to your personal heat preference for a customized kick.
- Cold Lager Beer: This is where the “beer-battered” magic truly comes alive! The robust carbonation in cold lager beers (such as Pabst Blue Ribbon, Coors Banquet, or Old Milwaukee) is absolutely essential for a light, delicate, and ultra-crisp batter. The bubbles create a delicate, lacy texture that fries up beautifully. Using cold beer also serves a dual purpose: it helps keep the batter mixture cool, which in turn slows down gluten development in the flour, resulting in a more tender and less chewy coating.
- Large Egg: The humble egg acts as a powerful binding agent in our batter. It helps the flour and other dry ingredients adhere perfectly and evenly to the fish fillets, ensuring a consistent and complete coating that locks in flavor and moisture.
- Oil for Frying: Choosing the right oil is paramount for successful deep frying. A high smoke point oil is essential to reach the required high temperatures without breaking down or burning. Peanut oil is my top recommendation because it’s a cleaner-burning oil, imparts minimal flavor to your food, and significantly reduces the lingering fried food odors in your home. Vegetable oil or canola oil are also perfectly suitable and widely available alternatives.
Pro Tips for Perfectly Crispy Fried Fish
Achieving restaurant-quality fried fish at home is far easier than you might think, especially when armed with these crucial tips and tricks:
- Pat the Cod Fillets Bone Dry: This step cannot be emphasized enough, as it’s foundational for a truly crispy batter! Before dipping your fish into the batter, use clean paper towels to pat each fillet thoroughly dry. Any excess moisture on the fish surface will create a barrier, preventing the batter from sticking properly and leading directly to a soggy, less appealing crust. A meticulously dry surface ensures maximum batter adhesion and guarantees a crispier, golden end product.
- Utilize a Wire Rack for Draining: Once fried, resist the urge to place your hot, crispy fish directly onto a flat plate lined with paper towels. While paper towels do absorb excess oil, a flat surface will inevitably trap steam underneath the fish, quickly making the bottom soggy. Instead, always transfer the hot, crispy fish to a wire rack set over a baking sheet. This simple setup allows air to circulate freely around all sides of the fish, maintaining that coveted crispness. If you’re frying in batches, you can keep the finished pieces warm in a very low oven (around 170°F or 75°C) on the wire rack, but be vigilant not to let them steam or burn.
- Choose the Right Frying Oil: The type of oil you use significantly impacts the final taste, texture, and even aroma of your fried fish. I prefer peanut oil for deep frying because it has a high smoke point, meaning it can reach and sustain the necessary high temperatures without breaking down or smoking. It also imparts a “cleaner” flavor to fried foods and is known for producing less lingering odor in your kitchen. Vegetable oil or canola oil are also excellent, widely available alternatives if peanut oil is not an option or if there are allergy concerns.
- Maintain Optimal Oil Temperature: Consistency in oil temperature is paramount for perfect frying results. Invest in a good deep-fry thermometer and use it to ensure your oil reaches precisely 375°F (190°C) before you introduce any fish. If the oil is too cool, the batter will absorb too much grease, resulting in a heavy, soggy, and unappetizing crust. If the oil is too hot, the exterior will burn quickly before the fish has a chance to cook through to tender perfection.
- Shake Off Excess Batter: After dipping each piece of cod into the prepared batter, gently lift it and allow any excess batter to drip back into the bowl for a few seconds. You’re aiming for a thin, even coating; too much batter can become heavy, potentially fall off during frying, and lead to a greasy, uneven crust. A light coating ensures optimal crispness.
- Do Not Overcrowd the Fryer: Resist the temptation to fry all your fish at once, even if your fryer seems large enough. Overcrowding the fryer drastically lowers the oil’s temperature. This sudden drop causes the fish to cook slower, absorb more oil, and ultimately leads to greasy, less crispy fish. Instead, work in small batches, typically 2-3 pieces at a time, depending on the size of your fryer or Dutch oven. This ensures ample space around each piece for even cooking and optimal crisping, and allows the oil temperature to recover quickly between batches.
- Monitor Internal Temperature for Doneness: While visual cues like a beautiful golden-brown batter are helpful, the most reliable way to ensure your fish is perfectly cooked (tender and flaky, not tough or raw) is by checking its internal temperature. Use an instant-read thermometer to confirm the thickest part of the fish reaches an internal temperature of 145°F (63°C). This guarantees both a safe and deliciously cooked meal. Remember to flip your fish a few times during cooking for even browning and crisping on all sides.
Storage and Reheating Fried Fish
While this beer-battered cod fish is undeniably best enjoyed piping hot and fresh from the fryer, sometimes leftovers happen! Here’s how to properly store and reheat your fried fish to best preserve its deliciousness and crisp texture.
Storing Leftovers Safely
If you find yourself with any leftover fried fish, it’s important to allow it to cool completely at room temperature before storing. This prevents condensation from building up inside the container, which can lead to sogginess. Once cooled, transfer the fish to an airtight container. Stored properly, it can be kept in the refrigerator for up to 3 days. For longer storage, you can freeze the cooked fish for up to 3 months. However, be aware that freezing and thawing fried fish often leads to a slightly softer, less crispy batter. While it will still be tasty, the texture might not be as pristine as when it was fresh. Only freeze if absolutely necessary.
Reheating for Maximum Crispness
The ultimate goal when reheating fried fish is to revive that crispy texture without drying out the delicate fish inside. It’s crucial to avoid the microwave, as it will steam the batter, rendering it disappointingly soggy. Here are the best methods:
- Oven Method (Recommended for Best Results): This is generally the best and most reliable method for reheating fried fish and bringing back its crispness. Preheat your oven to 350°F (175°C). Place the fish fillets on a lightly greased baking sheet, or even better, on a wire rack set over a baking sheet. The rack allows air to circulate around all sides, promoting even crisping. Heat for 10-15 minutes, or until the fish is heated through and the batter has crisped up beautifully again.
- Air Fryer Method (Excellent Alternative): An air fryer is an incredibly effective tool for reheating fried foods, mimicking the crisping action of deep frying with less oil. Preheat your air fryer to 350°F (175°C). Place the fish in a single layer in the air fryer basket, ensuring not to overcrowd it. Cook for 5-8 minutes, flipping halfway through, until the fish is hot and the batter is wonderfully crispy.
- Deep Fryer Method (Quickest Crispness Revival): If you still have your deep fryer set up and the oil is clean, a quick re-fry is the ultimate way to bring back the original crispness. Reheat the oil to 350°F (175°C) and briefly fry the fish for just 2-3 minutes. This method is incredibly fast but does require more setup and cleanup.
Your Easy Recipe for Crispy Beer-Battered Cod Fish
Crispy Beer-Battered Cod Fish
Julie Maestre
10 mins
8 mins
18 mins
4
Pin Recipe
Rate Recipe
Print Recipe
Ingredients
- 1 lb cod filet, cut into 2-inch strips
- 1 cup all-purpose flour
- 1 teaspoon baking powder
- 1 teaspoon granulated sugar
- ½ teaspoon garlic powder
- ½ teaspoon onion powder
- ½ teaspoon smoked paprika
- ½ teaspoon Kosher salt, or to taste
- ½ teaspoon black pepper
- ⅛ teaspoon cayenne pepper
- 1 cup lager beer, cold
- 1 large egg, beaten
- Oil, for frying (peanut oil recommended)
Instructions
- Prepare the Cod: Pat the cod fillets completely dry with a paper towel and set aside. Ensuring all excess moisture is removed is crucial for the crispiest batter.
- Combine Dry Ingredients: In a large bowl, whisk together the all-purpose flour, baking powder, granulated sugar, garlic powder, onion powder, smoked paprika, Kosher salt, black pepper, and cayenne pepper. Mix until thoroughly combined.
- Combine Wet Ingredients: In a separate small bowl, whisk together the cold lager beer and the beaten egg until well combined.
- Make the Batter: Pour the wet ingredients into the bowl with the dry ingredients. Whisk gently until just combined and there are no large lumps. Avoid overmixing, as this can develop the gluten in the flour and result in a tougher batter. A few small lumps are perfectly fine and often preferred.
- Heat the Oil: Heat about 4 inches of oil in a deep fryer or a heavy-bottomed Dutch oven to 375°F (190°C). Use a deep-fry thermometer to monitor the temperature accurately, as this is key for crispness.
- Batter the Fish: Dip one piece of cod into the prepared batter, ensuring it is fully and evenly coated. Lift the fish, allowing any excess batter to drip off back into the bowl before frying.
- Fry the Fish: Carefully place the battered cod into the hot oil. If using a deep fryer basket, gently shake it immediately after adding the fish to prevent it from sticking to the bottom. Do not overcrowd the fryer; fry in small batches of 2-3 pieces at a time to maintain oil temperature and ensure even cooking and optimal crisping.
- Cook Until Golden and Crispy: Fry the fish for about 6-8 minutes total, flipping a few times during cooking to ensure even browning and crispness on all sides. The batter should be a beautiful golden brown. Use an instant-read thermometer to check that the internal temperature of the fish reaches 145°F (63°C) for perfect doneness.
- Drain and Season: Once cooked, carefully remove the fish from the oil using tongs or a slotted spoon. Place the fried pieces onto a wire rack set over a paper-towel-lined baking sheet to absorb any excess oil and prevent sogginess. Immediately sprinkle with a little more Kosher salt while hot for enhanced flavor.
- Serve Warm: Continue frying the remaining cod in batches. Serve the finished, crispy fish immediately with your favorite sides and dipping sauces, such as tartar sauce and fresh lemon wedges.
Notes and Expert Tips
- Remember to pat the cod fillets completely dry before breading them. This will ensure the breading sticks and creates a crispier texture, preventing a soggy outcome.
- Always place the fried fish fillets on a wire rack over a sheet tray after cooking. This allows air circulation, preventing steam from making them soggy. You can keep finished pieces warm in a low oven (170°F or lower) if desired, but watch carefully for steaming.
- For a cleaner fry with less odor, I highly recommend using peanut oil. It has a high smoke point and a neutral flavor, allowing the fish flavor to shine.
- Ensure your frying oil has reached precisely 375°F (190°C) before adding any fish to achieve that perfect golden, crispy crust without excessive oil absorption.
- Before adding your fillets to the fryer, gently shake off any excess batter. This prevents a heavy, uneven coating and ensures the batter crisps up beautifully.
- Never overcrowd your fryer! Work in small batches (2-3 pieces at a time, depending on size). This is vital for maintaining the oil’s temperature and allowing each piece of fish to cook evenly and crisp perfectly.
- Flip your fish over a few times while cooking to ensure even browning. Always use an instant-read thermometer to check that the fish reaches an internal temperature of 145°F (63°C) for safety and optimal tenderness.
Nutrition Information
(Per Serving, calculated for 4 servings)
- Calories: 258 kcal
- Carbohydrates: 28 g
- Protein: 25 g
- Fat: 2 g
- Saturated Fat: 1 g
- Polyunsaturated Fat: 1 g
- Monounsaturated Fat: 1 g
- Trans Fat: 0.01 g
- Cholesterol: 95 mg
- Sodium: 374 mg
- Potassium: 653 mg
- Fiber: 1 g
- Sugar: 1 g
- Vitamin A: 263 IU
- Vitamin C: 1 mg
- Calcium: 79 mg
- Iron: 2 mg
Nutrition information is an approximation and will vary based on ingredients used and cooking methods. Oil absorption during frying is not fully accounted for.
Additional Recipe Details
Julie Maestre
10 minutes
8 minutes
18 minutes
Entree, Main Dish
American, Seafood
4
258
beer battered fish, fried cod, crispy fish, fish and chips, homemade fried fish
More Delicious Seafood Recipes You Might Enjoy
If you’ve loved this beer-battered cod, you’ll surely want to explore more fantastic fish and seafood dishes that cater to various tastes and cooking styles:
- Cod Piccata: A lighter, bright, and zesty preparation featuring tender cod fillets in a vibrant caper-lemon sauce. Perfect for a quick and elegant weeknight meal.
- Skillet Cod with Tomatoes, Onions, and Peppers: A colorful and flavorful one-pan meal bursting with Mediterranean-inspired flavors. It’s simple, healthy, and incredibly satisfying.
- Fried Fish Sandwiches: Take your perfectly fried fish to the next level by transforming it into a satisfying sandwich. Serve it on a soft bun with lettuce, tomato, and a generous dollop of tartar sauce for a casual classic.
- Fried Tilapia: An excellent alternative for perfectly fried white fish, offering a slightly milder flavor profile than cod, making it a great option for those who prefer a more subtle taste.
- Crispy Baked Fish: If you’re looking for a healthier alternative to deep frying that still delivers on that desirable crunch, this baked version is a winner. It provides a guilt-free way to enjoy crispy fish.
Your Turn to Fry!
There’s truly nothing quite like freshly made, crispy beer-battered cod fish. The golden, airy crust yielding to tender, flaky white fish is a culinary delight that appeals to almost everyone. This comprehensive guide provides all the tools, expert tips, and a straightforward recipe you need to achieve truly spectacular, restaurant-quality results right in your own kitchen.
Whether you’re planning a casual family dinner, hosting a fun gathering with friends, or simply treating yourself to a delicious meal, this homemade fried fish is guaranteed to be a hit. So, gather your fresh ingredients, fire up the fryer, and get ready to enjoy a meal that rivals your favorite seafood shack, all from the comfort of your home!
We absolutely love hearing from you and seeing your culinary creations! If you tried this beer-battered fish recipe and loved it, please take a moment to leave a star ⭐️⭐️⭐️⭐️⭐️ rating in the recipe section above or share your thoughts and a review in the comments section further down the page. Your valuable feedback not only brightens our day but also helps other home cooks discover and enjoy these fantastic recipes. And for more delicious culinary inspiration, daily tips, and exciting new recipes, don’t forget to follow us on Facebook and Pinterest!