
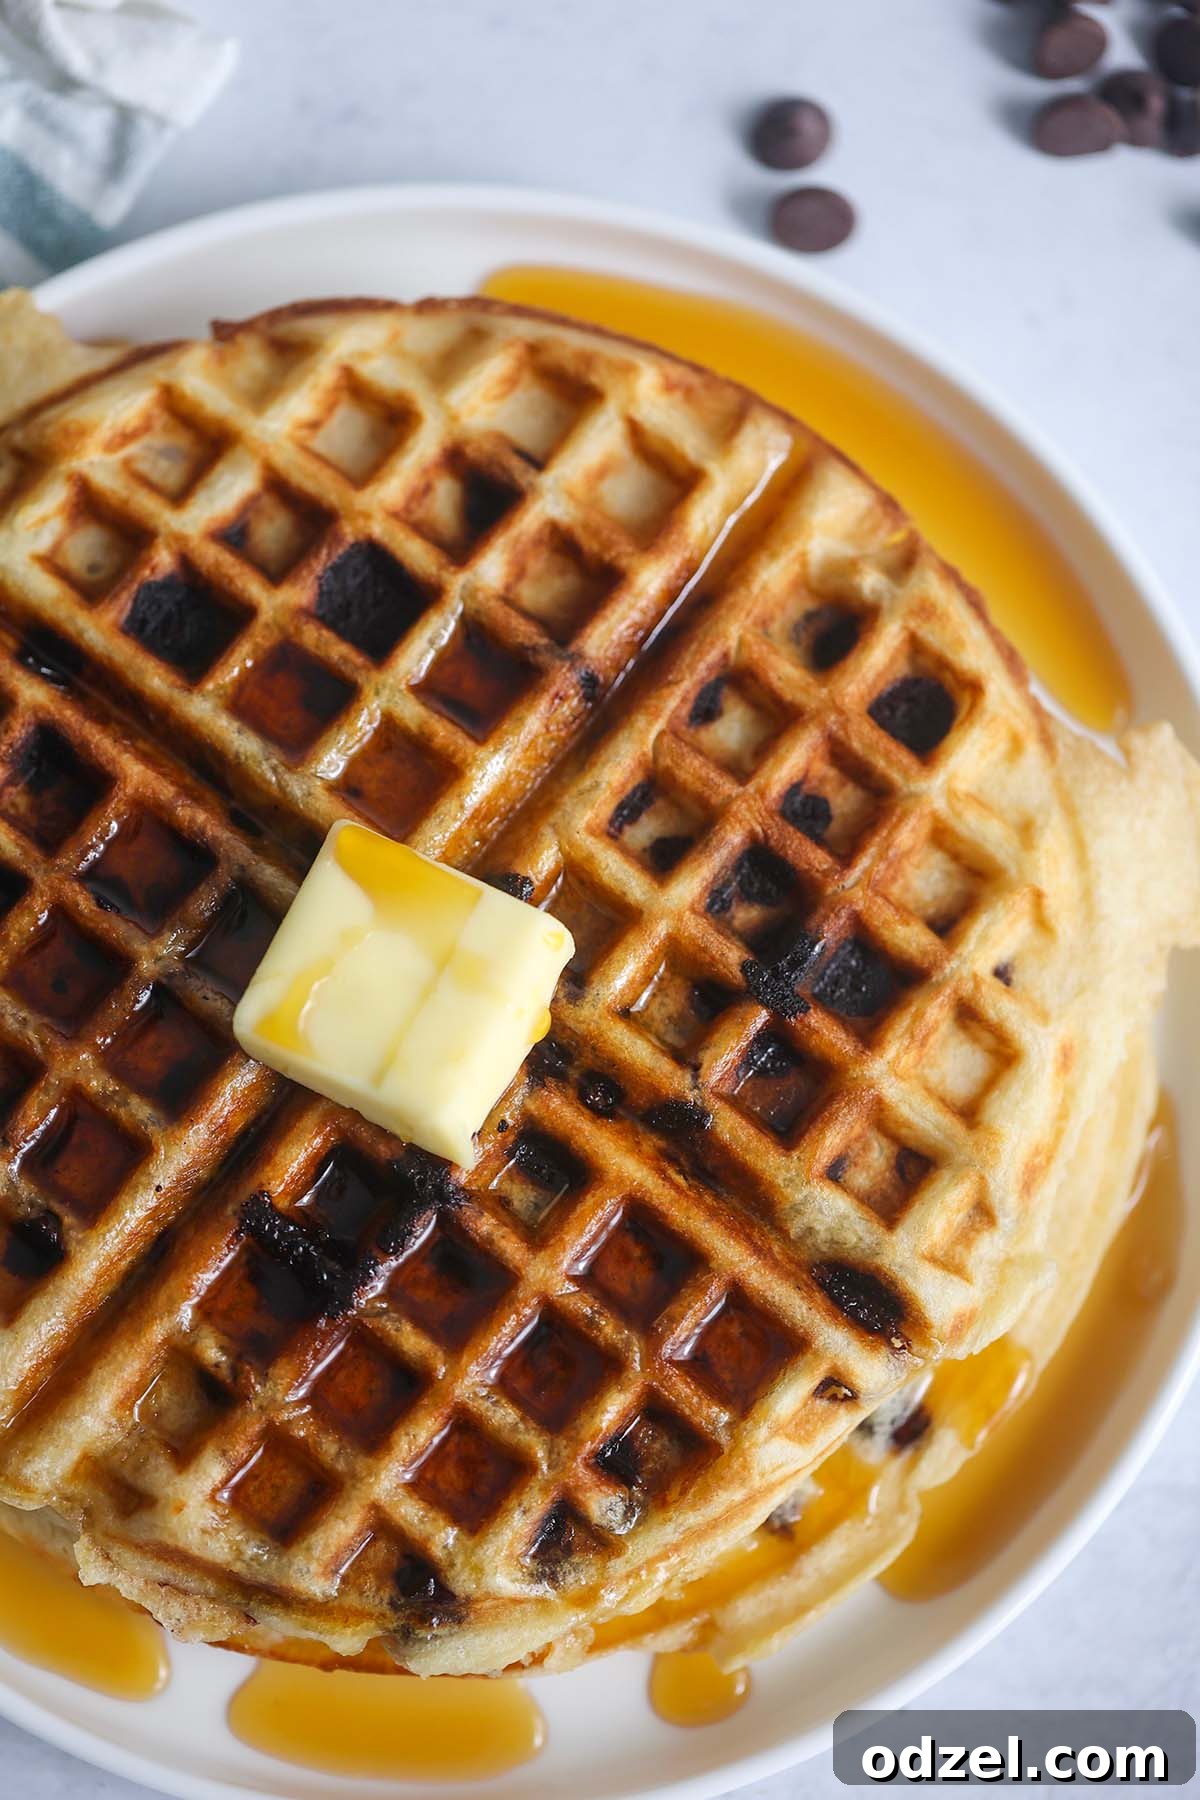
Ultimate Buttermilk Chocolate Chip Waffles: Your Secret to a Perfect Breakfast
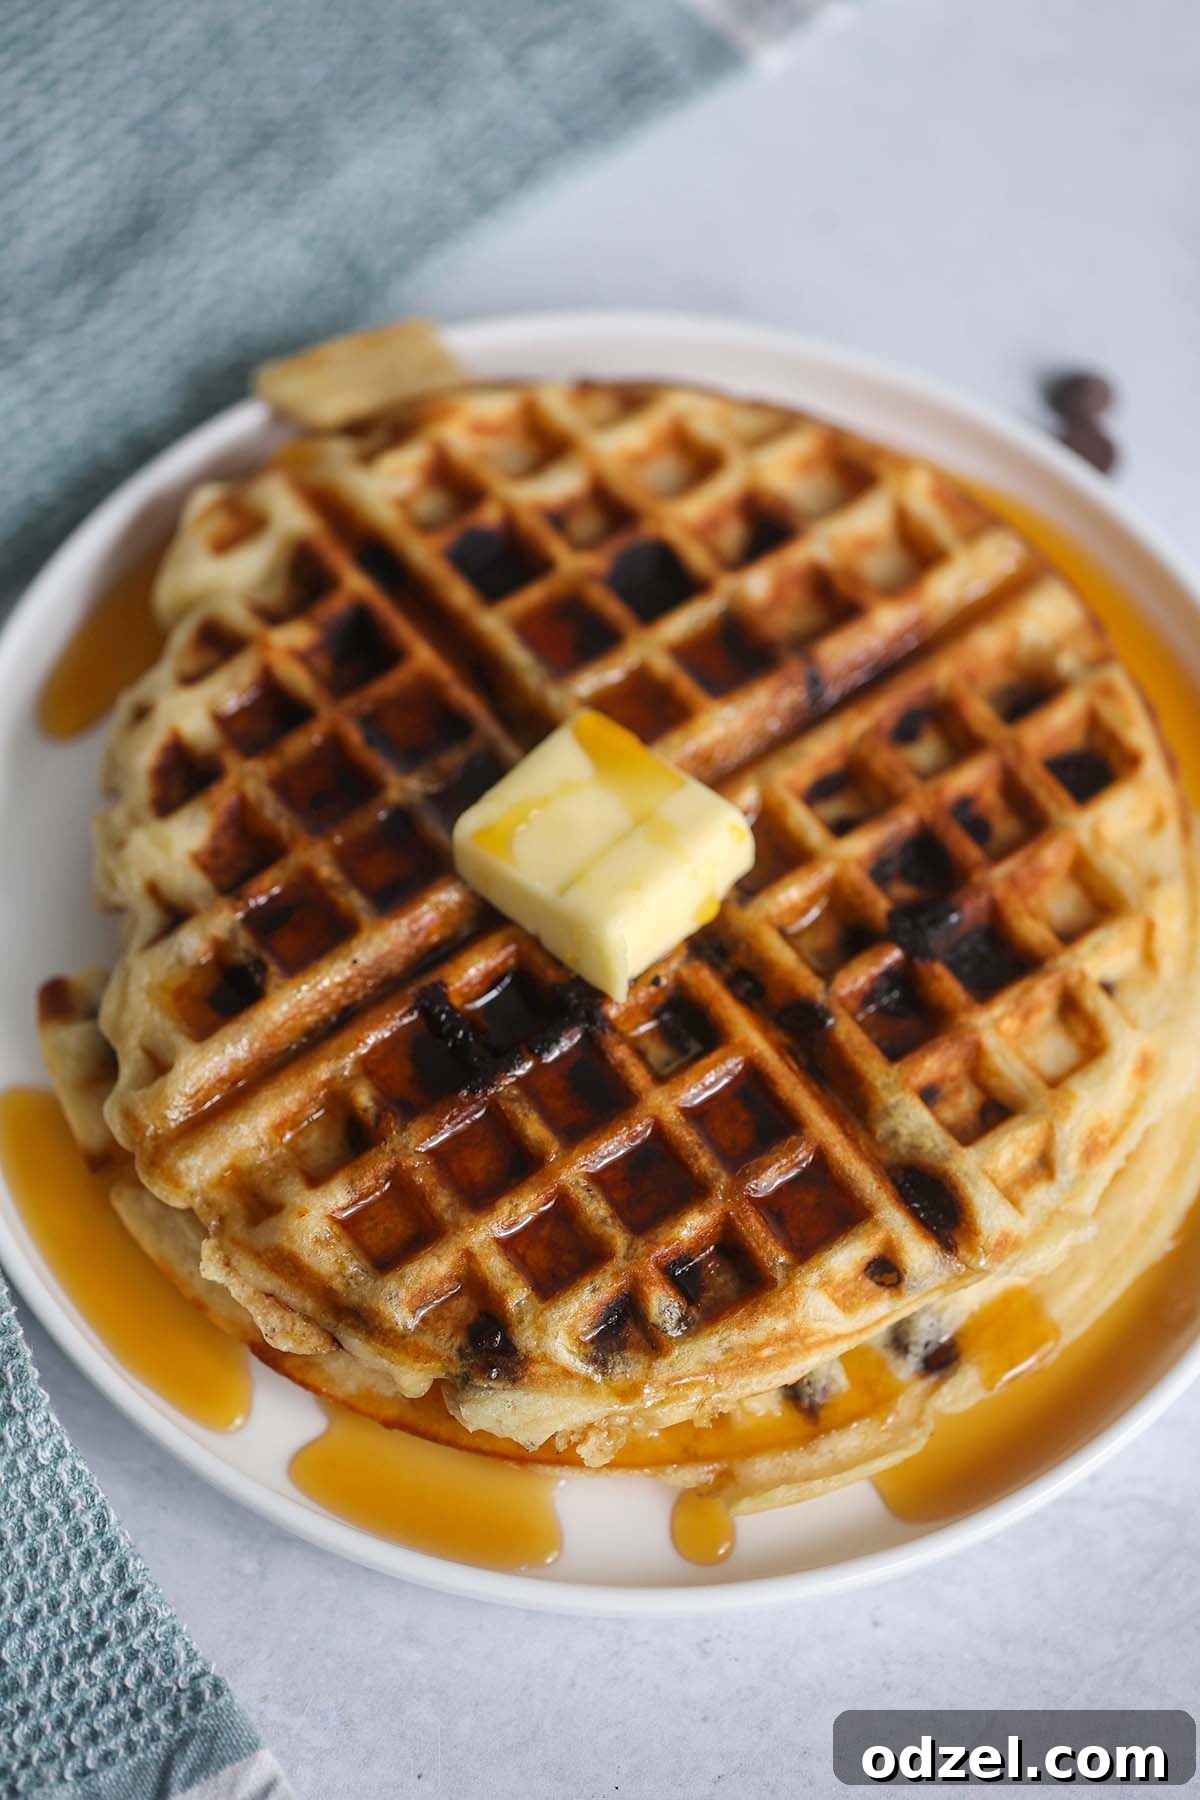
Imagine waking up to the aroma of freshly made waffles, crispy on the outside, incredibly moist and fluffy on the inside, and studded with pockets of warm, melty chocolate. That’s precisely what these **buttermilk chocolate chip waffles** deliver! They’re not just any waffles; the magic of buttermilk transforms them into an irresistible treat, perfect for any meal. Crowned with a generous pat of softened butter and a decadent cascade of pure maple syrup, each bite is a journey to breakfast bliss. Get ready to elevate your waffle game from good to absolutely unforgettable.
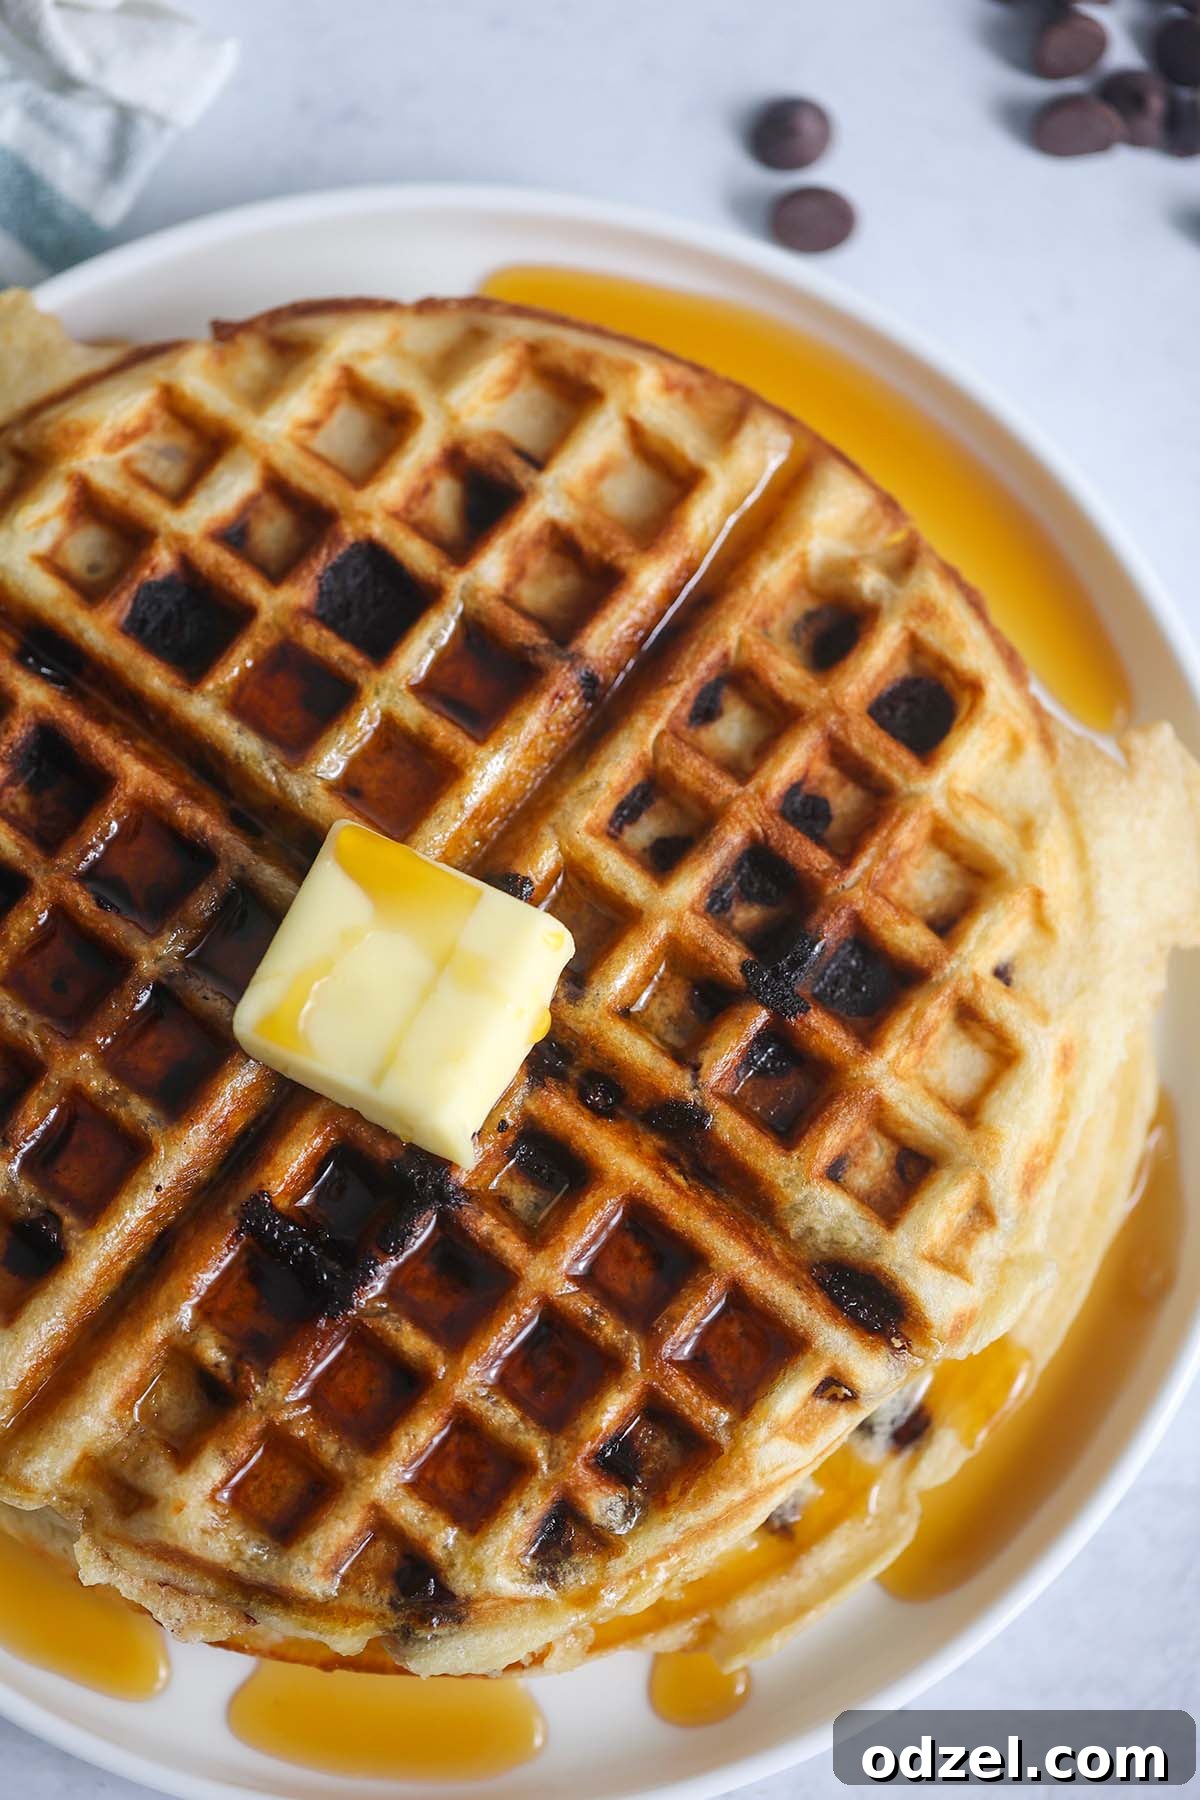
Waffles hold a special place in my heart, transcending the boundaries of traditional breakfast food. I enjoy them for breakfast, brunch, lunch, or even as a satisfying dinner. Just recently, after indulging in a truly satisfying plate of Southern fried chicken and waffles, I found myself craving that delightful texture and flavor again the very next day. However, instead of another savory pairing, I yearned for something sweet, prompting me to whip up these glorious chocolate chip waffles. And let me tell you, they were every bit as delicious and comforting, proving that a classic sweet waffle can stand proudly on its own.
Table of Contents
- The Buttermilk Advantage for Fluffy Waffles
- Key Ingredients for Perfect Chocolate Chip Waffles
- Pro Tips for Waffle Making Success
- Serving Suggestions and Creative Variations
- How to Store and Reheat Leftover Waffles
- Buttermilk Chocolate Chip Waffles Full Recipe
- Frequently Asked Questions About Waffles
The Buttermilk Advantage for Fluffy Waffles
If you’ve ever wondered what makes certain waffles exceptionally light, tender, and slightly tangy, the answer almost always lies in one hero ingredient: buttermilk. It’s not just a fancy name; buttermilk plays a crucial role in the chemistry of your waffle batter, leading to superior results that regular milk simply cannot achieve.
The primary benefit of buttermilk stems from its acidity. When buttermilk reacts with baking soda (and the baking powder typically found in waffle recipes), it creates a powerful leavening action. This reaction produces a surge of carbon dioxide bubbles, which are trapped within the batter, resulting in an incredibly airy, soft, and fluffy interior. Without this acidic interaction, your waffles would be denser and flatter, lacking that coveted light texture.
Beyond its leavening power, buttermilk also contributes significantly to the flavor. It imparts a subtle tanginess that beautifully balances the sweetness of the chocolate chips and any syrup you might add. This slight acidity tenderizes the gluten in the flour, preventing the waffles from becoming tough and ensuring they stay wonderfully moist. For these reasons, I cannot stress enough the importance of using real buttermilk. While a homemade substitute (milk + lemon juice or vinegar) can work in a pinch, store-bought buttermilk offers a more consistent and robust acidity and thickness, making it the preferred choice for truly exceptional buttermilk chocolate chip waffles.
Key Ingredients for Perfect Chocolate Chip Waffles
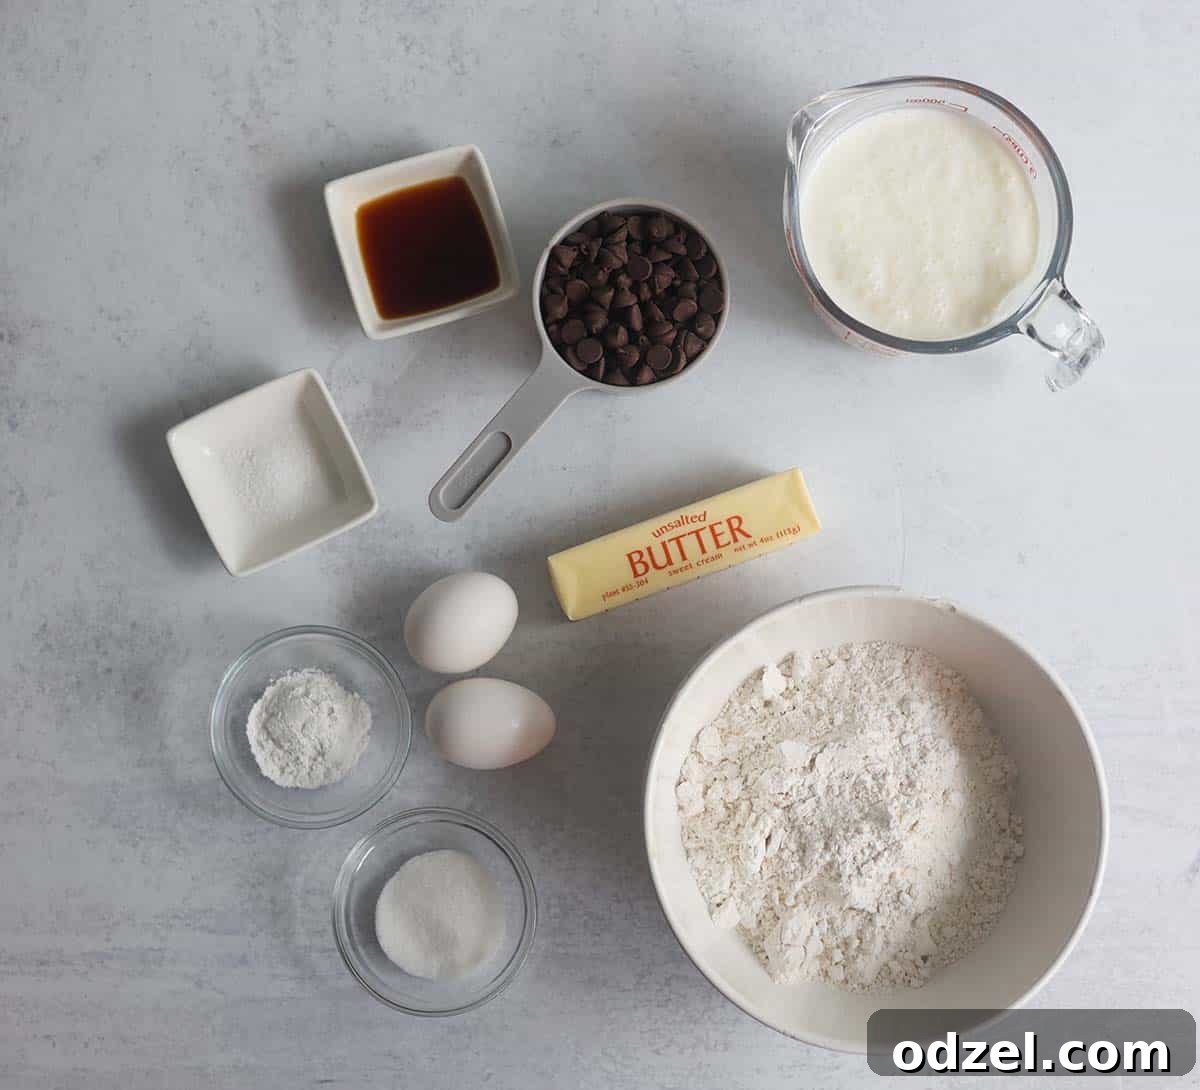
Crafting these delectable waffles relies on a simple list of ingredients, most of which are probably already in your pantry. However, understanding the role of each component and choosing wisely will significantly impact the final texture and taste of your homemade waffles. Here’s a detailed breakdown:
- Buttermilk: As our star ingredient, high-quality buttermilk is paramount. Its acidic nature is vital for activating the leavening agents, resulting in beautifully fluffy and tender waffles. The unique tang it adds also elevates the overall flavor profile. Please avoid substituting with regular milk, as it lacks the acidity necessary for the desired chemical reaction and will yield a denser, less flavorful waffle.
- All-Purpose Flour: This is your go-to flour for this recipe. All-purpose flour provides the perfect balance of protein for structure without making the waffles overly chewy. Steer clear of self-rising flour (which contains added leavening) or bread flour (which has a higher gluten content and will result in tougher waffles).
- Unsalted Butter (Melted and Cooled): Using unsalted butter allows you complete control over the salt content of your batter. Melting it ensures it distributes evenly, contributing to richness and moisture. Critically, ensure the melted butter has cooled to lukewarm or room temperature before incorporating it into the batter, especially when eggs are involved. Adding hot butter can inadvertently scramble the eggs, leading to an undesirable texture.
- Semi-Sweet Chocolate Chips: The heart of these waffles! Semi-sweet chocolate chips strike the ideal balance, offering a rich chocolate flavor that complements the buttermilk without overwhelming the sweetness. They melt perfectly within the hot waffle, creating delightful gooey pockets. You can also experiment with milk chocolate chips for a sweeter touch or dark chocolate for a more intense cocoa experience. Mini chocolate chips are great for an even distribution of chocolate in every bite.
- Large Eggs: Eggs serve multiple purposes in waffle batter: they act as a binder, add richness, and contribute to the structural integrity that helps create those crispy edges and fluffy interiors. Using room-temperature eggs can also help them incorporate more smoothly into the batter.
- Granulated Sugar: A small amount of sugar enhances the sweetness of the chocolate and helps in achieving that beautiful golden-brown crust. It’s just enough to sweeten the batter without making the waffles cloyingly sweet, especially once syrup is added.
- Baking Powder & Kosher Salt: These are your essential dry team players. Baking powder provides additional lift, working in conjunction with the buttermilk and baking soda. Kosher salt is crucial for balancing flavors, enhancing the sweetness, and preventing the waffles from tasting bland. Ensure you use Kosher salt for its cleaner taste compared to table salt.
- Vanilla Extract: A touch of pure vanilla extract adds a warm, inviting aroma and a depth of flavor that complements both the chocolate and the tangy buttermilk, tying all the ingredients together harmoniously.
Pro Tips for Waffle Making Success
While making waffles might seem straightforward, a few key techniques can transform your homemade efforts from good to truly extraordinary. Pay attention to these expert tips to ensure every waffle emerges perfectly crispy, delightfully fluffy, and full of flavor:
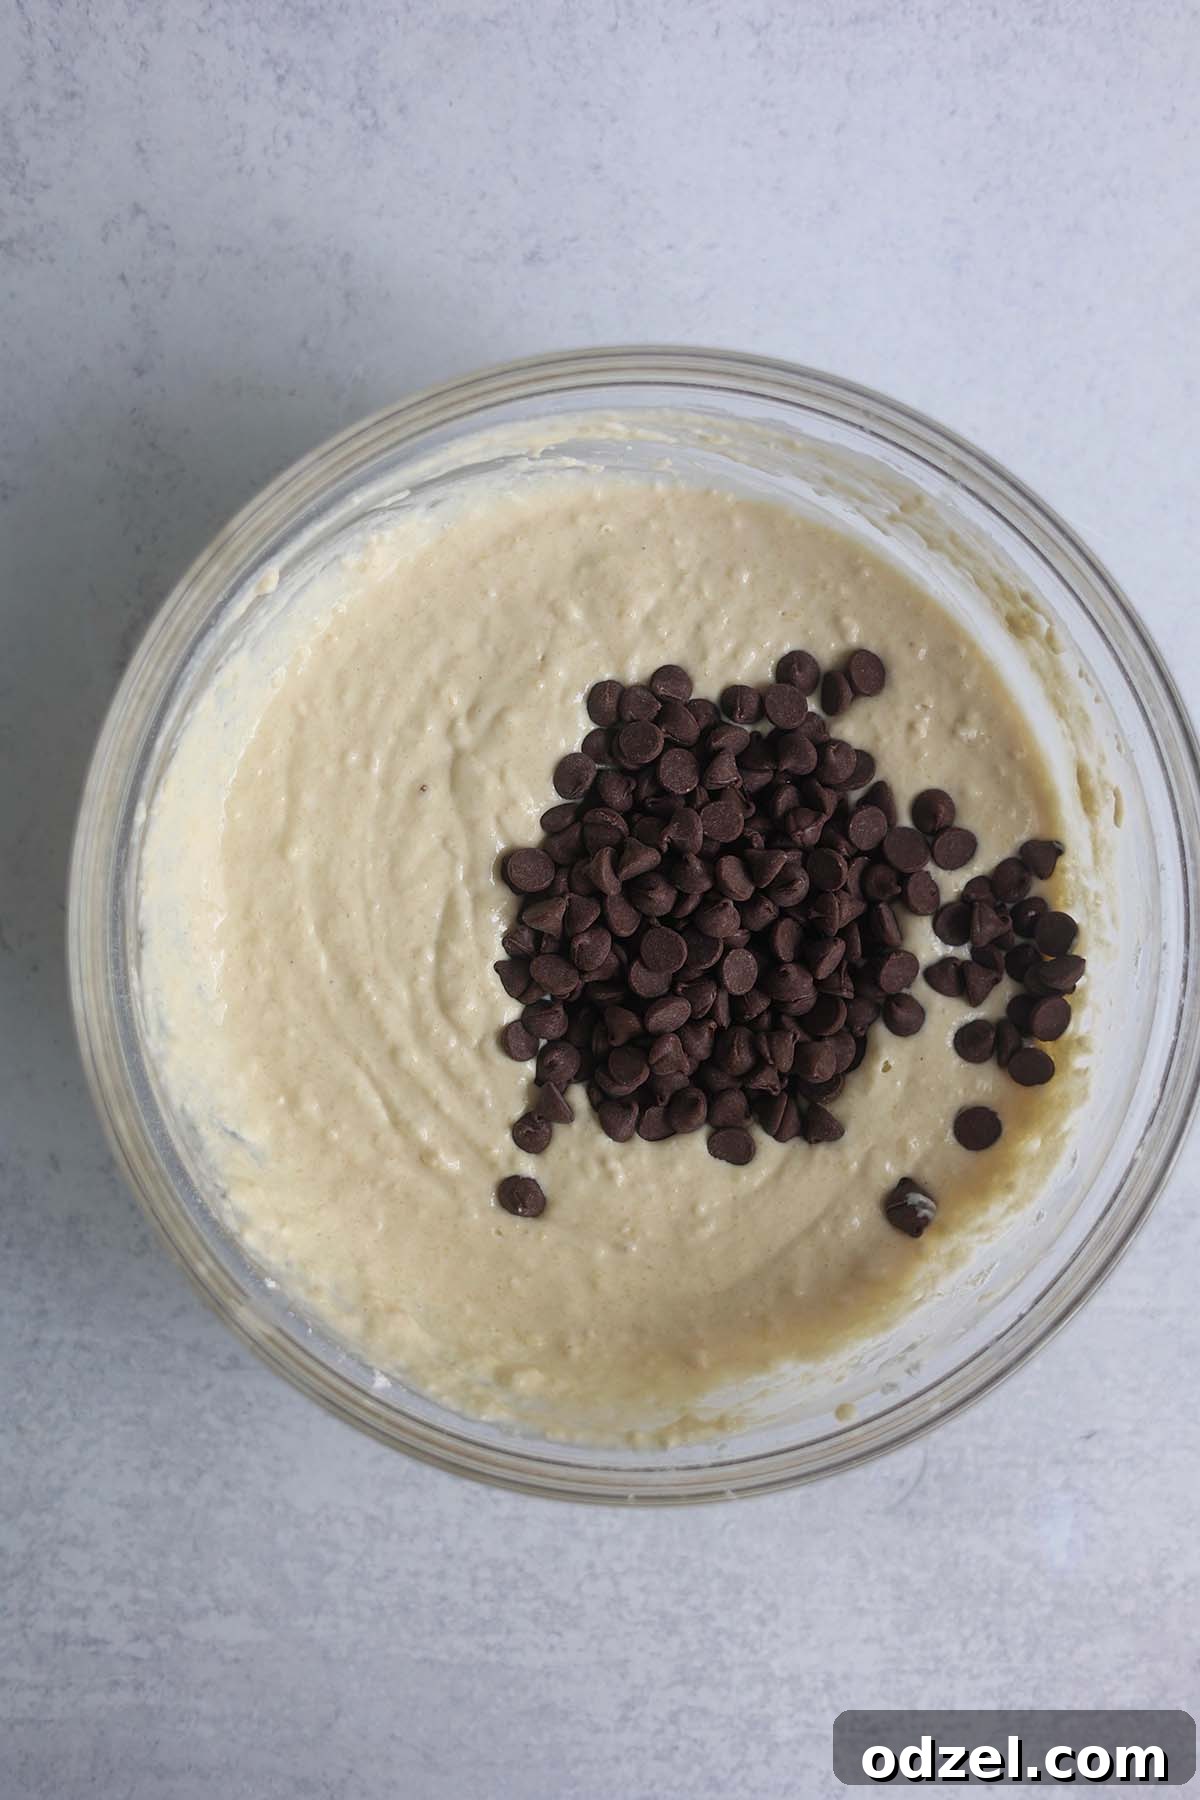
- The Golden Rule: Don’t Overmix the Batter! This is the absolute most important advice for light and tender waffles. Overmixing develops the gluten in the flour excessively, leading to tough, chewy, and dense waffles. Mix the wet and dry ingredients just until they are combined. A few lumps in the batter are not only acceptable but actually preferred, as they indicate you haven’t overmixed.
- Allow the Batter to Rest: Once your batter is mixed, cover the bowl and let it rest at room temperature for at least 5-10 minutes (or even up to 30 minutes). This crucial step allows the flour to fully hydrate, absorbs the liquid more completely, and gives the gluten a chance to relax. It also allows the leavening agents to begin their work, resulting in a more tender, evenly textured, and fluffier waffle.
- Preheat Your Waffle Iron Thoroughly: Patience is a virtue here. A properly preheated waffle iron is non-negotiable for achieving a beautifully crispy exterior. If the iron isn’t hot enough, the waffles will steam rather than bake, leading to a pale, soggy result. Always wait for the indicator light (if your machine has one) or allow at least 5-10 minutes for it to reach optimal temperature before pouring in the batter.
- Generously Grease Your Waffle Maker: Even if your waffle iron boasts a nonstick surface, a light coating of nonstick cooking spray or a brush of melted butter before each waffle is essential. This ensures easy release, prevents sticking, and helps create that desirable golden-brown, crispy crust.
- Cool the Melted Butter: When adding melted butter to your wet ingredients, especially those containing eggs, ensure the butter has cooled down to lukewarm or room temperature. Hot butter can partially cook or “scramble” the eggs, which can negatively impact the batter’s consistency and the waffle’s texture.
- Use the Right Amount of Batter: Most standard waffle irons require about ¾ cup of batter per waffle. Overfilling can lead to a messy overflow and uneven cooking. Underfilling, conversely, might result in smaller, less substantial waffles that don’t cover the entire cooking surface. Experiment slightly with your specific waffle maker to find the sweet spot.
- Resist the Urge to Peek: Opening the waffle iron too early disrupts the cooking process, causing steam to escape and potentially leading to flat, unevenly cooked waffles. Let the waffle maker do its job. A good indicator that a waffle is done is when the steam significantly reduces or stops coming from the sides of the iron, and the indicator light typically turns on.
- Serve Immediately for Peak Crispiness: Waffles are at their absolute best—crispiest on the outside and fluffiest on the inside—fresh off the iron. If you’re making a larger batch, you can keep cooked waffles warm and prevent them from getting soggy by placing them in a single layer on a wire rack set over a baking sheet in a warm oven (around 200°F or 95°C) while you finish cooking the rest.
Serving Suggestions and Creative Variations
These buttermilk chocolate chip waffles are undeniably magnificent on their own, but the right toppings can elevate them from delicious to utterly divine. My personal favorite way to enjoy them is classic: a generous slather of softened butter that melts into every crevice, followed by a luxurious drizzle of rich, pure maple syrup. The interplay of the warm waffle, melting butter, and sweet syrup is simply heavenly.
However, the possibilities for customization are endless! Here are some fantastic serving suggestions and ideas for creative variations to inspire your next waffle feast:
Classic Topping Enhancements:
- Fresh Whipped Cream: A cloud of freshly whipped cream adds an elegant touch and a delightful lightness.
- Seasonal Berries: Fresh strawberries, blueberries, raspberries, or a vibrant mixed berry compote provide a burst of freshness and a pleasant tartness that cuts through the richness.
- Vanilla Ice Cream: For an indulgent dessert-style treat, serve warm waffles with a scoop of premium vanilla bean ice cream. The hot and cold contrast is simply sublime.
- Chocolate Sauce or Ganache: For the ultimate chocolate lover, an extra drizzle of homemade chocolate sauce or a rich ganache takes these waffles to new heights.
- Powdered Sugar: A simple dusting of confectioners’ sugar not only makes them look picture-perfect but also adds a subtle, delicate sweetness.
- Nut Butters: A spread of peanut butter, almond butter, or hazelnut spread can add a creamy texture and nutty flavor.
Flavorful Batter Variations:
- Nutty Additions: Fold in a handful of finely chopped pecans, walnuts, or almonds along with the chocolate chips for an added layer of texture and a wholesome, nutty flavor. Toasting the nuts beforehand can enhance their aroma.
- Spiced Waffles: Introduce warm spices like ½ teaspoon of ground cinnamon, a pinch of nutmeg, or a dash of cardamom to the dry ingredients for a cozy and aromatic twist, especially perfect for cooler mornings.
- Citrus Zest Infusion: For a bright and zesty note that beautifully complements chocolate, grate in a teaspoon of fresh orange or lemon zest into the wet ingredients.
- Alternative Chocolates: Don’t limit yourself to semi-sweet! Explore white chocolate chips for a creamier sweetness, dark chocolate chunks for a more intense cocoa hit, or even a mix of different chocolate types for complex flavor.
- Double Chocolate Dream: For truly decadent chocolate waffles, substitute one or two tablespoons of the all-purpose flour with unsweetened cocoa powder. This will give your waffles a deep, dark chocolate base.
How to Store and Reheat Leftover Waffles
One of the many joys of making a batch of these delectable buttermilk chocolate chip waffles is that they are incredibly freezer-friendly. This means you can easily make a double batch and have quick, delicious breakfasts or snacks ready to go on busy days. Proper storage and reheating are key to maintaining their delightful texture.
Storing Your Waffles:
- Cool Completely: This is arguably the most crucial step. As soon as waffles come off the iron, they are steaming hot. Transfer them immediately to a wire rack in a single layer and allow them to cool down completely to room temperature. Stacking hot waffles or placing them directly into a container will trap steam, turning them soggy and ruining their crispiness.
- Airtight Container or Bag: Once thoroughly cooled, place the waffles in an airtight container or a heavy-duty resealable freezer bag.
- Prevent Sticking (Freezing): If you plan to freeze multiple waffles and stack them, interleave the layers with sheets of parchment paper. This prevents them from sticking together and allows you to easily grab a single waffle without thawing the entire batch.
- Refrigeration: Waffles can be stored in the refrigerator for up to 2-3 days.
- Freezing: For longer storage, freeze waffles for up to 3 months. Always label your container or bag with the date to keep track.
Reheating for Optimal Crispiness:
The goal when reheating is to revive that irresistible crispy exterior and warm, fluffy interior. Avoid using a microwave for reheating waffles, as it will make them soft, rubbery, and lose all their charm.
- Toaster or Toaster Oven (Highly Recommended): This is the absolute best method for bringing frozen or refrigerated waffles back to life. Pop a frozen or thawed waffle directly into your toaster or toaster oven on a medium setting. Heat until it’s warmed through and perfectly crispy again, typically 2-4 minutes.
- Air Fryer: An air fryer works wonders for reheating waffles, especially if you have a few to warm up. Preheat your air fryer to 350°F (175°C). Place the waffles in a single layer in the basket and air fry for 3-5 minutes, or until they are heated through and delightfully crisp.
- Conventional Oven: If you’re reheating a larger batch, the oven is an excellent choice. Preheat your oven to 350°F (175°C). Place frozen or thawed waffles directly on a baking sheet. Heat for about 8-10 minutes (for frozen) or 5-7 minutes (for thawed), or until they are warm and crisp to your liking.
Buttermilk Chocolate Chip Waffles Full Recipe

Buttermilk Chocolate Chip Waffles
Julie Maestre
5 minutes
3 minutes
8 minutes
6 waffles
Rate Recipe
Print Recipe
Equipment
- Waffle Maker
- Large Mixing Bowls
- Whisk
Ingredients
- 2 cups all-purpose flour
- 1 tablespoon baking powder
- ¼ teaspoon Kosher salt
- 1 tablespoon granulated sugar
- 2 cups buttermilk
- 2 large eggs
- 1/2 cup unsalted butter, melted and cooled
- 1 teaspoon vanilla extract
- 1 cup semi-sweet chocolate chips
- Maple syrup, for topping
- Softened butter, for topping
Instructions
-
In a large mixing bowl, combine the buttermilk, eggs, granulated sugar, cooled melted butter, and vanilla extract. Whisk until all the wet ingredients are thoroughly combined and smooth.
-
In a separate medium bowl, whisk together the all-purpose flour, baking powder, and Kosher salt. Gradually add the dry ingredients to the wet ingredients, mixing gently with a whisk or spatula until just combined. The batter should be slightly lumpy; be careful not to overmix, as this can lead to tough waffles. Gently fold in the semi-sweet chocolate chips. Let the batter rest at room temperature for 5-10 minutes.
-
While the batter rests, preheat your waffle iron according to the manufacturer’s instructions. Once heated, lightly spray the cooking plates with nonstick cooking spray or brush with a thin layer of melted butter.
-
Pour about ¾ cup of the waffle batter onto the hot waffle iron (adjust the amount based on the size of your waffle maker). Close the lid and cook for 3-5 minutes, or until the waffle is golden brown, crispy, and the steam escaping from the sides significantly reduces or stops.
-
Carefully remove the cooked waffle from the iron and transfer it to a plate. Repeat the process with the remaining batter, ensuring to grease the iron between each waffle if necessary.
-
Serve your warm buttermilk chocolate chip waffles immediately with softened butter, a generous drizzle of maple syrup, and any other favorite toppings. Enjoy the perfect balance of crispy texture and rich, chocolaty flavor!
Notes
- Avoid Overmixing: This is key to fluffy waffles. A few lumps in the batter are perfectly fine.
- Batter Rest: Letting the batter sit for 5-10 minutes allows the flour to hydrate and improves waffle texture.
- Grease Consistently: Always spray your waffle maker for easy release and a crispy finish.
- Butter Temperature: Ensure melted butter is cooled to lukewarm before adding to wet ingredients to prevent scrambled eggs.
- Serve Hot: For the best crispy texture, serve waffles immediately after cooking. If making a batch, keep finished waffles warm on a wire rack in a low oven.
Nutrition Information (Approximate Per Serving)
Calories: 543kcal | Carbohydrates: 55g | Protein: 11g | Fat: 31g | Saturated Fat: 18g | Polyunsaturated Fat: 2g | Monounsaturated Fat: 9g | Trans Fat: 1g | Cholesterol: 106mg | Sodium: 210mg | Potassium: 551mg | Fiber: 4g | Sugar: 17g | Vitamin A: 699IU | Calcium: 216mg | Iron: 4mg
Nutrition information is automatically calculated and should be used as an approximation only. Actual values may vary based on ingredients and preparation.
Additional Recipe Information
Author: Julie Maestre
Prep Time: 5 minutes
Cook Time: 3 minutes
Total Time: 8 minutes
Course: Breakfast
Cuisine: American
Servings: 6
Keywords: buttermilk chocolate chip waffles, chocolate chip waffles, homemade waffles, easy waffle recipe, crispy waffles, fluffy waffles, breakfast, brunch
Frequently Asked Questions About Waffles
- Can I prepare the waffle batter in advance?
- Yes, you absolutely can! You have a couple of options: you can mix the dry ingredients in one bowl and the wet ingredients (excluding the chocolate chips) in another, covering both tightly and refrigerating them for up to 24 hours. Combine them just before cooking. Alternatively, you can mix the entire batter, cover it, and refrigerate. Be aware that the batter may thicken slightly in the fridge; if so, add a splash of buttermilk or milk to reach the desired pouring consistency. Also, chocolate chips might sink to the bottom if left too long, so give the batter a gentle stir before using.
- What if I don’t have buttermilk on hand?
- While genuine buttermilk yields the best results, you can create a quick homemade substitute. For every 1 cup of buttermilk required, pour 1 tablespoon of lemon juice or white vinegar into a liquid measuring cup, then fill the remainder of the cup with regular milk (any fat percentage will work). Stir it gently and let it sit for about 5-10 minutes until it slightly curdles. This provides the necessary acidity for leavening, though the flavor and thickness won’t be identical to store-bought buttermilk.
- My waffles aren’t crispy; they’re soft and chewy. What went wrong?
- Several factors could contribute to less-than-crispy waffles:
- Insufficiently Hot Waffle Iron: This is the most common culprit. Always preheat your waffle maker thoroughly until it reaches its optimal temperature.
- Opening the Iron Too Soon: Resist the temptation to peek! Opening the iron prematurely releases steam and can prevent the waffle from crisping up.
- Overmixing the Batter: Developing too much gluten makes waffles chewy instead of tender and crispy.
- Overfilling the Waffle Iron: Too much batter can lead to steaming rather than baking, resulting in a soft texture.
- Stacking Hot Waffles: Immediately after cooking, place waffles on a wire rack to cool slightly or keep warm in a low oven. Stacking traps steam, making them soggy.
- Can I use other mix-ins besides chocolate chips?
- Absolutely! This recipe is incredibly versatile and welcomes various additions. Some popular choices include fresh blueberries, chopped strawberries, sliced bananas, toasted nuts (like pecans or walnuts for a delightful crunch), shredded coconut, or even a dash of citrus zest for a brighter flavor. Just be mindful not to overcrowd the batter to ensure even cooking.
- How do I know when my waffles are perfectly cooked?
- Many modern waffle irons come with an indicator light that signals when the waffle is ready. If yours doesn’t, a good visual cue is to observe the steam: when the steam escaping from the sides of the iron significantly diminishes or stops, your waffle is likely cooked through. The waffle should also be golden brown and easily lift out of the iron without sticking.
We truly hope you enjoy making and savoring these Buttermilk Chocolate Chip Waffles as much as we do! Your feedback is invaluable. Please consider leaving a star ★★★★★ rating and a comment below to share your experience and help other home cooks discover this fantastic recipe. Happy cooking and happy eating!
Stay connected with us and find more delightful recipes and kitchen inspiration by following us on Facebook and Pinterest!